Meteor Herd
From Sonic Retro
| |
Sonic Adventure 2 |
| Levels |
| Meteor Herd |

|
This article needs cleanup. This article needs to be edited to conform to a higher standard of article quality. Specifically, issues with this article are:
After the article has been cleaned up, you may remove this message. See How to Edit a Page for help. |
| Meteor Herd |
|---|
| Fourteenth hero stage, Sonic Adventure 2 |
| Location: Space Colony ARK |
| Level theme: outer space |
| Mission 1: Find 3 pieces of the Master Emerald!
|
| Mission 2: Collect 100 rings!
|
| Mission 3: Find the lost Chao!
|
| Mission 4: Collect the Emerald pieces in 4 minutes 30 seconds!
|
| Mission 5: Clear Hard Mode!
|
| ← Eternal Engine | Crazy Gadget → |

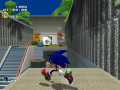
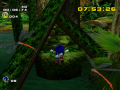
Meteor Herd is the fourteenth stage in the Hero storyline of Sonic Adventure 2 and the fifth and last stage playable with Knuckles. It represents Knuckles's attempt to find the Master Emerald pieces that spilled from the ship the heroes used to travel to the ARK.
Contents
Plot
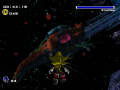
Halfway through the heroes’ trip in space, the cargo bay of the shuttle opens and the Master Emerald shards that were being kept there are released onto outer space. After unsuccessfully trying to stop the shuttle right then, Knuckles disembarks with the others at the ARK but immediately sets off to the outside of the colony, to search for the shards.
This is also where Knuckles has a show-down with Rouge for the Master Emerald, after this level and Mad Space ends.
Level layout
Appearance
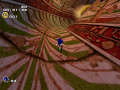
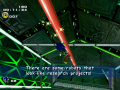
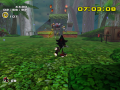
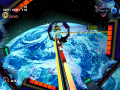
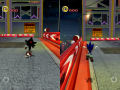
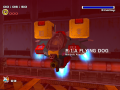
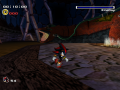
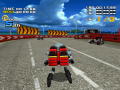
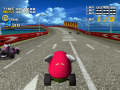
Meteor Herd takes place on the outside of the ARK (just like Rouge's Mad Space), but inside some kind of protective barrier. It appears to be modelled after many classic Sci-Fi, especially those set on Mars.
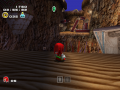
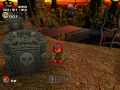
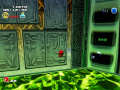
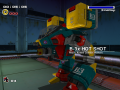
The major gimmicks of this level are the falling meteorites that will aim randomly around the area where Knuckles is with explosive impacts, light blue meteorites that can be used to open cubic containers and locked doors around the central structure and lighter gravitational pull, which allow Knuckles to jump higher and glide further. The meteorites that can be punched should take a special mention, since they will travel farther as the strength of the punch is: stand next to it and punch it will tilt it a bit, running to one and punch it will send it flying.
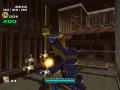
Other level-specific objects are yellow bulldozers, blueish-grey towers, moon and star signs, rotating beacons, light blue cubic containers that can be destroyed, some containers may be floating due to the low gravity and small red and grey level specific containers that can be punched.
Level sections
Meteor Herd is divided into three major sections.
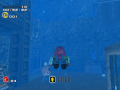
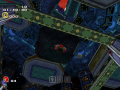
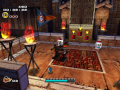
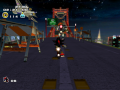
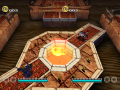
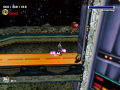
The first section is an arena in the lowest height of the level, with ground in different colours and see-through floors that allows seeing the bubbling lava below and leaving Knuckles' detailed footprint on its surface for awhile as well. To the north is a grey ground area where loading dock 0-1 is, to the west is a yellow ground area where loading dock 0-2 and 0-3 are, both very close together, to the south is a red ground area where loading dock 0-4 is, on which Knuckles first starts, and to the east is a yellow ground area where loading dock 0-5 is. There’s also a central structure in the middle that raises up, which will lead to the platform section.
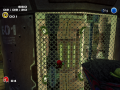
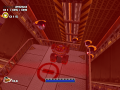
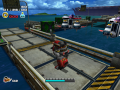
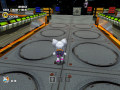
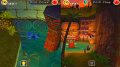
The second section is a platform section, which is filled with large and rectangular ones, along with small and square ones as well. There will be two important areas to take notice here: one is the northern region which will appear on the right after letting go of the rocket and that as two containers stacked together; and a larger one, the southern region which will appear to the left after letting go of the rocket and that has lots of containers in rows. In one of the highest platforms, the one on the left, there will be a rocket that will lead to the ARK section.
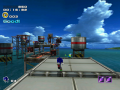
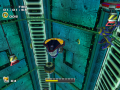
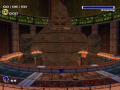
The third section is the ARK area, with two major height levels, each with four attached platforms. There are some small and square platforms as well, along with two sealed containers. There's a Mystic Melody on the platform opposite to the one Knuckles arrives if he takes the rocket, which warps to the right sealed container, if Knuckles is facing outer space. There's another as well, which will warp to the left one.
Other versions
Meteor Herd shares some of its aesthetics and outer space themes with Rouge's Mad Space.
Enemies
- Beetle series: Gold Beetle
- Artificial Chaos: Articifial Chaos P-1, Artificial Chaos Float Type
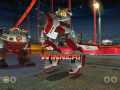
- Hornet series: Hornet-3 (Normal Mode), Hornet-6 (Hard Mode), Phoenix (Hard Mode)
Locations
Animals
| Animal | Number | Location |
|---|---|---|
| 1 | Ground level: On the ground, below the three arch structures to the east, more specifically, under the southern arch. | |
| 1 | Platform area: Flying under the platform above the two containers stacked together, easily seen if Knuckles is standing on one of them. | |
| 2 | Ground level: On the ground, between the excavator and dock 0-3. Central structure: On the entrance platform to the Sunglasses upgrade, facing dock 0-1. | |
| 2 | Platform area: Floating next to an indestructible container, in the platform with a rocket that leads to the ARK. ARK area: Floating amongst indestructible containers, in a platform in the lower level. | |
| 1 | Ground level: On dock 0-4, close to the large container (disappears on Hard Mode). | |
| Random | 3 | Ground level: In a pipe, located on the foot of the tower, close to dock 0-4. Ground level: In a pipe, located on the foot of the tower to the northwest which is close to a crusher. Platform area: In a pipe, located in a small floating platform, which is directly above the crusher and jailed switch puzzle. |
| Total | 10 |
The level specific animal (third Chao container) is a Phoenix.
Big the Cat
Head left around the central tower until you're between loading docks 0-2 and 0-3. Upon turning to face the tower now, you'll see 3 square pipes come out and extend a long way below the floor. Go up to the glass section of the floor, and look through it, hoping to catch Big hanging onto the left side of the center pipe. Even if the camera has the correct view of the shot, you may have to reposition yourself as Big's location is at the very edge of draw distance and may well escape past that distance depending on your location. In Hard Mode he switches places and it's currently unknown.
Chao containers
- Ground level: Inside the shovel of a bulldozer, close to dock 0-4.*
- Central structure: Behind one of the blinking doors, directly in front of dock 0-4.*
- Platform area: Inside the front and left container, on the large container area.*
*Not present in Hard Mode.
Gold Beetle
The Gold Beetle can be found on the ground level, inside the cube between dock 0-4 and the four rotating beacons. The box needs to be destroyed with a meteorite from afar.
Master Emerald Shards - Hard Mode
| Emerald shard | Hints |
|---|---|
| #1 | Use a meteorite that flies when you hit it! Pyramid-shaped base. Try throwing a meteorite at the blinking door near the moon symbol. |
| #2 | Sunglasses The top of the steel beam. Try getting to the suspended spring! |
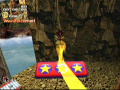
| #3 | Wear sunglasses on the moon. The inverted blue tower. Beyond the rings that you see using sunglasses on the moon. |
- The first shard is behind one of the blinking doors, facing platform 0-5 and the one to the left. Throw a meteorite at it to get rid of the door.
- The second shard is in the air, close in height to the two containers stacked together, northeast, exactly above the cubic container near dock 0-1. In the platform with a spring, there is a steel beam with an extra life, and putting the sunglasses here will reveal a spring that will lead to another and from this to the emerald shard. It can also be obtained by gliding into its location or dropping onto it from the wide-open space above.
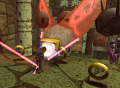
- The third shard is in the air as well, on the ARK area, close in height to the edge of the lower level. In the platform with a moon symbol and a Hornet Phoenix, using the sunglasses will reveal a spring that when hit will send Knuckles down a direction of rings, which will lead to the emerald shard. It can also be obtained by gliding into its location.
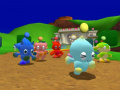
Lost Chao
- Required upgrades: Mystic Melody
From where Knuckles first starts, hit the spring on the Central structure and then use the rocket. As Knuckles lets go of the rocket, glide left and catch the other rocket towards the ARK. Climb to the highest level of the ARK and go to the platform with the Mystic Melody, which is opposite to where he's sent to. Activate it and jump the warp holes to access the sealed containers.
Upgrade
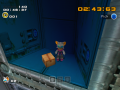
Knuckles' Sunglasses upgrade can be found here, though the Hammer Gloves will usually be a prerequisite to finding it. It's in a room underneath the central structure, accessed by activating a switch behind the blinking door that faces dock 0-1.
Comparisons
| |
Main article: Sonic Adventure 2/Comparisons/Meteor Herd |
A Rank Tips
Mission 1
At this time, the best help we can give you is to familiarize yourself with the level. The level is enormous, and disorienting at times. Play the first mission repeatedly, and you'll get acquainted with the structure, level objects, where hint computers are, and which hints point to which area and which spots. Time bonus are the key to A Ranking any of Knuckles' or Rouge's missions, and with this huge design, that is very tricky to pull off. Hopefully, you get good enough that you can know at least half of the time where the Emerald Shard is by the first hint alone. (Though the ones referring to stars and moons require memory or the second hint.)
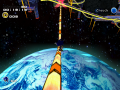
Given that the A Rank needs fast maneuvering, here's a nice way to get to the very top of the level (the inverted blue tower on the top of the ARK ;)): At the start of the level, fly up to the center onto the base of the tall structure in the middle. Go right and you'll find a spring, that leads to a small platform with a rocket, that leads to a small platform with 4 rings and a spring, that leads to a big, gray, octagon-shaped platform with a rocket, that leads up to your destination.
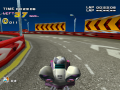
Mission 2
You must collect 100 rings in 2 minutes. Not easy, especially with those darn red meteorites that will inevitable cause you to restart.
- PLAN AHEAD. Have a planned route to go through the level that leads to the most rings, because too much dillydallying will result in lower rank.
- If you follow these instructions, you can get a quick 60 rings by the first 45 seconds.
- Collect the 8 rings at the start.
- Go forward and down for 6 more.
- Go to the right and to the blue, blocky partition. At the end of it, there's a 20 ring capsule.
- Continue right and on the other side of the partition, there's 6 more rings.
- Continue in the general direction you were going, and there's a yellow and gray platform with a blue container and a blue meteorite. Hit the container with the meteorite and get a 20 ring capsule.
- There's no rings at the very top of the level. Don't even touch that place here.
- Near the three structural beams connected to the base of the tall structure in the middle (familiarize yourself with the level!) are fifteen rings.
- 5 are in plain sight in a capsule.
- 10 are in a special compartment on the second base of the tall structure in the middle. Knock a blue meteorite into the left one. It might take a few tries, but a couple of misses aren't the end of success.
- The octagon-shaped platform trio is host to a lot of nice rings and capsules just lying out in the open. Going two steps to the very top of the ARK (i.e. after the first rocket) should get you there fast.
Mission 3
The location of the Lost Chao is above. Do it fast and it's an easy A Rank.
Mission 4
Well...same as Mission 1, really. The time bonus practically needed for the A Rank in mission one is close to the time limit here, so it's a pretty similar experience. Though a dash of luck wouldn't hurt.
Mission 5
Given that the Emerald shards never change locations in Hard Mode (AND these locations are listed above), the simple answer is to plow through it quickly by memory with no hints and get it. But the Emerald shards aren't exactly easy to get, either. No. 2 is the most painful, so you have to get into the grove of quick obtainment.
- For the first shard, punch the meteorite two times lightly in the direction of the compartment with the shard. This, hopefully, will get it right next to the door and allow for easy passagI MISSED!? HOW DID I-
- For the second and third shards, timing is key. We'd say glide as soon as you reach the peak of the bounce the springs give you, but this isn't foolproof.
- The fast and easy way to get to the top of the ARK we told you about in Mission 1 is slightly altered, with more springs. Just a heads up.
Trivia
| |
Trivia sections are bad Try and incorporate this information into the main article. See the manual of style to find out why. |
|---|
- There is an unused rail in the level. It's invisible, but if the player hacks and chooses to play as either Sonic or Shadow, they can use it. It starts on the tall structure in the middle. The player must go the middle set of girders, and go to the middle of the girder on the right (as seen from the starting point). (video)
- There is an Artificial Chaos hidden inside the cubic containers on loading dock 0-3. If you stand on top of the container long enough, it will fire lasers at you and try to attack you with its arms. It can be destroy by hitting the container with the meteorite beside it. The container will explode and a Chaos Drive will be left behind.
References
| Sonic Adventure 2 / Sonic Adventure 2: Battle | |
|---|---|
|
Main page (SA2B|2012) Manuals (SA2B) Development (SA2B) |
show;hide
2 Player Mode: Mini-games: Dr. Eggman's Robots: GUN Robots: Ghosts: Hero: Dark: Both: Final: Dreamcast Prereleases: SA2B Prereleases: Books:
Music: Songs: "Live & Learn" | "It Doesn't Matter" | "Believe in Myself" | "Unknown from M.E." | "Throw It All Away" | "E.G.G.M.A.N." | "Fly in the Freedom" | "Escape from the City" | "Kick the Rock!" | "A Ghost's Pumpkin Soup" | "Dive into the Mellow" | "Deeper" | "Space Trip Steps" | "Rhythm and Balance" | "The Supernatural" | "For True Story" | "Supporting Me" |