Lost Colony
From Sonic Retro
| |
Sonic Adventure 2 |
| Levels |
| Lost Colony |

|
This article needs cleanup. This article needs to be edited to conform to a higher standard of article quality. Specifically, issues with this article are:
After the article has been cleaned up, you may remove this message. See How to Edit a Page for help. |
| Lost Colony |
|---|
| Sixth dark storyline stage, Sonic Adventure 2 |
| Location: Space Colony ARK |
| Level theme: Death Egg |
| Mission 1: Find the way to the colony's core!
|
| Mission 2: Collect 100 rings!
|
| Mission 3: Find the lost Chao!
|
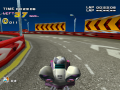
| Mission 4: Reach the goal within 3 minutes 30 seconds!
|
| Mission 5: Clear Hard Mode!
|
| ← Egg Quarters | Weapons Bed → |

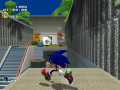
Lost Colony is the sixth stage in the Dark story of Sonic Adventure 2 and the third playable as Eggman.
Contents
Plot
Level layout
Appearance
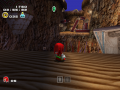
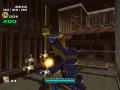
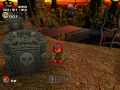
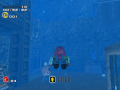
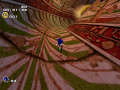
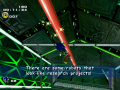
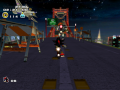
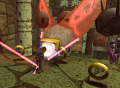
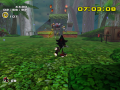
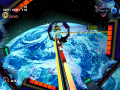
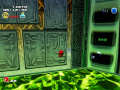
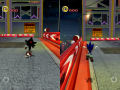
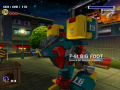
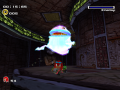
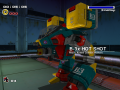
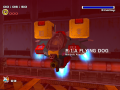
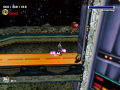
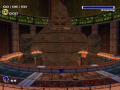
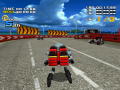
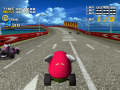
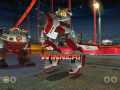
The level takes place in the abandonned halls of Space Colony ARK, after GUN shut it down 50 years ago. Most of the the level is in darkness, which is the main gimmick of the level. Eggman can use the GUN robots as lights by destroying them. The level also has a Death Egg feel to it.
Walkthrough
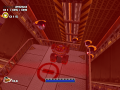
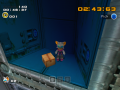
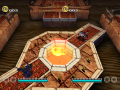
Eggman first starts riding an elevator platform upwards. There’s a locked door as he stops, but busting the two dynamite packs will open it. There’s a hallway, a square room with an unlocked door, another hallway and a downreel, that will help descend a shaft with lasers at the bottom, but simply jumping down also works. Busting the dynamite packs will open the door leading to a hallway and a room with a switch hidden amongst wooden containers and past the door, another hallway and beyond a room with radioactive green liquid, and two elevators. There’s a secret room with rings and an extra-life boxes to the back and up the wall on this room, and the door opens if the switch hidden on the containers on the hallway before is hit. Up the left elevator and after the switch, there’s a hallway with the First Point Marker.
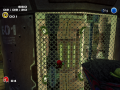
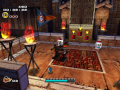
Past this there’s a square room filled with containers and robots, Eggman starts at the right edge, and there are two ways to the level above by climbing containers, where the Jet Engine upgrade is and a missile, that will bust a row of cages and access a hallway and past it there’s another room with radioactive green liquid. By taking the elevator at the end of the track, it will take Eggman upwards and from here it’s possible to hover past the pit and to hit the second Point Marker.
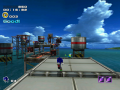
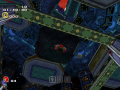
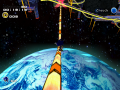
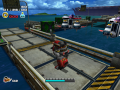
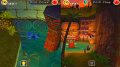
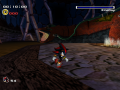
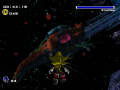
Beyond, there’s a room with a switch and past there’s the first outside ARK section. There’s a small elevator at the end of the first path that will lead to a platform above, where a Mystic Melody is. Up the platforms there’s a room that will lead to a second outside ARK section and hovering, busting a Mono Beetle at the end and opening the door, it will lead another room. Back at the first outside ARK section and past the platform path there’s a hallway that leads to the second outside ARK section, and an elevator will take Eggman down, although jumping also cuts the deal. At the back there’s a small ledge but continuing and past the door there’s the third Point Marker.
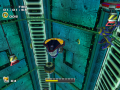
From here, there’s an elevator that will take Eggman up a shaft filled with Beetles, that can be climbed and descended multiple times, and at the end and past the locked there’s a hallway and a third outside ARK section. Jumping down to the platform below there’s a missile that will destroy some of the cages past a locked door there’s a hallway and a room with the Goal.
Locations
Animals
| Animal | Number | Location |
|---|---|---|
| 6 | Beginning: On the room with the first Gun Beetle, to the northwest corner. Beginning: On the right elevator on the green liquid room (changes to the left in Hard Mode). Beginning: By whistling above the indestructible containers to the southeast of the green liquid room. First Point Marker: Above and between the two elevators, accessible by riding the one on the right, at the second Chao container room. Second Point Marker: On the radioactive capsule path, in the room past the Point Marker. Second Point Marker: Above the door on the second ARK outwards section, reachable by taking the elevator at the back of the section and hovering it. | |
| 1 | Third Point Marker: On the left of the platform after the long upwards elevator shaft filled with Beetles. | |
| 1 | Third Point Marker: Inside one of the cages at the last hallway before the Goal platform. | |
| Random | 7 | Beginning: On a pipe, to the back of the laser shaft. Beginning: On a wooden container, to the left on the hallway past the laser shaft. Beginning: On a container of a group of them, on the hallway past the first switch room. First Point Marker: On a wooden container to the left wall on the right side of the square room after the checkpoint. First Point Marker: On a wooden container to the right wall on the left side of the square room after the checkpoint. Second Point Marker: On a pipe, located the southwest corner of the first ARK outwards section, on the second platform path. Third Point Marker: On a wooden box next to the missile. |
| Total | 15? |
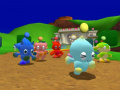
The level specific animal (third Chao container) is a Skeleton Dog.
Big the Cat
Ride up the long shaft after the third Point Marker. Big can be seen sitting and fishing at a ledge to the left of the shaft, facing away but looking over his shoulder to the bottom of the shaft, close to where the rotating Beetles first appear.
Chao containers
- First Point Marker: At the left part of the right edge of the square room.
- First Point Marker: Between the two elevators at the beginning, in the room with the green radioactive liquid.
- Second Point Marker: In a ledge at the back of the second outside ARK section.
Gold Beetle
The Gold Beetle can be found halfway down the second ARK section after the second Point Marker. In Hard Mode he switches place to 90º degrees counter clockwise from where it's at in Normal Mode.
Lost Chao
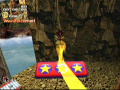
- Recommended Upgrades: Jet Engine, Mystic Melody
Past the second Point Marker and in the first outside the ARK section, there's a small elevator platform at the end of the first path. Ride it upwards and activate the Mystic Melody on the platform above. Jump the platforms that appear (it helps to jump up the Mystic Melody for the first) towards the door at the end. Pass through the corridor to the second outside the ARK section. Here hover to the other door visible at the end and destroy the beetle that appears when you near it to open the door.
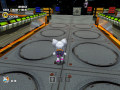
Upgrade
Eggman's Jet Engine is found after the first pointmarker in the square room, in the levels of the room e
References
| Sonic Adventure 2 / Sonic Adventure 2: Battle | |
|---|---|
|
Main page (SA2B|2012) Manuals (SA2B) Development (SA2B) |
show;hide
2 Player Mode: Mini-games: Dr. Eggman's Robots: GUN Robots: Ghosts: Hero: Dark: Both: Final: Dreamcast Prereleases: SA2B Prereleases: Books:
Music: Songs: "Live & Learn" | "It Doesn't Matter" | "Believe in Myself" | "Unknown from M.E." | "Throw It All Away" | "E.G.G.M.A.N." | "Fly in the Freedom" | "Escape from the City" | "Kick the Rock!" | "A Ghost's Pumpkin Soup" | "Dive into the Mellow" | "Deeper" | "Space Trip Steps" | "Rhythm and Balance" | "The Supernatural" | "For True Story" | "Supporting Me" |