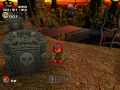
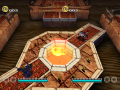
Death Chamber
From Sonic Retro
| |
Sonic Adventure 2 |
| Levels |
| Death Chamber |

|
This article needs cleanup. This article needs to be edited to conform to a higher standard of article quality. Specifically, issues with this article are:
After the article has been cleaned up, you may remove this message. See How to Edit a Page for help. |
| Death Chamber |
|---|
| Twelfth hero storyline stage, Sonic Adventure 2 |
| Level themes: desert/western, industrial, spooky/supernatural |
| Mission 1: Find the 3 Gate Keys!
|
| Mission 2: Collect 100 rings!
|
| Mission 3: Find the lost Chao!
|
| Mission 4: Find the keys within 5 minutes!
|
| Mission 5: Clear Hard Mode!
|
| ← Pyramid Cave | Eternal Engine → |

Death Chamber is the 12th stage in the Hero story of Sonic Adventure 2 and the fourth stage playable with Knuckles. It represents Knuckles' role in, and the conclusion of, the heroes' trilogy of consecutive stages at Eggman's secret base. This is the only stage where Knuckles is looking for something (Gate Keys) that aren't Master Emerald shards.
Contents
Plot
Sonic, "Tails," Knuckles and Amy Rose are heading towards the centre of the base when they arrive at a locked door. Sonic asks Knuckles to go find the keys, playfully calling him the world’s greatest treasure hunter.
Level Layout
Appearance
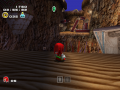
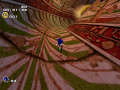
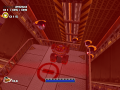
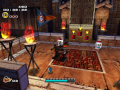
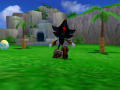
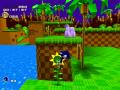
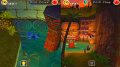
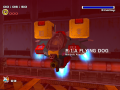
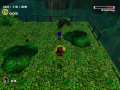
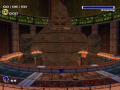
Death Chamber is a an Egyptian indoors ruin themed level, with large murals and hieroglyphs. Since it's Eggman's base, his head appears in giant animal and human statues instead of theirs and his face emblazes the Gate Knuckles is trying to find the Keys for as well.
The major gimmicks of this level are hourglass doors similar to those from Sonic & Knuckles' Sandopolis Zone. Another major gimmick of the level are cockroach tapestries on the walls, that will always lead to another location, if dug into it's centre.
Other level specific objects include colour coded sarcophagus and golden and Egyptian themed urns.
Level sections
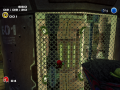
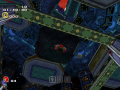
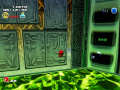
Death Chamber is composed by a large central core of some sorts and from all the other sections branch out in a cross like shape. The central section, labeled E-01 is a large cylindrical room, with two major height divisions, a lower route and an upper route, where some pillars are scattered. If the red section is the south one, the blue is the east, the green is the west and finally there’s a north underwater section as well.
- The south section is colour coded red and it’s where Knuckles first starts. There are three wings here, a left corridor, which eventually leads to the green branch, a forward corridor, which leads to the central room, and a right corridor, which eventually leads to the blue branch.
- The east section is coded blue. There are two wings here, a left corridor, which eventually leads back to the red branch and a forward corridor, which leads to the central room. There’s also a small alcove to the right, which leads to secret room #1.
- The boundary room between the red and blue sections has a Mystic Melody, which makes some rings appear and a painting, which leads to secret room #2, very alike secret room #1 in layout.
- The west section is colour coded green. There are are two wings here, a right corridor, which eventually leads back to the red branch and a forward corridor, which leads to the central room. There’s also another hallway to the left which halfway in leads back to the main room.
- The boundary room between the red and green sections has a painting that leads to secret room #3, which layout is similar to Rouge’s Egg Quarters’ secret rooms.
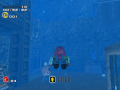
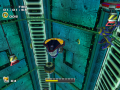
- The north section is accessible through a Mystic Melody at the bottom level of the central room. It’s completely underwater, perhaps as a system to cool down E-10. Right next to where Knuckles dives there’s a hourglass door, which hourglass is directly opposite to it, and whose time is quite narrow to pass through. From here there’s a long hallway filled with ghosts and it ends in an underwater chamber with some hourglass doors and an opening through the ceiling. This opening is protected by a weight, whose switch is at the top of this chamber. The hourglass to open the hourglass doors below is in this room as well, in an upper ledge.
Hard Mode
Other Versions
Its layout is analogous to the Dark side equivalent of the stage, Rouge's Egg Quarters, but twice the size and has a cross shape.
Death Chamber also shares some of it's Egyptian themes with Sonic's Pyramid Cave and less similar but still considerable, Eggman’s Sand Ocean and Tails’ Hidden Base.
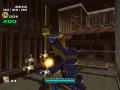
Enemies
| Type | Series |
|---|---|
| Beetle series: Gold Beetle | |
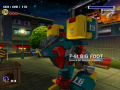
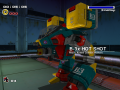
| Unidus, Ghola, E-1000 | |
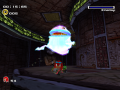
| Ghosts | Boo, Boom Boo |
Locations
Animals
| Animal | Number | Location |
|---|---|---|
| 2 | Green area, left path: At the last room of all. (x2) | |
| 1 | Green area, right path: By whistling close to the giant cockroach, located on the first cubic room. | |
| 1 | Boundary room between red area and blue area: Inside a room accessible by digging the painting | |
| 2 | Blue area, right path: By whistling close to the giant cockroach, located on the shaft with two E-1000. Pyramid Core: On the upper platform, running around the E-01 core. | |
| Random | 4 | Red area, forward path: In right golden head Knuckles can pick up, on the ground of the room with the E-1000 Red area, forward path: In a pipe, located on the upper ledge of the room with the E-1000. Blue area, left path: In a pipe located below a crusher. Blue area, forward path: In a pipe, located on the upper ledge of the room with the crusher. |
| Total | 10 |
- The level specific animal (third Chao container) is a Skeleton Dog.
Big the Cat
In the Pyramid Core, on the side facing the exit to the Red area, Big is behind the grating of the central machine, grabbing onto one of the pillars there. In Hard Mode he moves about halfway around the core, this time hanging onto the outer wall of the core, just below floor level.
Chao containers
- Blue area, right path: In an alcove, located in the room accessible through digging the painting.
- Green area, left path: At the last room of all.
- Pyramid core: On the lowest height level, below the platform of the Red area entrance.
Gate Keys
Hard Mode
| Gate Key | Requirements | Hints |
|---|---|---|
| #1 | Shovel Claw | Invisible ground. The room with no entrance. Dig in the center of the room using the hourglass. |
| #2 | Air Necklace Mystic Melody |
There is a black cockroach on the table. Underwater. In a secret underwater room in a hole in the Pyramid Core floor.</br> |
| #3 | Air Necklace Mystic Melody |
Double sliding floor. Inverted underwater room. The hourglass to open the sliding floor is in the upper room. |
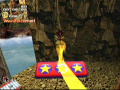
- The first Gate Key is located at secret room #3. Once there, destroy the steel containers and flip the hourglass, which will reveal a piece of terrain in the centre of the room, which can be dug into and where the first key is.
- The second Gate Key is located at the end of the north underwater path. Once at the final underwater chamber, circle behind the sarcophagus with a beetle on it and the key is there.
- The third Gate Key is in the same room as the second. Once at the final underwater chamber, go up through the gap in the ceiling, deactivate the weight trap and flip the hourglass. Quickly go back to the underwater room and head towards the double hourglass door, where the Key is accessible while the doors don't slide back into place.
Gold Beetle
The Gold Beetle can be found inside the cages, located on the room past the painting in right red path.
Lost Chao
Recommended upgrades: Mystic Melody, Air Necklace (optional), Hammer Gloves
In the north underwater hallway, go through the ceiling to the dry room above. Climb the wall to the lower upper ledge, flip the hourglass and quickly go through the hourglass platform directly above it by climbing a bit more, behind which the Lost Chao is.
Upgrade
Knuckles' Hammer Gloves upgrade can be found in this level. It's in the side room past wooden containers on the first room of the forward red path.
Miscellaneous
| |
Trivia sections are bad Try and incorporate this information into the main article. See the manual of style to find out why. |
|---|
- In Sonic Adventure 2: Battle's VS mode, there is a pipe in the first room of the Blue section. It sits on the the stone shelf next to the flames on the wall. An animal will come out of it if the player whistles into it. The animal can be picked up and can even be taken to the Chao Garden.
Level Map

A map featuring every possible location an Eggman key could be in the level.
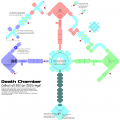
A map for those adventurous enough to grab every ring.


References
| Sonic Adventure 2 / Sonic Adventure 2: Battle | |
|---|---|
|
Main page (SA2B|2012) Manuals (SA2B) Development (SA2B) |
show;hide
2 Player Mode: Mini-games: Dr. Eggman's Robots: GUN Robots: Ghosts: Hero: Dark: Both: Final: Dreamcast Prereleases: SA2B Prereleases: Books:
Music: Songs: "Live & Learn" | "It Doesn't Matter" | "Believe in Myself" | "Unknown from M.E." | "Throw It All Away" | "E.G.G.M.A.N." | "Fly in the Freedom" | "Escape from the City" | "Kick the Rock!" | "A Ghost's Pumpkin Soup" | "Dive into the Mellow" | "Deeper" | "Space Trip Steps" | "Rhythm and Balance" | "The Supernatural" | "For True Story" | "Supporting Me" |