Radical Highway
From Sonic Retro
| |
Sonic Adventure 2 |
| Levels |
| Radical Highway |

|
This article needs cleanup. This article needs to be edited to conform to a higher standard of article quality. Specifically, issues with this article are:
After the article has been cleaned up, you may remove this message. See How to Edit a Page for help. |
| Radical Highway |
|---|
| Fourth dark storyline stage, Sonic Adventure 2 |
| Level theme: urban |
| Mission 1: Break through the besieging military!
|
| Mission 2: Collect 100 rings!
|
| Mission 3: Find the lost Chao!
|
| Mission 4: Reach the goal within 3 minutes 0 seconds!
|
| Mission 5: Clear Hard Mode!
|
| ← Sand Ocean | Egg Quarters → |

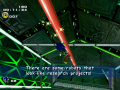
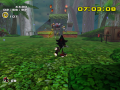
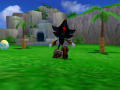
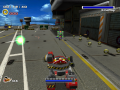
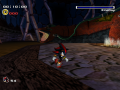
Radical Highway is the fourth stage in the Dark story of Sonic Adventure 2 and the first playable as Shadow. It represents Shadow escaping the military pursuit and siege after stealing a Chaos Emerald.
Contents
Plot
After stealing a Chaos Emerald from the City's bank, Shadow, who is mistaken for Sonic, flees the City, in an effort to deliver the Emerald to Dr. Eggman. At some point, Shadow stands on top of a bridge and looks down at the police cars swarming in. He flashbacks to a scene where Maria bids him goodbye and collapses. After collecting himself after this, Shadow vows for revenge and the level begins.
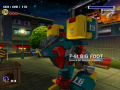
At the end of the level, Shadow and Sonic will meet for the first time, after Sonic defeats F-6t BIG FOOT, and a confrontation between the two will ensue. Shadow will flee the scene by using Chaos Control and Sonic is left behind to be captured by GUN.
Level layout
Appearance
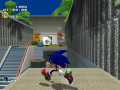
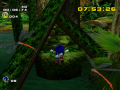
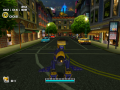
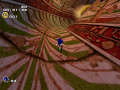
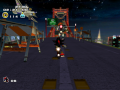
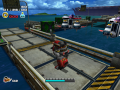
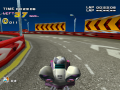
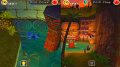
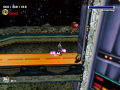
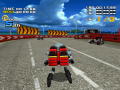
Radical Highway is a city themed level with stretches of highways and bridges, with the city’s layout in the background. It is located at the city’s highway stretch that is under-construction at the moment.
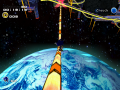
The major gimmick of this level is the bridge’s main cables, which can be grinded to achieve momentum and access places unreachable otherwise.
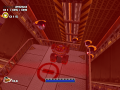
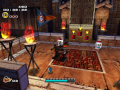
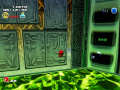
Other level specific objects are toll booths, sharp bend signs, traffic lights, purple light signs signalizing the way to go, pillars that can be somersaulted or used to get to high places, road blockers and yellow containers that can be destroyed. Other advertising billboards or signs include two direction signs: a “38 Amigo LEFT LANE”, probably referencing Samba de Amigo, and “00 Freedom ? MILE”, placard contraptions saying “ROAD CLOSED AHEAD”, informative placards above the road: “SYSTEM CHECK ACTIVE”, “ROAD CONSTRUCTION AHEAD” and “DANGER Construction in progress Do not enter” signs, and advertisement billboards, like a SOAP ad, which shows their logo and advertises their website and a CHAOS SODA ad ”Primal Venom”, probably referencing Chaos. In addiction, there are several yellow blimps advertising SOAP or with the message “GOT RINGS?” and giant NiGHTS heads visible in the landscape.
Walkthrough
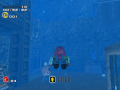
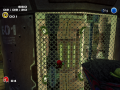
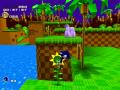
Shadow first starts grinding down a cable of a Golden Gate styled bridge to a platform down below, with a lot of road blockers. Some springs will lead to the level above, where a row of toll booths are and the first bombs from the airplanes flying over the place are dropped. Down a slope there’s a two way loop and after a tunnel, at the end there’s a dash panel that will lead to another platform. Here, there’s an upreel that takes to a level above and a long stretch of curved road. To the left there’s a spinning hexagonal pillar, which after a somersault and a trail of rings, leads to where Shadow’s Flame Ring upgrade is. At the end there’s a rocket that will take to a raised level. Back at the stretch of road, there’s a second upreel that will also take Shadow to this same level. A rocket is here to take Shadow to another platform, where the first Point Marker is.
After this, there’s a hexagonal pillar and past it, a slope, a loop and a downwards house of springs. Take note that by doing a leap out of the right side of the building and always pressing forward will lead to a balloon with an extra life (the left side leads to a balloon with invincibility). At the end of the building there's another stretch of highway, and an above one that crosses it, which can he accessed by jumping higher on the springs. Disregarding that, there’s a long stretch of road and after another hexagonal pillar there’s a staircase section, with a trail of Mono Beetles leading to the highest section. Past this, there’s the stretch of cross road mentioned above, and a slope that will lead to a second staircase like section. In here there’s a set of a spring and upreel (or a spring inside the steel container) that will lead to a higher level with a rocket. It will launch Shadow high above in the air, to fall on a platform with a toll booth where the second Point Marker is.
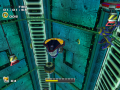
Beyond there’s a slop and a screw loop and from here there’s a multitude of second paths. The first is the one by taking the lower road, which goes down the slope and leads to a dead end. It’s possible to go past the void thanks to an updraft, to a platform at the end and to a staircase section after a trail of Mono Beetles. Note that this route triggers the Blue Eagle airplane to land and fire at Shadow. The second is by taking the pole at the dead end, to a platform standing on a level above, a pole that will swing Shadow to a set of hexagonal vertical pillars and after a trail of Beetles, to a platform and up it to another at the very top of the tower of the Golden Gate type tower. There’s also a third option, which is by taking the bridge cables and grind them. It becomes easier if Shadow jumps to either left or right (the right has a ring box) exactly after the dash panel at the end of the screw loop and before the slope, homing attack to the spring as it comes close to the bridge cable. Either way will launch Shadow to the bridge’s tower, where a Mystic Melody that takes to a higher platform is, and after grinding down the next cable, to the same tower platform as the second path. Grinding down the cable either way, will launch Shadow to the platform where the first path ends. From here there are two paths with a stretch of highway each, being the right one faster and with no GUN robots. At either end there will be the third Point Marker.
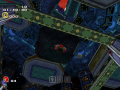
Past this there’s a tunnel with some acrobatic obstacles, a slope, a loop and Shadow will be launched to a platform with a swing, which in turn will lead to another platform above, or will go through some vertical hexagonal pillars if Shadow let’s go of it. Either way and past the second swing pole (or a platform with a toll booth and a spring), Shadow will go down a slope and a stretch of highway with the left side with no protection, to a two way loop. Beyond there’s a stretch of highway that spirals and at the end, Shadow will be launched to a platform, which has the Goal at the end of the tunnel and past the second toll booth.
Other versions
Radical Highway shares its setting and level objects with Tails' Mission Street minus the street sections, and to a minor extent, to Tails' Route 101 and Rouge's Route 280, like the roads and respective walls, the Golden Gate styled bridge, billboards and sharp bend signs.
Enemies
- Beetle series: Mono Beetle, Spark Beetle, Gold Beetle, Gun Beetle (Hard Mode)
- Hunter series: Gun Hunter, Shield Hunter (Hard Mode)
- Fighter series: Blue Eagle
Locations
Animals
| Animal | Number | Location |
|---|---|---|
| 4 | Beginning: By whistling behind the yellow and black sign on toll booth No.1. In Hard Mode, there are two of them here; the second one spawns inside of the roof of the toll gate Beginning: Above a road block before the second upreel. First Point Marker: Close to the “ROAD CLOSED AHEAD” sign on the second staircase like section. Second Point Marker: At the dead-end if Shadow takes the downwards path after the screw loop. | |
| 1 | Second Point Marker: In a wooden container on the lower level of the staircase section. | |
| 3 | Beginning: At the back of the first platform after the cable grind, behind the last road blocker. First Point Marker: Inside a wooden container to the right on the stretch of road after the house of springs. Third Point Marker: On the platform Shadow ends up swinging after being launched from the loop. | |
| 5 | Beginning: Above the yellow containers before the two way loop. Beginning: Behind a “ROAD CLOSED AHEAD sign on the second platform, before the upreel. First Point Marker: On the roof of the toll booth past the rocket that takes Shadow high above in the air. Second Point Marker: On the back of the staircase section, to the right. Third Point Marker: On the right of the second toll booth, on the Goal platform. | |
| Random | 7 | Beginning: Inside one of the wooden containers on the second platform, before the upreel. First Point Marker: On a steel container before the spring house. First Point Marker: In a pipe, located at the top of the staircase section. Second Point Marker: In a pipe, located at the very top of the tower bridge platform. Third Point Marker: By whistling close to the yellow containers behind the Point Marker. Third Point Marker: In a pipe on the left of the first toll. Third Point Marker: By whistling close to the yellow containers, before the two-way loop. In Hard Mode, there are two of them here. |
| Total | 20 (22 in Hard Mode) |
- The level specific animal (third Chao box) is a Unicorn.
Big the Cat
After letting go of the rocket high up in the air, while Shadow is falling and the camera gives a top-view from the the platform of the second checkpoint, Big can be seen in the wing of the yellow blimp to the right, looking at the street below.
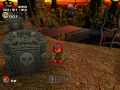
Chao containers
- Beginning: On the left hallway on the platform with the first upreel.
- First Point Marker: In the middle stair of the staircase section (changes to the south of the bottom level of the staircase in Hard Mode).
Second Point Marker: In the staircase section after the cable grinding, amongst some wooden containers.
Gold Beetle
The Gold Beetle can be found of top of the tower platform, after the second Point Marker and if Shadow took the second or third path. On Hard Mode the Gold Beetle changes locations. It can be found before the vertical hexagon pillars beyond the loop, after the third Point Marker.
Lost Chao
After the second checkpoint and after the second screw loop, there's a slope downwards. Stop and go back, all the way to the ending of the loop, then jump out of the track (any side will do but the right has an item box nearby), do a homing attack as the the suspension cable is approaching to hit a spring. Shadow will be sent to the main tower's top and from here head to the Mystic Melody ruin on the middle of it, activate and follow the platforms that appear to the suspended platform.
Upgrade
Shadow's Flame Ring upgrade can be found here, though the Air Shoes will typically be a prerequisite to obtaining it. It's past the first upreel, on a platform to the left and after both the hexagonal horizontal pillar and the trail of rings.
Other appearances
- A snow-covered Radical Highway makes an appearance in Mario & Sonic at the Olympic Winter Games as the Snowboard Cross Dream Event.
- A remake of the level appears in the 3DS version of Sonic Generations.
Trivia
| |
Trivia sections are bad Try and incorporate this information into the main article. See the manual of style to find out why. |
|---|
- Radical Highway is modeled after the Golden Gate bridge and its surrounding area of San Francisco, although the Empire State Building is also visible.
- In Hard Mode, there are 22 small animals in the level, even though Shadow's counter is supposed to top out at 20. After the twentieth animal, the game will give an extra life and the number will blink red like usual; when the twenty-first and twenty-second are subsequently collected, additional lives are awarded and the counter (which remains 20) will blink red again as well.
- In Mario & Sonic at the Olympic Winter Games, the NiGHTS head that was part of a building was changed to a Chao head.
References
| Sonic Adventure 2 / Sonic Adventure 2: Battle | |
|---|---|
|
Main page (SA2B|2012) Manuals (SA2B) Development (SA2B) |
show;hide
2 Player Mode: Mini-games: Dr. Eggman's Robots: GUN Robots: Ghosts: Hero: Dark: Both: Final: Dreamcast Prereleases: SA2B Prereleases: Books:
Music: Songs: "Live & Learn" | "It Doesn't Matter" | "Believe in Myself" | "Unknown from M.E." | "Throw It All Away" | "E.G.G.M.A.N." | "Fly in the Freedom" | "Escape from the City" | "Kick the Rock!" | "A Ghost's Pumpkin Soup" | "Dive into the Mellow" | "Deeper" | "Space Trip Steps" | "Rhythm and Balance" | "The Supernatural" | "For True Story" | "Supporting Me" |