Sand Ocean
From Sonic Retro
| |
Sonic Adventure 2 |
| Levels |
| Sand Ocean |

|
This article needs cleanup. This article needs to be edited to conform to a higher standard of article quality. Specifically, issues with this article are:
After the article has been cleaned up, you may remove this message. See How to Edit a Page for help. |
| Sand Ocean |
|---|
| Third dark storyline stage, Sonic Adventure 2 |
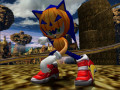
| Level themes: spooky/supernatural, desert/western |
| Mission 1: Return to Hidden Base!
|
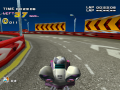
| Mission 2: Collect 100 rings!
|
| Mission 3: Find the lost Chao!
|
| Mission 4: Reach the goal within 4 minutes 0 seconds!
|
| Mission 5: Clear Hard Mode!
|
| ← Dry Lagoon | Radical Highway → |

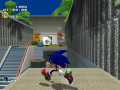
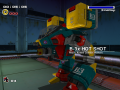
Sand Ocean is the third stage in the Dark storyline of Sonic Adventure 2 and the second stage playable with Eggman. It represents Eggman's attempt to return to his Hidden Base hideout, after his confrontation with Knuckles and Rouge.
Contents
Plot
After returning from Prison Island from where he released Shadow Eggman sets off to his secret base, taking notice that there’s an emerald sign on the area. Since Shadow has asked him to bring Chaos Emeralds the next time they meet, Eggman does a detour and finds Knuckles and Rouge fighting over the Master Emerald, and not a Chaos Emerald like he initially thought. Still, he snags it, thinking he could use it for something, but Knuckles foils his plans by smashing the emerald into pieces. Eggman leaves the scene baffled at the echidna’s antics and continues his way back to his base.
Level layout
Appearance
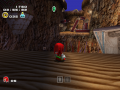
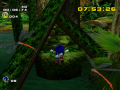
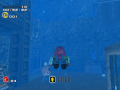
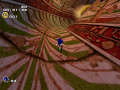
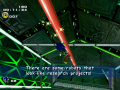
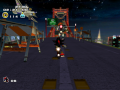
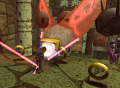
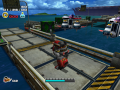
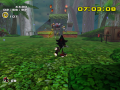
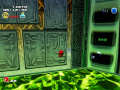
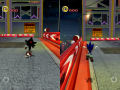
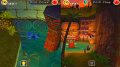
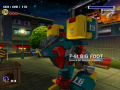
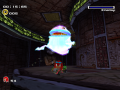
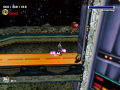
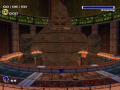
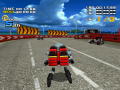
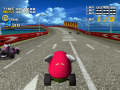
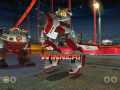
Sand Ocean is desert themed, with an interesting concept of bottomless pit, since the level is constructed above sand where the Egg Walker will sink into immediately if in contact, because the mecha is too heavy to sustain its weight above the surface. Since Sonic is lighter, he'll be able to escape the sand by repetitive jumping, as seen in the Egg Golem boss. It’s Egyptian themed as well, with large murals, hieroglyphs in small square platforms, and giant statues with an Eggman like head on top. For some strange reason, there are flags and gas tanks with the GUN’s insignia emblazed on it.
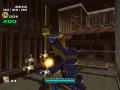
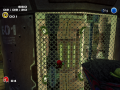
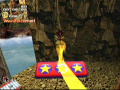
The major gimmicks of this level are the pillars that can be knocked over by locking-on to the Dynamic packs attacked to the base of it, form new paths and access other platforms and gyratory platforms that make alternative paths easier to access.
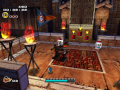
Other level specific-objects are torches and fire pots that will hurt if touched, black and yellow jars that can be smashed, GUN gas tanks, that were already mentioned, that can be destroyed and then used to reach higher heights
Walkthrough
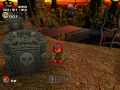
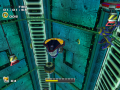
Eggman first starts in a platform with half walls, similar to Tails’ “houses” but not quite. After this there’s a gyratory platform, which can lead to three ways. The one on the right and past some steel containers is a dead end but contains some rings, the one on the left leads to Eggman’s Mystic Melody upgrade is. There’s a Mystic Melody here as well, which is a massive shortcut to a stone pillar section that will be mentioned below. Back at the gyratory platform and following the forward path, there’s some moving platforms over the sand, another half wall platform and the first stone pillar with dynamite packs that can be knocked off. Using will access a hallway of some sorts and halfway down there’s another stone pillar that can be knocked off and up the staircase there’s a third stone pillar that can be knocked on, that eventually leads to the first Point Marker.
Here there’s a gyratory platform and platforms over the sand, leading to yet another stone pillar that can be knocked off. At the end there’s another gyratory platform has two ways, one beyond and the other to the right where the second Point Marker is. Regardless of it, the forward path leads to some platforms over the sand, which access a larger one beyond them.
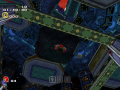
Past the Point Marker there’s more square platform, moving and stationary, over the sand and another stone pillar that can be knocked off. A the end there’s a drop down platform and past the staircase and to the right there’s the stone pillar section close to where the Mystic Melody shortcuts to. Past this and a similar setting as the beginning of the level, there’s two GUN gas tanks, which destroyed make a path to another section with more square platforms, moving and stationary, a gyratory platform and the third Point Marker.
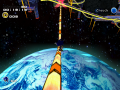
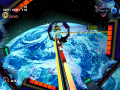
At the end of the long platform there’s a jump plate that will launch Eggman to a hallway of some sorts, with various pillars that an be knocked off, making a staircase upwards that Eggman will take to reach the level above, where the Goal is.
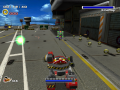
Other versions
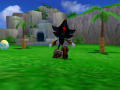
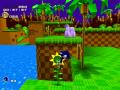
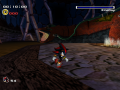
Sand Ocean and Tails’ Hidden Base are both in the same area, on the outskirts of the pyramid that is Eggman’s base, so they share the level theme and various objects, with some small variants, though the first is set at night while the latter is during the day. Their gimmicks are also very close to one another as well, with one having a progression path based on knocking down platforms or pillars to proceed forward. Sand Ocean also shares some of its desert and Egyptian themes with Sonic’s Pyramid Cave, the murals or the giant Eggman’s heads, and both Knuckles’ Death Chamber and Rouge’s Egg Quarters, with hieroglyphs and Eggman statues scattered through the level.
Enemies
- Beetle series: Mono Beetle, Bomb Beetle, Gun Wing, Gold Beetle
- Rhino series: Rhino Jet
- Hawk series: Sky Hawk, Laser Hawk (Hard Mode)
Locations
Animals
| Animal | Number | Location |
|---|---|---|
| 3 | Beginning: In a lower platform behind the one Eggman starts in. Second checkpoint: In a raised platform, located at the top of the platform after the first large pillar. Second checkpoint: In the gyrating platform, just before the third checkpoint. | |
| 2 | Beginning: Close to a GUN flag at the right, on the right hallway accessed from the first gyratory platform. Third checkpoint: In the lower edge corner of the stairway that Eggman is launched to. | |
| 2 | Beginning: In an alcove next to the first Chao container, beyond the spinning spikes. First checkpoint: In the platform where the second Chao container is. | |
| 2 | Beginning: In the platform before where the second large pillar is. Second checkpoint: Amongst some vases at the right, located on the lower part of the platform after the first large pillar. | |
| 1 | First checkpoint: In a container located at a small platform, in the left forward side path accessible through the second gyratory platform. | |
| Random | 5 | First checkpoint: In a pipe, located in a side platform to the left, in the platform before the second gyratory platform is, which In turn is very close to the second checkpoint. First checkpoint: In a pipe, located in a side platform to the right, in the platform before the second gyratory platform is, which In turn is very close to the second checkpoint. Second checkpoint: In a pipe, located after the raised pillar section. Third checkpoint: In a pipe, located on the platform where the checkpoint is. Third checkpoint: In a pipe, located in the lower right edge corner of the stairway that Eggman is launched to. |
| Total | 15 |
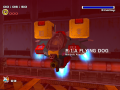
- The level specific animal (third Chao container) is a Skeleton Dog.
Big the Cat
On the goal platform, stand close to it. Rotate the camera to the left and Big is sitting on a platform, seemingly trying to fish in the sand and looking over his shoulder.
Chao containers
- Beginning: In an alcove, located in the same raised platform of the third pillar that needs to be knocked and spinning spikes are.
- First checkpoint: In the platform where the first pillar that needs to be knocked and the second Chao container are.
- Second checkpoint: On top of a pillar, on the pillar platform area.
Gold Beetle
The Gold Beetle can be found on top of a small platform at the end of the stone pillar that needs to be knocked off, after the first Point Marker.
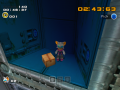
Lost Chao
- Upgrades: Jet Engine
Just before the second checkpoint, there's a gyratory platform, which will also take to a side hallway. Hover to the platform with a spring and then hover to the one moving back and forth. Destroy the steel containers, hover to this platform and the Chao is at the end of the next one.
Upgrade
Eggman's Mystic Melody upgrade can be found in this level - though it requires the Jet Engine to access. It’s in platform to the left of the first gyratory platform, right at the beginning.
Dreamcast / GameCube differences
- Some of the Hawk series robots were moved from one location to another.
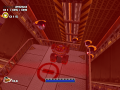
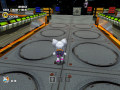
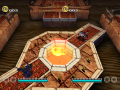
- Ceramic jars were added in the room with the circle of rings on the floor in the GameCube version.
- Just before the last checkpoint, you will need to lock-on and destroy two water containers blocking your way in the Dreamcast version. This was changed three water containers in the remake.
Known Bugs
- The quicksand in this level, also found in the Egg Golem boss fight, stops the timer a small amount of time before the player actually dies. This introduces a bug where it's possible to force the timer to freeze without the player also dying. In a certain part of the level, a spring is placed on a platform above the quicksand; with careful timing it's possible to jump into the sand while moving towards the spring, and hit the spring between the point the timer stops and the point where the player would die. If done correctly, the timer will be stopped but the player will be safely ejected from the quicksand, allowing them to achieve a large time bonus while completing the level entirely at their leisure.
References
| Sonic Adventure 2 / Sonic Adventure 2: Battle | |
|---|---|
|
Main page (SA2B|2012) Manuals (SA2B) Development (SA2B) |
show;hide
2 Player Mode: Mini-games: Dr. Eggman's Robots: GUN Robots: Ghosts: Hero: Dark: Both: Final: Dreamcast Prereleases: SA2B Prereleases: Books:
Music: Songs: "Live & Learn" | "It Doesn't Matter" | "Believe in Myself" | "Unknown from M.E." | "Throw It All Away" | "E.G.G.M.A.N." | "Fly in the Freedom" | "Escape from the City" | "Kick the Rock!" | "A Ghost's Pumpkin Soup" | "Dive into the Mellow" | "Deeper" | "Space Trip Steps" | "Rhythm and Balance" | "The Supernatural" | "For True Story" | "Supporting Me" |