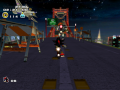
Wild Canyon
From Sonic Retro
| |
Sonic Adventure 2 |
| Levels |
| Wild Canyon |

|
This article needs cleanup. This article needs to be edited to conform to a higher standard of article quality. Specifically, issues with this article are:
After the article has been cleaned up, you may remove this message. See How to Edit a Page for help. |
| Wild Canyon |
|---|
| Second hero storyline stage, Sonic Adventure 2 |
| Level themes: mountain/canyon, ancient ruins, underground/cave, desert/western |
| Mission 1: Find 3 pieces of the Master Emerald!
|
| Mission 2: Collect 100 rings!
|
| Mission 3: Find the lost Chao!
|
| Mission 4: Collect the Emerald pieces in 2 minutes 0 seconds!
|
| Mission 5: Clear Hard Mode!
|
| ← City Escape | Prison Lane → |

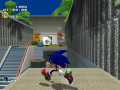
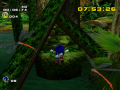
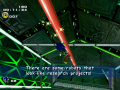
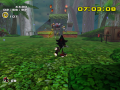
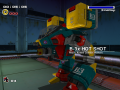
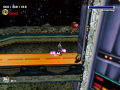
Wild Canyon is the second stage in the Hero storyline of Sonic Adventure 2 and the first stage playable with Knuckles. It represents Knuckles' search to find the Master Emerald shards that were scattered after he smashed it.
Contents
Plot
- 11:08
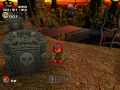
- Desert area
The Master Emerald has been stolen again from Angel Island, this time by Rouge, a jewel thief. Knuckles follows her and finally catches up in a desert area near Eggman's pyramid base. The two of them bicker and throw taunts to one another. The doctor shows up on his way to his base after his confrontation with Shadow, he followed an Emerald signal he was detecting and is surprised to see it was the Master Emerald. Eggman decides to take it, figuring that he could use it for something. Knuckles jumps and smashes the Master Emerald to pieces, before Eggman manages to escape and the doctor flees the scene befuddled. The echidna figures if it's in pieces he can put it back together. After yet another squabble with Rouge, Knuckles then sets off to find the Master Emerald shards to restore it, as seen in Sonic Adventure.
Level Layout
Appearance
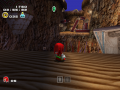
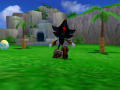
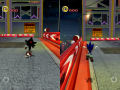
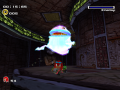
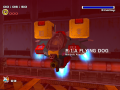
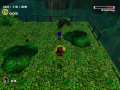
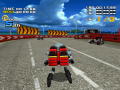
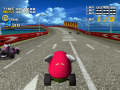
Wild Canyon is a desert and wind themed level, with sand and windmills, along with several Egyptian references which seem to be recurrent in this game.
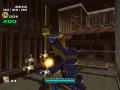
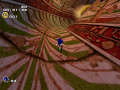
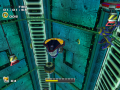
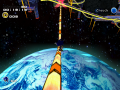
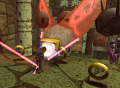
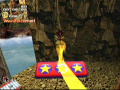
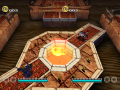
The major gimmick of this level is the "Wind Altar", a giant air tunnel with a strong wind to blow Knuckles upwards and permit access to new sections.
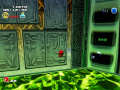
Other level-specific objects are ribbons that fly with the wind, swirl tyles arranged in different shapes and cubic stone alcoves; giant statues holding boxes that can be dug into, rocks that are floating in the upwards currents that can be destroyed, stone head blocks that can pushed along tracks, old purple treasure chests with a gold bird emblazed on it that can be smashed and skulls that can be picked up.
Level sections
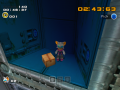
Wild Canyon is divided into two major sections plus four secret rooms.
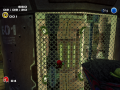
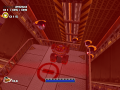
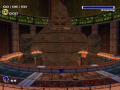
The first section is called Chamber of Wind and it’s where Knuckles first starts. It’s located inside some ancient ruins and is composed of two major level heights, with small ledges along the walls between them. The bottom floor is where the Wind Altar is located, surrounded by high pillars and statues holding boxes. The upper floor (also called the "Wild Canyon Track") is a ledge all around the room, very close to the ceiling. In the southeast part of the upper level there’s a painting that leads to secret room #1, which has some Knuckles Tribe Pedestal, which activates warp to secret room #3. Riding the wind current at the Altar of Wind will allow Knuckles to reach the section above, which is unreachable otherwise.
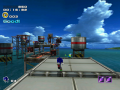
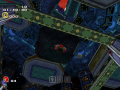
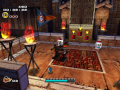
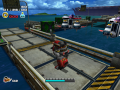
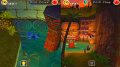
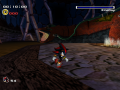
The second section is a dry and reddish canyon setting and is composed of three sub-sections.
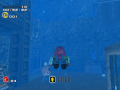
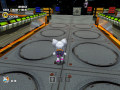
- The central section is called Stone Dance Hall and it’s where Knuckles ends up after being blown upwards from the room below. There are four statues holding boxes (numbered 1 through 4, indirectly, by a count of swirl panels above each one's head) and two raised platforms, along with some ledges. Behind where Knuckles is facing after heading straight ahead from the start and being blown upwards, there’s a painting below the raised platform, which will lead to secret room #2. This secret room has nine paintings: the large one leads back to the panel that sent you here, seven of the small ones are "traps" that send you back to the Chamber of Wind, and the last small one (the central painting on the right side) takes you to secret room #3. Also in the Stone Dance Hall, there are holes in the ground level that will drop Knuckles back to the Chamber of Wind. There are two passageways that branch from here, opposite to each, the second and third area.
- The second is called the Lonely Statue area and it’s to the left if you head straight ahead from start and get blown upwards. There are cubic stone alcoves filled with wooden containers, which are called square buildings in some hints, a raised X shaped platform and at the end, a giant statue holding a box. High above this statue there’s a painting, which leads to secret room #4 and the Mystic Melody upgrade. The only way out is indeed taking the upgrade, to activate the pedestal nearby and e warped back to the eye at the Chamber of Wind.
- The third is called the "Sphinx Head" area and it’s to the right if you head straight ahead from start and get blown upwards. There are broken pillars stuck on the ground and the walls, and at the end there are some ledges and a statue’s head buried in the sand.
Hard Mode
In the Chamber of Wind there are a couple of springs on the pillars seen only by using the Sunglasses, which direct to the core of the Wild Altar. The Knuckles Tribe Pedestal present in secret room #1 are absent.
In the Lonely Statue Area, in secret room #4 there is no Mystic Melody upgrade nor pedestal anymore. To exit this secret room, a painting was added, which leads back to the Lonely Statue area.
Other versions
Wild Canyon mirrors Rouge’s Dry Lagoon in many ways: both are Egyptian themed to a certain degree, both are near the beginning of the story, and except for one extra side path in Dry Lagoon, the two stages are shaped identically.
Wild Canyon is identical to Sonic's Pyramid Cave, Eggman’s Sand Ocean and Tails’ Hidden Base: Egyptian themes and sand.
Enemies
| Type | Series | Models | |
|---|---|---|---|
| Normal Mode | Hard Mode | ||
| Beetle series | Gold Beetle | ||
| Rhino series | Rhino Jet | Rhino Spike | |
| Hawk series | Gun Hawk | ||
Locations
Animals
| Animal | Quantity | Location |
|---|---|---|
| 1 | Chamber of Wind: By the foot of the statue, northwest. | |
| 2 | Lonely Statue area: Above the middle pillar stuck on the wall. Lonely Statue hallway: In the southeast beam of the X platform. | |
| 1 | Sphinx Head area: Behind the statue's head. | |
| 2 | Chamber of Wind: Behind the stone block at the right corner, on the platform where Knuckles first starts. Chamber of Wind: Inside a treasure chest located in the eastern wall ledge. | |
| Random | 3 | Chamber of Wind: In a pipe located in the south wall ledge. Stone Dance Hall: In a pipe on the foot of statue, southwest from how Knuckles is first blown upwards. Lonely Statue area: In a pipe by the last pillar before the pit with the two Rhino Jet. |
| 1 | Level specific animal Lonely Statue area: In the southwest corner of secret room 4 (reachable by digging through the painting located above the head of the Lonely Statue). |
Big the Cat
At the beginning, ride the wind up to the top, then turn around 180° and glide to the wall. When Knuckles hits the wall, climb up and right next to the windmill, where Big can be seen hanging onto the wall and facing away from Knuckles. In Hard Mode he switches places and his location currently unknown.
Chao container
- Chamber of Wind: On the northwest highest pillar.
- Sphinx Head area: To the left of the statue's head.
- Lonely Statue area: By the statue's foot.
Gold Beetle
The Gold Beetle can be found behind the head of the statue, in Sphinx Head area. In Hard Mode it switches places and its location currently unknown.
Lost Chao
- Recommended upgrades: Shovel Claw, Hammer Gloves, Mystic Melody
From where Knuckles first starts, climb the south wall and in the southeast corner, there will be some steel containers that broken will reveal a painting. Dig through it into secret room 1, activate the two Mystic Melodies and jump into the warp hole to secret room 3.
There's another path that leads to secret room 3 and that bypasses any need for the Hammer Gloves or Mystic Melody. For details on this path, see the directions to the second piece in hard mode.
Wild Canyon is one of the only stages that were purposely constructed so the Lost Chao can be found without the Mystic Melody upgrade.
Master Emerald shards
Hard Mode
| Emerald shard | Upgrades | Hints |
|---|---|---|
| #1 | Shovel Claw | "X" marks the spot. Behind something. Right below the suspended ceiling in front of a lonely statue. |
| #2 | Shovel Claw | A secret room. The other side of a wall painting. If you dig into a wall painting, there is a new path to... |
| #3 | Shovel Claw Sunglasses |
A very windy area. You can't use your technique to get it! Try wearing your sunglasses on a pillar somewhere. |
- The first shard is in the Lonely Statue area, under the X shaped raised platform. Jumping and gliding from the closest stone apartment will make it easier to grab.
- The second shard is in secret room 3, the same room that the lost Chao was in, but the Knuckles Tribe Pedestal and warp hole from secret room 1 have been removed so you'll have to find another way in. Dig through the painting in the Stone Dance Hall, and you'll emerge in secret room 2 with many small paintings, only one of which leads to the desired room. Using the Sunglasses here will make a vertical line of rings appear, and these rings point to the correct panel (from the way you came in, it's the central panel on the right side).
- The third shard is at the bottom of the vertical wind tunnel, at the Altar of Wind. It's most readily obtained by using the Sunglasses while standing on the lowest pillar to the right, which will relay you from one spring to another spring to the piece.
Upgrade

- Recommended upgrades: Shovel Claw
Knuckles' Mystic Melody upgrade can be found in secret room #4, accessed by digging through the painting above the head of the Lonely Statue.
References
| Sonic Adventure 2 / Sonic Adventure 2: Battle | |
|---|---|
|
Main page (SA2B|2012) Manuals (SA2B) Development (SA2B) |
show;hide
2 Player Mode: Mini-games: Dr. Eggman's Robots: GUN Robots: Ghosts: Hero: Dark: Both: Final: Dreamcast Prereleases: SA2B Prereleases: Books:
Music: Songs: "Live & Learn" | "It Doesn't Matter" | "Believe in Myself" | "Unknown from M.E." | "Throw It All Away" | "E.G.G.M.A.N." | "Fly in the Freedom" | "Escape from the City" | "Kick the Rock!" | "A Ghost's Pumpkin Soup" | "Dive into the Mellow" | "Deeper" | "Space Trip Steps" | "Rhythm and Balance" | "The Supernatural" | "For True Story" | "Supporting Me" |