Mission Street
From Sonic Retro
| |
Sonic Adventure 2 |
| Levels |
| Mission Street |

|
This article needs cleanup. This article needs to be edited to conform to a higher standard of article quality. Specifically, issues with this article are:
After the article has been cleaned up, you may remove this message. See How to Edit a Page for help. |
| Mission Street |
|---|
| Seventh hero storyline stage, Sonic Adventure 2 |
| Level theme: urban |
| Mission 1: Elude enemy pursuit!
|
| Mission 2: Collect 100 rings!
|
| Mission 3: Find the lost Chao!
|
| Mission 4: Reach the Goal within 5 minutes 0 seconds!
|
| Mission 5: Clear Hard Mode!
|
| ← Pumpkin Hill | Aquatic Mine → |

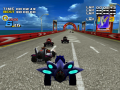
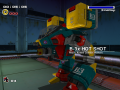
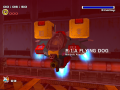
Mission Street is the seventh stage in the Hero storyline of Sonic Adventure 2 and is playable by Tails. It represents Tails’ searching for a safe place to hide and plan ahead to get at Eggman.
Contents
Plot
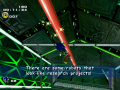
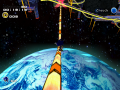
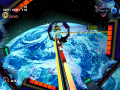
Eggman hacks into Earth’s satellites and broadcasts himself bragging about how he’s about to take over the world and start the Eggman empire. He proceeds to demonstrate his strength by firing the Eclipse Cannon against the moon, blowing half of it away. Eggman also gives a 24 hour countdown, before he’ll fire the Eclipse Cannon again, this time against Earth.
Sonic, Tails and Amy contemplate Eggman’s destruction and conclude that Eggman used Chaos Emeralds to power up the Eclipse Cannon, since it’s so powerful. Tails brings the yellow Chaos Emerald and explains that they have the power to detect each other like magnets. The three of them are cut short as the police surrounds the three of them and Tails sets off to find a place to hide.
Level layout
Appearance
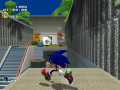
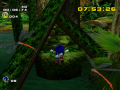
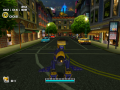
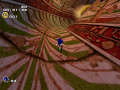
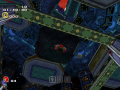
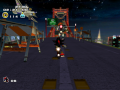
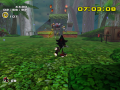
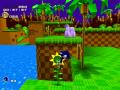
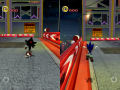
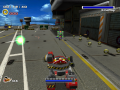
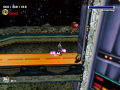
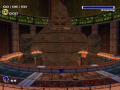
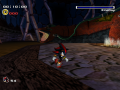
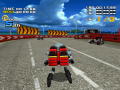
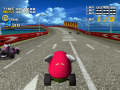
Mission Street is a city themed level with street roads and stretches of highways and bridges, with the city’s layout in the background. It takes place between the city and the highway stretch that is under-construction at the moment.
The major gimmick of this level is plane bombings that make parts of the highway shake about or fall off.
Other level specific objects are the same as Sonic’s City Escape for the street sections (including two new police cars) and of Shadow’s Radical Highway for the highway sections, along with informative placards above the roads with Tails’ face, a 1,000,000 WANTED reward and a description: Date of Birth: none, Hair: Fox Brown, Place of Birth: None, Eyes: Blue, Height: small, Complexion: Fox, Weight: Light, Sex: Male, Build: Light, Race: Fox, Occupation: None, Nationality: None.
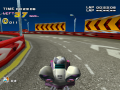
The highway sections of Mission Street are modeled after the Golden Gate Bridge and it's surrounding area of San Francisco, although the Empire State Building is also visible. The street sections are modeled after Mission Street, the longest and one of the oldest streets in San Francisco.
Billboards and Ads (Dreamcast)
- Shared with City Escape

Chaos Soda
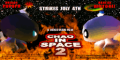
Chao in Space 2

Chaos Soda Bench Ad


- Exclusive

Not depicted is a SOAP shoes billboard (green).
Walkthrough
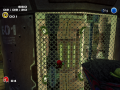
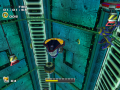
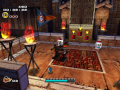
Tails first starts at the beginning of a street, with a road blocked to the right. After the corner of the street and after some police cars blocking the way there’s a tunnel and past the tunnel there’s a stretch of road that will collapse to a level below, and to the end and left that’s where Booster upgrade is. Still there’s road above it at the end of the collapsed stretch of road, but either way, both paths will meet shortly after near a crusher. Riding the crusher upwards will lead to a platform with pillars stacked with dynamite packs, which busted will make them fall. Past this there’s an upreel and some moving pillars that staircase the way up to the level above, where the first Point Marker is.
Past this there’s a highway slope down and pillars with Hunters flank the way. At the end there’s a missile to the left, which will bust the cages open to the right and past this there’s a Golden Gate like tower bridge. It’s worth noting that below the highway there’s a spring, but it does nothing but launch Tails back to the highway above. Beyond there’s a stretch of highway and pillars that can knocked down, along with some falling Laser Hunters and another Golden Gate like tower. Knocking the pillars will make a way up the warehouse rooftop and past a pit there’s a platform with some police cars. Back at the second Gold Gate like tower, below the highway there’s a Mystic Melody, which makes a platform shortcut appear at the left of the platform with the police cars, and a jump plate that launches Tails to this same platform. Despite the platforms, there’s a pair of crushers disabled by a switch hidden inside the wooden container to the right. Past this there’s a highway turn and going upwards, flanked by pillars that can be knocked and at the end and after the pair of crushers seen below this time, there’s a small stretch of highway where the platforms that appeared from the Mystic Melody lead to, and a pillar staircase. Riding them upwards will lead to the second Point Marker, and circling them will take to a smaller platform, where another Mystic Melody is. The warp will take Tails to a warehouse top, and from here some side pillars are reachable.
Beyond the Point Marker there’s a long stretch of falling highways and a pit that can be jumped by knocking the pillars and making them the way. Past this there’s another curving road flanked by pillars that can be knocked and a set of three highways that will work as seesaws, and then a tunnel. Past this there’s a street section, with two falling highways from above and past this the Goal.
Hard Mode
Just before the first Point Marker, the number of vertical hexagon pillars is smaller and they stand father apart.
After the first Point Marker, at the end of the bridge, the Mystic Melody is not present, and a jump plate leading back to the end of the bridge is there instead. After the garage, the bottomless pit now has rotating spikes as well, which will go up and down, but it's possible to navigate around the spikes without needing to wait. Further along and at the vertical hexagon pillars just before the second Point Marker, a Vulkan Fighter appears to the right.
To the underside of the platform where the second Point Marker is, the Mystic Melody is still present, but not the hexagon pillar that leads back to the Point Marker. The Mystic Melody warp doesn't lead to the roof anymore, but to the street before the vertical hexagon pillar leading to the Point Marker. Further down, after the long stretch of falling highway platforms, one of the teetering highways is missing.
Other Versions
Sonic's City Escape and Shadow's Radical Highway stage share their city and highway setting with Mission Street, since they are located at the same part of the city as well. To a minor extent, Tails' Route 101 and Rouge's Route 280 also apply, with elements like the roads and respective walls, the Golden Gate styled bridge and sharp bend signs.
Enemies
| Type | Series | Models | |
|---|---|---|---|
| Normal Mode | Hard Mode | ||
| Beetle series | Gold Beetle | ||
| Hunter series | Laser Hunter | Laser Hunter, Shield Hunter | |
| Hornet series | Hornet-3 | Hornet-6 | |
| Fighter series | Blue Eagle | ||
Locations
Animals
| Animal | Quantity | Location |
|---|---|---|
| 4 | Beginning: By whistling on the mail boxes at the first road. Second Point Marker: Before the long stretch of falling highways. Second Point Marker: By whistling next to the tree to the right after the tunnel. Second Point Marker: Above a yellow awning to the right and close the Hunters, before the second falling highway. | |
| 2 | Beginning: On the corner of the road, before the tunnel. First Point Marker: On the steel container on the right before the pair of crushers. | |
| 2 | Beginning: By whistling close to the street lamp at the corner just before the tunnel. First Point Marker: Above the first pillar to the right after the pair of crushers, after its knocked. | |
| 3 | Beginning: Below a wooden container stacked with the first black containers, inside the tunnel. First Point Marker: Below the northwest yellow container, close to the first Golden Gate like tower. Second Point Marker: By whistling close to the right street light, before the tunnel. | |
| Random | 4 | Beginning: On a pipe, located below the crusher. Beginning: On a wooden container, below the pillar staircase. First Point Marker: In a pipe, hidden by wooden containers at the right of the warehouse on the second Golden Gate like tower. Second Point Marker: In a pipe, located close to the street blockers after the long stretch of falling highways. |
| 1 | Level specific animal Second Point Marker: In a cage just before the Point Marker (the missile is beyond some steel containers inside the warehouse). |
- The level specific animal (third Chao container) is a Phoenix.
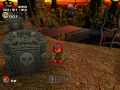
Big the Cat
After clearing the cage barricade, there's a bridge with lots of collapsing pillars and roads, eventually leading to a collapsing road with a gap before the next section of road. Drop down here, rather than hover across the gap, and you'll see Big sitting on a support beam on the left side. In Hard Mode, he switches locations to the top of the first collapsing highway at the city section before the Goal, flamboyantly doing his Sonic Adventure stage end animation.
Chao containers
- Beginning: On the upper path past the falling highway.
- Beginning: Amongst wooden containers, below the pillar staircase.
- First Point Marker: Amongst wooden containers, at the back of the platform with the pair of crushers.
Gold Beetle
The Gold Beetle can be found close to the fifth pillar of the pillar staircase, before the first Point Marker. It switches location for Hard Mode, appearing on the top of the pillar staircase section just before the second Point Marker.
Lost Chao
- Recommended upgrades: Booster, Mystic Melody
Just before the second Point Marker, there's a platform below the highway. Drop down to it and activate the Mystic Melody. Jump through the warp and hover past the pillars to the highest one. It should be noted that there's a Mystic Melody that shortcuts the stretch of curve highway by some platforms appearing, located below the highway close to the second Golden Gate tower bridge, after the first Point Marker.
Sonic Adventure 2 upgrades

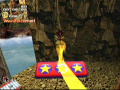
Tails' Booster upgrade can be found here. It's located to the left on the end of the stretch of highway after the first tunnel.
Trivia
| |
Trivia sections are bad Try and incorporate this information into the main article. See the manual of style to find out why. |
|---|
- At least in the Dreamcast version, the game's counter considers there to be only 15 animals on the level, even though, as listed above, there's actually 16. After the fifteenth animal, the game will give an extra life and the number will blink red like usual; when the sixteenth is subsequently collected, an additional life is awarded and the number fifteen will blink red again as well.
References
| Sonic Adventure 2 / Sonic Adventure 2: Battle | |
|---|---|
|
Main page (SA2B|2012) Manuals (SA2B) Development (SA2B) |
show;hide
2 Player Mode: Mini-games: Dr. Eggman's Robots: GUN Robots: Ghosts: Hero: Dark: Both: Final: Dreamcast Prereleases: SA2B Prereleases: Books:
Music: Songs: "Live & Learn" | "It Doesn't Matter" | "Believe in Myself" | "Unknown from M.E." | "Throw It All Away" | "E.G.G.M.A.N." | "Fly in the Freedom" | "Escape from the City" | "Kick the Rock!" | "A Ghost's Pumpkin Soup" | "Dive into the Mellow" | "Deeper" | "Space Trip Steps" | "Rhythm and Balance" | "The Supernatural" | "For True Story" | "Supporting Me" |