Crazy Gadget
From Sonic Retro
| |
Sonic Adventure 2 |
| Levels |
| Crazy Gadget |

|
This article needs cleanup. This article needs to be edited to conform to a higher standard of article quality. Specifically, issues with this article are:
After the article has been cleaned up, you may remove this message. See How to Edit a Page for help. |
| Crazy Gadget |
|---|
| Fifteenth hero storyline stage, Sonic Adventure 2 |
| Location: Space Colony ARK |
| Level theme: Death Egg |
| Mission 1: Hurry and find Eggman!
|
| Mission 2: Collect 100 rings!
|
| Mission 3: Find the lost Chao!
|
| Mission 4: Reach the goal within 5 minutes!
|
| Mission 5: Clear Hard Mode!
|
| ← Meteor Herd | Final Rush → |

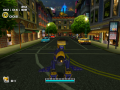
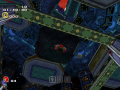
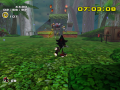
Crazy Gadget is the fifteenth stage in the Hero storyline of Sonic Adventure 2 and the fifth stage playable with Sonic. It represents Sonic's run through the ARK's interior to meet Eggman in the control room, where he's keeping Amy, and fulfills the role of "gravity-changing contraption" for the game. Perhaps the most iconic imagery of the level is the colored block puzzle found in the final room.
Contents
Plot
Inside Space Colony ARK
Cannon countdown: 45 minutes
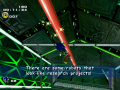
As Sonic is about to insert the fake yellow Chaos Emerald into the main console of the ARK according Tails' instructions, Eggman interrupts both, telling Sonic to meet him at the research facility, where he’s holding Amy.
Inside Space Colony ARK
Cannon countdown: 41 minutes
As the level progresses, Eggman threatens Sonic to hurry up at certain set times (2:00:00 and 4:00:00). At the arrival of the final room, there's another comment, as Eggman expresses his confidence that Sonic cannot get out of it alive.
ARK: Research lab
Cannon countdown: 33 minutes
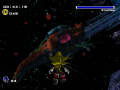
After the stage is over, Sonic meets Eggman, who offers a trade between Amy and the Chaos Emerald. Sonic accepts it, thinking that he only wins if he does it, as the emerald is fake anyway. However Eggman suspects something and imprisons Sonic along with the emerald, accusing it of being fake. Tails innocently asks him how he knows, confirming Eggman’s suspicions. Eggman then throws Sonic off the ARK in a capsule, in a situation reminiscent of Shadow's. Tails' then steps up and confronts Eggman as Sonic asked him to, defending the real emerald. Back in the capsule with Sonic, he remembers Tails' explaining about the fake emerald, and he tries Chaos Control, successfully teleporting himself back to the ARK before the capsule blows up. He then meets Knuckles and asks him to protect Amy and Tails, while he runs to find the point of the cannon, to disrupt the firing with the fake emerald.
Level Layout
Appearance
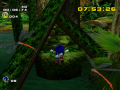
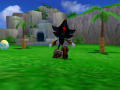
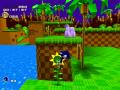
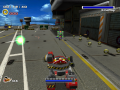
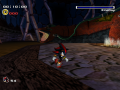
Crazy Gadget shares its' space theme with the rest of the ARK and since it mostly runs through the inside of it, it's most close to Lost Colony and Eternal Engine, somewhat to Cannon's Core as well. It also shares some themes with the outside levels as well (Meteor Herd, Final Rush, Cosmic Wall and Final Chase), but not as much.
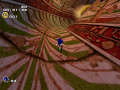
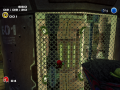
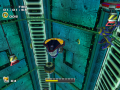
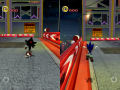
The main gimmick of this level are the changes in the gravitational field, similar to those used in the Death Egg Zone. They work just as analogously as well, with a Gravity Control Switch, but instead of being constricted to 2D, naturally they can be done in 3D. Another gimmick that connects level sections is the high-speed warp tube, which is a solid way and required, but is reminiscent of the light tunnels of Death Egg in its purpose, redundant switches and turns and discs lightening up as Sonic travels through it. A minor gimmick is the rails, which can be used both for grinding or sliding down like rappel, according to Sonic's placement in the level and/or gravity. These are only used again in Cannon's Core.
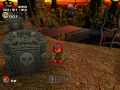
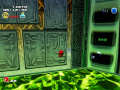
Other level specific objects are a green radioactive substance that harms on contact, locks that can be destroyed with regular rockets and small blocks that Sonic can pick up.

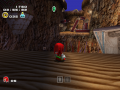
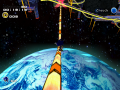
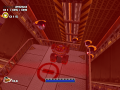
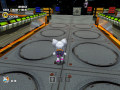
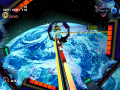
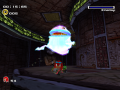
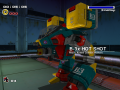
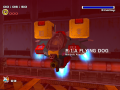
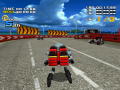
3D gravity switches
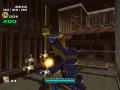
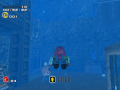
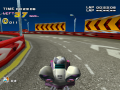
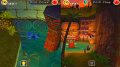
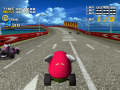
High-speed warp tube
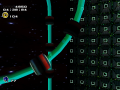
High-speed warp tube way
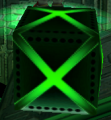
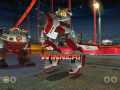
X object

.png)

Walkthrough
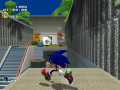
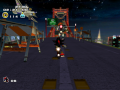
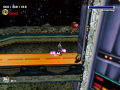
The level starts with a set of corridors and sharp bends. After a rail tacked on the ceiling, which is possible to slide down in it, Sonic reaches a radioactive put and a gravity switch. Using it will reverse the gravity and will allow Sonic to run through the ceiling and reach the other side of the pit, to a dead end. Here using another gravity switch will reverse the gravity once again and after a set of doors there’s an upreel that leads to the first Point Marker.
After there's the first high-speed warp tube, which can be used after breaking the glass. The way is pretty linear but it’s worth noting that after the gravity switch it’s possible to backtrack through the ceiling to find an extra-life to the back and above the warp tube’s exit. At a point forward, there’s the second Point Marker.
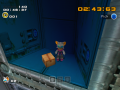
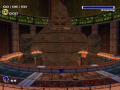
Just a bit farther, there’s a long shaft where three gravity switches are. The ones on the extremities are the ones to take. The left path eventually leads to the right and therefore consumes time, but also has a shield to grab. The right path ends with a rail that leads to the next section. Using the central gravity switch will drop Sonic to the pit below, where is difficult to land on the rail, but cuts time as well. It’s easier to press down to pan the camera out, and then try to land from there. Another much easier option is to press left and enter the next section sideways, but since the boundaries are messed up, Sonic will die if he lands far away from the entrance. Either way, after a set of corridors, there’s a room with two level heights doors. Both are controlled by the Artificial Chaos below, and its’ destruction will unlock them. Through the bottom door there’s the third Point Marker. The upper door can be reachable by a path made from the Ancient Ruin at the back of the room. Inside, there’s a dead end and a gravity switch, which leads Sonic through the bottom door (and the third Point Marker) to run through the ceiling.
After a downhill set of corridors, there’s a pit that can be passable with the help of a string of Beetles and rings (or just a gravity switch that resets the gravity), leading to the fourth Point Marker.
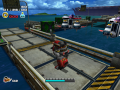
Next, there’s the second high-speed warp tube and after a long chamber, there’s a gravity switch. Here, another gravity switch, that sets some steel containers across a summersault gap. If Sonic has the Flame Ring, he can go forth, while if he doesn’t, he must use the springs to backtrack to the upper ledge and find the upgrade. Further to the back of this platform, there are two rails in each side of the chamber, leading to a small platform in the back where a Chao Container is. Past the summersault gap, there are several corridors until a small room with several containers. The central steel container has a spring that works as a gravity switch. At the end of the corridor there’s a door leading outside and a trail of rings that u-bends forth and back the ARK through another door. After yet other downhill corridors there’s the third high-speed warp tube that eventually leads to yet another room with two level heights doors. The upper door is controlled by the Beetle next to it and past there’s a gravity switch. Using it will make Sonic run through the ceiling and access a rocket that will release the lock over a small room where another gravity switch (and Chao Container) is. It’s possible to backtrack a lot without using that switch however, finding another to the further back. Through the bottom door there’s some ledges and past a door guarded by Hunters, there’s the fifth Point Marker.
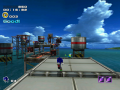
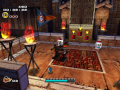
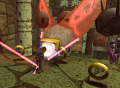
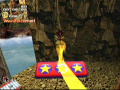
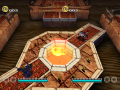
After hitting a switch, the doors down the corridor will open, revealing the final and by far the most interesting section of the level. It's composed of a room outside the ARK with several blocks, which lead to one another by using gravity switches. Although it seems complicated on theory, close to every block path only has one gravity switch so the way to go through is quite linear. The exception is the red T block, which has two. To proceed forward, Sonic must use the one furthest away, which will drop him to the final platform. The other gravity switch drops Sonic back at the purple block, but in a different path. Several things can be done from here. Right next to where Sonic drops in, there's a gravity switch, leading back to the red block. To the left there's the green block, with a few extra-lives and a spring leading back to the purple block. To the right, a rocket that destroys the cage on the purple block and a spring leading back there as well. To the back, there's an Ancient Ruin. Activating it will reveal a trail of rings, leading to the red block, where the Lost Chao in mission 3 (or an extra-life in the rest) is. At the ending platform, there's a rocket, that isn't on place if its switch wasn't activated. At the end of the purple block when it's run for the second time (and before the red block), there's a switch, that activates this rocket. A spring to the back of the final platform will launch Sonic back to the room’s entrance.
Hard Mode
After the first warp tube and at the switching gravity, the way is then done with a staircase of rails and indestructible containers, instead of a spring.
At the shaft with the three gravity switches, there are only two, to the left and to the bottom. The one on the left eventually leads to the right path, like in Normal Mode.
At the first two level height doors, they are now guarded by two Artificial Chaos. The Ancient Ruin platform path leading to the upper doors is absent, and a magnetic shield is given instead. The way through the pit further down is now done with an additional Artificial Chaos as well.
After the second warp tube, the gravity switches and Sonic is dropped to the floor instead of the ceiling. The path over the pit is made with a rail and Beetles. The way to the summersault is done by a staircase of rails and indestructible containers.
The way through a pit after the summersault was made by a trail of rings, in Hard Mode with a trail of Beetles.
At the second two level height doors, the catwalk is now shouldered by lasers.
In the block room, the first purple path has two gravity switches. The further away works like in Normal Mode, but the one halfway leads to the green block, where another gravity switch is, reversing back to the purple one.
At the end of the green block, right before switching to the yellow, the switch that controls the rocket on the last platform is hiding under an indestructible container. Sonic must use the gravity switch to clear the container away, then use the one on the yellow to come back and hit the switch before the container drops on top of it. At the yellow block on the second passage after the light blue one, there are two gravity switches. The further away function as Normal Mode but the other also permits to hit this same switch with more easiness as it drops Sonic right on top of it.
At the second green block passage, lasers guard the path instead of Beetles. Lasers are also present in the light blue one, at its second passage.
At the purple block after the gravity switch from the red, the Ancient Ruin only generates an extra life, not a way to the top of the red block.
Enemies
| Type | Series | Models | |
|---|---|---|---|
| Normal Mode | Hard Mode | ||
| Beetle series | Mono Beetle, Spark Beetle, Spring Beetle, Gun Beetle, Gold Beetle | ||
| Hunter series | Gun Hunter, Shield Hunter | ||
| Artificial Chaos | Artificial Chaos P-1, Artificial Chaos P-100 | ||
Locations
Animals
| Animal | Quantity | Location |
|---|---|---|
| 1 | Second Point Marker: Above the ledge to the back before the third Point Marker. | |
| 3 | Beginning: At the southeast corner, after the first gravity change. Switches to random and inside one of the nearby steel containers in Hard Mode. Second Point Marker: Circling the base of the rail after the shaft with the three gravity switches. Fourth Point Marker: Circling the end shaft of the second high-speed warp tunnel. | |
| 1 | First Point Marker: Circling the left tube next to the first high-speed warp tunnel entrance. | |
| Random | 14 | Beginning: In a pipe at the southeast corner, at the square room connecting the two first corridors. Beginning: In the right cube in the upreel room. First Point Marker: In a pipe at the right wall, after the first high-speed warp tunnel and before the radioactive pit. First Point Marker: In the left wooden container, after the radioactive pit and close to the summersault gap. Switches to the steel container on the upper ledge next to the gravity switch in Hard Mode. First Point Marker: In the steel container after the summersault gap. Switches to a wooden container in Hard Mode. Second Point Marker: In a pipe on the ceiling, by backtracking after the first two height door room. Fourth Point Marker: Whistling next to the right tube next to the second high-speed warp tunnel entrance. Fourth Point Marker: Inside one of the boxes Sonic can pick up, southeast of the upgrade ring. Fourth Point Marker: In left metal container, after the summersault. Fourth Point Marker: Inside the one of the southwest boxes Sonic can pick up, after the spring that switches gravity. Fourth Point Marker: In a pipe at the east wall, after the u-bend trail of rings. Fourth Point Marker: Inside right box next to the third high-speed warp tunnel. Fourth Point Marker: Inside the metal container to the back of the two height door room. Fourth Point Marker: Inside the metal container to the left of the two height door room. |
| 1 | Level specific animal Fifth Point Marker: In a cage at the purple block, after coming from the red (the rocket is on top of the light blue one). |
Big the Cat
After the fifth Point Marker, amongst the colored block complex, Big is standing on the left side of the yellow block, though it's an indented part of that block, located close to the front. Big can be seen while attempting to get on the ring-laden rail from the yellow block to green. Jumping from the south corner of the yellow block as soon as Sonic first lands on it will allow a better look. In Hard Mode, he changes position to the underside of the blue block.
Chao container
- First Point Marker: Just before the second Point Marker.
- Third Point Marker: Behind the upgrade ring. In Hard Mode, it switches to the top of the green block (accessible by means of the red block, then switching gravity to the purple one) after the fifth Point Marker.
- Fourth Point Marker: Inside a locked room close to the fifth Point Marker (the rocket to destroy the locket is located at the ceiling, therefore the gravity must be switched at the second two height doors room).
Gold Beetle
The Gold Beetle is just before the third high-speed warp tube. In Hard Mode it switches locations to the square room halfway down the set of corridors leading there.
Lost Chao
- Recommended upgrades: Light Shoes, Mystic Melody
The Lost Chao is at the top of the red block, towards the end of the level. Sonic must reach this red block like in a normal playthrough, then switch from the red to the purple by using the gravity switch on the left, run all the way back of the block towards the Ancient Ruin, then activate it to reveal a trail of rings, light dash (and press forward) to reach the top of the red block and finally running to the edge of it.
Upgrade

Sonic's Flame Ring upgrade is on top of the upper ledge to the back, just before the summersault gap after the second high-speed warp tube.
Trivia
| |
Trivia sections are bad Try and incorporate this information into the main article. See the manual of style to find out why. |
|---|
- The announcer of the ARK is female on the Japanese audio and is male in the English.
- The containers are different level objects, to be able to work with the gravity switches like Sonic. They award no score and animals that can be found inside of it will always generated even if they have been destroyed in a previous life.
- If the block room is arrived before 4:00:00, Eggman will not threaten Sonic the second time.
- The story timelines of the final stretch of the Hero story are out of place. The cutscene of Sonic being interrupted by Eggman clocks at 45 minutes until the cannon fires, then Knuckles searching for the last shards of the Master Emerald in Meteor Herd clocks at 1 hour and 26 minutes,
Comparisons
| |
Main article: Sonic Adventure 2/Comparisons/Crazy Gadget |
References
| Sonic Adventure 2 / Sonic Adventure 2: Battle | |
|---|---|
|
Main page (SA2B|2012) Manuals (SA2B) Development (SA2B) |
show;hide
2 Player Mode: Mini-games: Dr. Eggman's Robots: GUN Robots: Ghosts: Hero: Dark: Both: Final: Dreamcast Prereleases: SA2B Prereleases: Books:
Music: Songs: "Live & Learn" | "It Doesn't Matter" | "Believe in Myself" | "Unknown from M.E." | "Throw It All Away" | "E.G.G.M.A.N." | "Fly in the Freedom" | "Escape from the City" | "Kick the Rock!" | "A Ghost's Pumpkin Soup" | "Dive into the Mellow" | "Deeper" | "Space Trip Steps" | "Rhythm and Balance" | "The Supernatural" | "For True Story" | "Supporting Me" |