Pyramid Cave
From Sonic Retro
| |
Sonic Adventure 2 |
| Levels |
| Pyramid Cave |

|
This article needs cleanup. This article needs to be edited to conform to a higher standard of article quality. Specifically, issues with this article are:
After the article has been cleaned up, you may remove this message. See How to Edit a Page for help. |
| Pyramid Cave |
|---|
| Eleventh hero storyline stage, Sonic Adventure 2 |
| Level themes: spooky/supernatural, desert/western, underground/cave |
| Mission 1: Infiltrate Eggman's Hidden Base!
|
| Mission 2: Collect 100 rings!
|
| Mission 3: Find the lost Chao!
|
| Mission 4: Reach the goal within 4 minutes!
|
| Mission 5: Clear Hard Mode!
|
| ← Hidden Base | Death Chamber → |

Pyramid Cave is the eleventh stage in the Hero story of Sonic Adventure 2 and the fourth playable with Sonic. It represents Sonic's role in the heroes' trilogy of consecutive stages at Eggman's secret base.
Contents
Plot
Level layout
Appearance
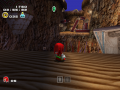
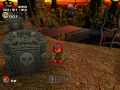
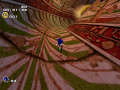
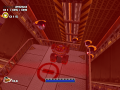
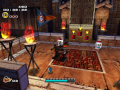
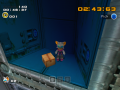
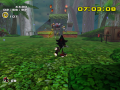
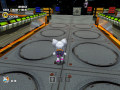
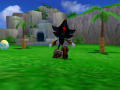
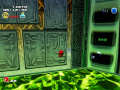
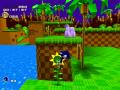
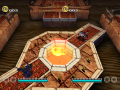
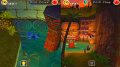
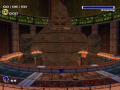
Pyramid Cave is an Egyptian indoors ruin themed level, with large murals and hieroglyphs, and since it's Eggman's base, statues with their heads replaced by one with his face.
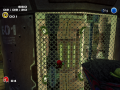
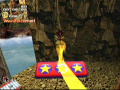
The major gimmicks of this level are hourglass doors derived from Sonic & Knuckles' Sandopolis Zone. There are also hoops that jumped across will award Sonic skill points and the only level featuring object-to-place mechanics.
Other level specific objects include bars that can be swung, torches and bonfires, chimneys with Eggman's face, boat pendulums and windmills.
Walkthrough
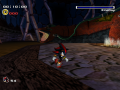
Sonic first starts by being dropped from a shaft above. From here there’s a long tunnel with some hoops and at the end after a jump plate, there’s the first Point Marker.
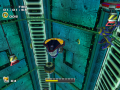
Beyond there’s the first hourglass door and past it a spring and an upreel, leading to the ceiling above the door. From here there’s a corridor and at the end, there’s a pair of poles that will make Sonic fly past the level below, where some hourglass platforms are, also leading to the same place. Either way there’s another hourglass door, a loop, a jump plate and a stair case section., with lower ledges in either side at the beginning. Close to the top there’s an hourglass door and beyond there’s a switch door, whose blue key is between the locked door and the respective key dais. By grabbing the key and releasing it on top of the dais the door will open, to reveal the second Point Marker.
Here there’s a long tunnel that can by completely bypassed by the rail close to the Point Marker. Ignoring the rail, the tunnel is made of different height levels and traps, like E-1000s, ghosts or rotating spikes, making the way up to a hallway, where the rail also leads to. At the front there’s another switch door, this time the key is at the end of the side hallway to the right. Here there’s another long rail that bypasses half of the corridor, to the top of the house and past an upwards ramp there’s the green key. Doing the way backwards, the camera changes as soon as Sonic grabs the key, and there’s an hourglass door, note that at the end there’s two upreels on each side in case Sonic didn’t take the rail to bypass this zone, and after some jumps up the staircase there’s some dash panels, which will propel Sonic close to the dais. Past the door there’s an hourglass, which opens the door after the long tunnel and past this there’s the third Point Marker. In case of not making it in time, there’s a convenient hole on the ground, which will drop Sonic next to the hourglass for another try.
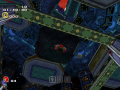
Here and next to the Point Marker there’s a Mystic Melody, which will make some rings appear. Light dashing will lead to an upreel and another platform. From here it’s possible to jump to another platform with a missile and a cage along with a pole that swings Sonic to the third ceiling that will be mentioned below, or to take the rail above and access another set of platforms, where the highest has a switch to the back will activate the rocket on the front which leads to the end of the two loops that will be mentioned below. Back at the Point Marker there’s a succession of three hourglass doors, with rails around the structures in case if Sonic doesn’t make it in time. Above each door there’s a ceiling, which count as an alternative route. Past either way there’s a somersault and a jump plate, two loops and a jump plate. After a small hallway there’s a E1000 and a spring and past this a wall with an E-1000 on top. Beyond there’s a similar setting to the beginning of the stage, with a rail that bypasses a level below with some hourglass platforms also leading there. Past this there’s yet another hourglass door, which can be tricky to pass without using spin dash and at the end of a small hallway there’s a Mystic Melody, which will make a spring appear. Hitting it will access a level above, with an hourglass, which door is after some poles. There’s two springs at the beginning of the platform with the door, which will launch Sonic to before the poles, allowing him to go back to the path. Back at the Mystic Melody, there are two loops and a jump plate that will launch Sonic to the Goal platform.
Hard Mode
Other versions
Pyramid Cave shares it's Egyptian ruin theme with Knuckles' Death Chamber, also sharing the major level gimmick, and Rouge's Egg Quarters. It also shares the overall Egyptian theme with Tails' Hidden Base and Eggman's Sand Ocean.
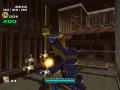
Enemies
| Type | Series |
|---|---|
| Beetle Series: Gold Beetle | |
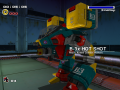
| E-1000 | |
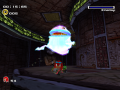
| Ghosts | Boo, Boom Boo (Hard Mode) |
Locations
Animals
| Animal | Number | Location |
|---|---|---|
| 4 | First Point Marker: By the first Eggman symbol, in the drop down room with the four hourglass platforms. First Point Marker: On the left, past the second hourglass door. Second Point Marker: On the first white left ledge, on the side hallway. Third Point Marker: On the northwest of the drop down room with the four hourglass doors and the spinning spikes. | |
| 3 | First Point Marker: On the southeast edge of the platform above the four hourglass platforms. Third Point Marker: Close to the bonfire, located at the first rooftop. Third Point Marker: Close to the switch to activate the rocket, past the rail that is accessed through the two acient ruins and the upreel next to the third Chao container. | |
| 4 | First Point Marker: On the ceiling past the first upreel, close to the bonfire. Second Point Marker: On the left wooden container on the platform after the two spinning spikes. Second Point Marker: On the southeast of the lowest level of the side hallway, on the hourglass section. Third Point Marker: Close to the bonfire, located at the third rooftop. | |
| 2 | Second Point Marker: On the southeast edge of the platform with the two spinning spikes. Second Point Marker: On the southeast of the lowest level of the side hallway, on the hourglass door and upreels section. | |
| 1 | First Point Marker: In a cage, located on the second ledge of the staircase section, to the downwards right. | |
| Random | 6 | First Point Marker: In a pipe inside a wooden container, located on the second ledge of the staircase section, to the downwards left. First Point Marker: In a pipe opposite the cage, located on the second ledge of the staircase section, to the downwards right. First Point Marker: In a pipe located on the third ledge of the staircase section, to the downwards left. First Point Marker: In a pipe located on the third ledge of the staircase section, to the downwards right. Second Point Marker: On the right pyramid Sonic can pick up, at the end of the rail. Third Point Marker: On the right pyramid Sonic can pick up, at the drop down room with the four hourglass doors and three spinning spikes. |
| Total | 20 |
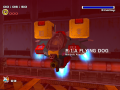
- The level specific animal (third Chao container) is a Skeleton Dog.
Big the Cat
Right after the second Point Marker, there's a long rail to grind. It starts going down, then up, then levels out for a while. Big can be seen through the grating to the left side right as it levels out.
Chao containers
- First Point Marker: By northwest stacked with a wooden container, in the platform with the four hourglass platforms.
- First Point Marker: On the first ledge of the staircase section, to the downwards right.
- Third Point Marker: Past the rail that is accessed through the two ancient ruins.
Gold Beetle
The Gold Beetle can be found close to the bottom of the Eggman symbol, on the room with a E-1000 and a three start spring, after the third Point Marker. In Sonic Adventure 2: Battle, it is moved over to the left.
Lost Chao
- Recommended upgrades: Mystic Melody
Close to the end of the stage and after the steep incline with the hourglass door at the end, there's a Mystic Melody. Activate it and hit the spring that appears nearby. Go down the tunnel, flip the hourglass and swing the poles to reach the far platform section.
Upgrade
Sonic's Bounce Bracelet upgrade can be found in this level. It's on the first ledge of the staircase section, after the first Point Marker.
Comparisons
| |
Main article: Sonic Adventure 2/Comparisons/Pyramid Cave |
References
| Sonic Adventure 2 / Sonic Adventure 2: Battle | |
|---|---|
|
Main page (SA2B|2012) Manuals (SA2B) Development (SA2B) |
show;hide
2 Player Mode: Mini-games: Dr. Eggman's Robots: GUN Robots: Ghosts: Hero: Dark: Both: Final: Dreamcast Prereleases: SA2B Prereleases: Books:
Music: Songs: "Live & Learn" | "It Doesn't Matter" | "Believe in Myself" | "Unknown from M.E." | "Throw It All Away" | "E.G.G.M.A.N." | "Fly in the Freedom" | "Escape from the City" | "Kick the Rock!" | "A Ghost's Pumpkin Soup" | "Dive into the Mellow" | "Deeper" | "Space Trip Steps" | "Rhythm and Balance" | "The Supernatural" | "For True Story" | "Supporting Me" |