Aquatic Mine
From Sonic Retro
| |
Sonic Adventure 2 |
| Levels |
| Aquatic Mine |

|
This article needs cleanup. This article needs to be edited to conform to a higher standard of article quality. Specifically, issues with this article are:
After the article has been cleaned up, you may remove this message. See How to Edit a Page for help. |
| Aquatic Mine |
|---|
| Eighth hero storyline stage, Sonic Adventure 2 |
| Level themes: underground/cave, underwater |
| Mission 1: Find 3 pieces of the Master Emerald!
|
| Mission 2: Collect 100 rings!
|
| Mission 3: Find the lost Chao!
|
| Mission 4: Collect the Emerald pieces in 3 minutes 30 seconds!
|
| Mission 5: Clear Hard Mode!
|
| ← Mission Street | Route 101 → |

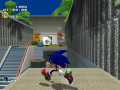
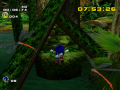
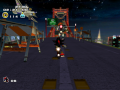
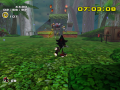
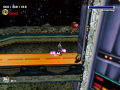
Aquatic Mine is the eighth stage in the Hero storyline of Sonic Adventure 2 and the third stage playable with Knuckles. It represents Knuckles attempt to find Master Emerald pieces that were scattered after he smashed it.
Plot
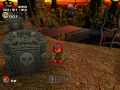
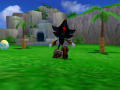
After finding every Master Emerald shards on the Pumpkin Hill area, Knuckles sets off deeper inside the canyon region, after feeling a weak signal from the Master Emerald from this place.
Level layout
Appearance
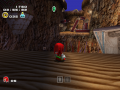
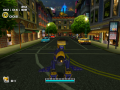
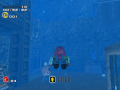
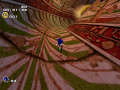
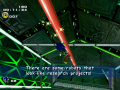
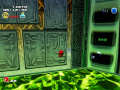
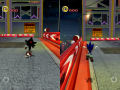
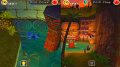
Aquatic Mine is an abandoned coal mine that has been flooded, accessible through the sewer system of the Capital City, with a system of tight hallways connecting different heights and mine shafts leading to dead-ends and pits. The level follows a theme similar to that established in Labyrinth Zone.
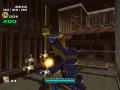
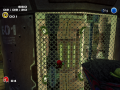
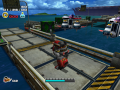
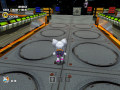
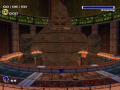
The major gimmick of this level is the Water-Powered Lift, a structure which vertical position will vary on the water level. Different areas are accessible depending on the water heights that can be changed by throwing one of the three switches, which makes this level more puzzle and labyrinth like then the rest. Switch No.1 and Switch No.2 are exactly behind Knuckles when he starts the level. The first switch is the one set by default and it will raise the water to the highest level. The second switch will set the water to medium level. Switch No.3 is located in the room above where Knuckles first starts and will set the water to the lowest level.
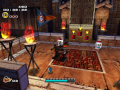
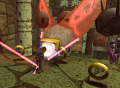
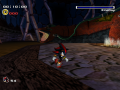
Other level specific objects are watermills, lumber crosspieces in stacks, skulls that breathe fire similar to the ones found in Sonic Adventure, overturned mine carts and metal cylindrical containers that can be destroyed and pails and skulls that can be picked. Ghosts will also patrol the corners and hallways, along with haunting one of the rooms.
Level sections
Vertical height
Aquatic Mine is divided into four sections by vertical height.
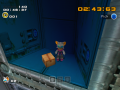
The first is a room above the Water-Powered Lift hall, where switch No.3. It’s also possible to access a room below through the Mystic Melody, called the “Ghost room”, which in composed of a ground level with ghosts and an attic-like section above made with wooden crosspieces. Through another gap in the ceiling, this time following the trail of rings, there’s a hallway with lumber stands and an upwards shaft at the end with an upreel, which leads to a small room.
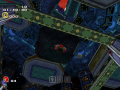
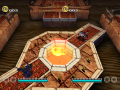
The Water-Powered Lift hall is divided into three sub-levels.
- The first and highest sub-level is where Knuckles starts and from where is possible to access the pit with switch No.1 and No.2, the room above with switch No.3 and a shaft that will lead to “Ghost room”.
- The second and medium sub-level accesses a bricked shaft that will lead to Knuckles’ Air Necklace upgrade and the medium height entrance for the network of tight passageways.
- The third and lowest one will accesses the lowest height entrance for the network of tight passageways.
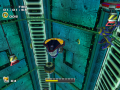
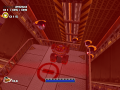
The network of tight passageways doesn't have a height division, since it twists and turns through several layers. It's composed of three hallways, two being the respective lowest and medium height entrance passageways mentioned above and the third a hallway located between both of them, which leads to a long downwards shaft filled with ball spikes and ghosts, called the "Bottomless Shaft."
Water level
Aquatic Mine is divided into three major sections by water level.
The first section is with switch No.1 pressed. The room above the Water-Powered Lift hall, and consequently switch No.3, becomes available since the Water-Powered Lift system will be at its highest. Here there's the Mystic Ruin pedestal, which activated will reveal another hallway, wich leads to the Ghost room and which in turn leads to another tight hallway by following a trail of rings up the ceiling. Down the hallway there's another opening in the ceiling that leads to a small room. The only way to go back is by the way Knuckles came in, since a buoyancy platform is barring the way up the shaft from the Ghost room. The passageway network in the Water-Powered Lift hall will connect the middle height hallway to the bottom height hallway and accessible both the “Bottomless Shaft” and a small pit with smashed mine carts.
The second section is with switch No.2 pressed. The passageway network in the Water-Powered Lift hall won’t connect the middle height hallway to the lowest height hallway because of a buoyancy platform barring the way, yet the full network will be available, except the “Bottomless Shaft”. The Ghost room will also be accessible, with a thin sheet of water on the ground.
The third section is with switch No.3 pressed. The passageway network in the Water-Powered Lift hall will connect the middle height hallway to the lowest height hallway, but neither the “Bottomless Shaft” or the small pit with smashed mine carts will be available, both barred by buoyancy platforms. The Air Neklace shaft and the Ghost room will be available however.
Hard Mode
Other versions
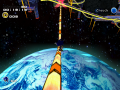
Aquatic Mine shares some of it's layouts objects with Pumpkin Hill and Shadow's Sky Rail
Enemies
| Type | Series |
|---|---|
| Beetle Series: Mono Beetle, Gold Beetle Rhino Series: Rhino Spike | |
| Ghosts | Boo, Boom Boo (Hard Mode) |
Locations
Animals
| Animal | Number | Location |
|---|---|---|
| 1 | Switch No.3 room: Over a lamp near the Omochao. | |
| 1 | Air Necklace shaft: Close to the ceiling, in the room where the Air Necklace was. | |
| 2 | Water-Powered Lift hall, medium level: From where Knuckles first starts, southwest, close to a spring. Network passageways: By two wooden containers next to each other, in the hallway between the lowest and medium hallways, which leads to the "Bottomless Shaft". | |
| 1 | Water-Powered Lift hall, lowest level: Near a switch No.3 sign. | |
| 1 | Water-Powered Lift hall, upper level: From where Knuckles first starts, west. | |
| Random | 4 | Switch No.3 room: In a pipe, at the left of a beam in the same wall as switch No.3. Switch No.3 room: In a pail that Knuckles can pick up, beyond the Mystic Melody room and before the mine cart. Water-Powered Lift hall, medium level: In a pipe, through the medium height hallway and between the mine carts. Water-Powered Lift hall, lower level: In a pipe, through the lowest height hallway and before the Rhino Spike. |
| Total | 10 |
- The level specific animal (third Chao container) is a Dragon.
Big the Cat
From the start (or with switch No.1 our No.2 pressed), go to the back left corner and dive down to the lowest level of the main room. Big will appear among the submerged rubble on the other side of the shaft's fence, on his hands and knees and looking at the outside.
Chao containers
- Switch No.3 room: In the left corner of the Mystic Ruin entrance wall, behind the stack of lumber.
- Water-Powered Lift hall, lowest level: In the lowest height hallway, after the corner.
- Water-Powered Lift hall: On a steel beam to the northeast of the Ghost room.
Gold Beetle
The Gold Beetle can be found at the northwest ledge corner of the upper level of Water-Powered Lift hall.
Lost Chao
- Recommended upgrades: Mystic Melody, Air Necklace
Go to the switch No.3 room and activate the Mystic Melody. Go through it and dive to the Ghost room, follow the trail of rings up the ceiling, go down the hallway and then up the opening in the ceiling by the upreel.
Master Emerald shards
Hard Mode
| Emerald shard | Hints |
|---|---|
| #1 | Skull dead end. Behind the mysterious door. Open the door with that melody. |
| #2 | The deep end of the ghost tunnel. Switch No.1. The bottom of the hole to the abyss. |
| #3 | Almost reaching the ceiling. "Water-Powered Lift" hall. Put them on the pulley. |
- The first shard is at the end of the ceiling hallway of the Ghost Room. Go to the switch No.3 room and activate the Mystic Melody pedestal. Go through it and dive to the Ghost room, follow the trail of rings and then go down the hallway.
- The second shard in at the end of the Bottomless Shaft. Dive to the medium height hallway, go forwards down the hallway between the one Knuckles came from and the lower height hallway and then go down the shaft.
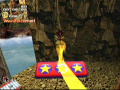
- The third shard is in the ceiling of Water-Powered Lift hall, surrounded by fences. In the higher level there's a watermill in the wall to the northeast. Use the sunglasses in the south arm, and hit the spring that becomes visible.
Upgrade
Knuckles' Air Necklace upgrade can be found in this level. It’s down a shaft accessible in medium vertical height and with switch No.3 thrown.
Trivia
| |
Trivia sections are bad Try and incorporate this information into the main article. See the manual of style to find out why. |
|---|
- Aquatic Mine is the only treasure hunting stage that doesn't surround the level with a forced U-turn barrier, and the only level in all of SA2 that doesn't have a "kill plane" polygon no matter how far the player travels in any direction, perhaps owing to its design as a small, completely enclosed stage.
- Also interestingly, it's the only level that doesn't limit the camera's draw distance.
References
| Sonic Adventure 2 / Sonic Adventure 2: Battle | |
|---|---|
|
Main page (SA2B|2012) Manuals (SA2B) Development (SA2B) |
show;hide
2 Player Mode: Mini-games: Dr. Eggman's Robots: GUN Robots: Ghosts: Hero: Dark: Both: Final: Dreamcast Prereleases: SA2B Prereleases: Books:
Music: Songs: "Live & Learn" | "It Doesn't Matter" | "Believe in Myself" | "Unknown from M.E." | "Throw It All Away" | "E.G.G.M.A.N." | "Fly in the Freedom" | "Escape from the City" | "Kick the Rock!" | "A Ghost's Pumpkin Soup" | "Dive into the Mellow" | "Deeper" | "Space Trip Steps" | "Rhythm and Balance" | "The Supernatural" | "For True Story" | "Supporting Me" |