Eternal Engine
From Sonic Retro
| |
Sonic Adventure 2 |
| Levels |
| Eternal Engine |

|
This article needs cleanup. This article needs to be edited to conform to a higher standard of article quality. Specifically, issues with this article are:
After the article has been cleaned up, you may remove this message. See How to Edit a Page for help. |
| Eternal Engine |
|---|
| Thirteenth hero stage, Sonic Adventure 2 |
| Location: Space Colony ARK |
| Level themes: outer space, space station |
| Mission 1: Destroy the colony's power generator!
|
| Mission 2: Collect 100 rings!
|
| Mission 3: Find the lost Chao!
|
| Mission 4: Reach the goal within 5 minutes!
|
| Mission 5: Clear Hard Mode!
|
| ← Death Chamber | Meteor Herd → |

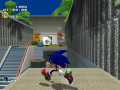
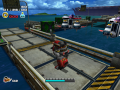
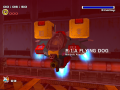
Eternal Engine is the thirteenth stage in the Hero storyline of Sonic Adventure 2 and the fifth and last stage playable with Tails. It's the heroes' first venture inside ARK, a setting they won't leave for the remainder of the story, and Tails’ mission is to navigate through it and find the colony’s power generator and destroy it. Even though he’s successful, the remaining ARK stages don't appear to show any signs of it, with fully functioning lights and machinery.
Contents
Plot
Level Layout
Appearance
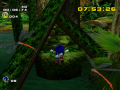
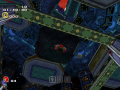
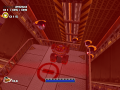
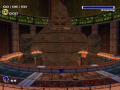
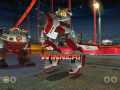
Eternal Engine is space themed.
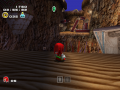
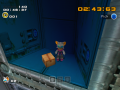
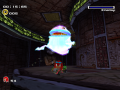
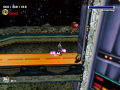
The primary gimmick in this level is that of dynamite hatches. Whereas in other stages, dynamite is used to perform useful demolitions, shooting dynamite in this stage results in the creation of a vacuum field that attempts to suck Tails out into space from close range and succumbing to the field results in loss of life. The dynamite packs are also attached to platforms, which destroyed make the navigation much more difficult.
Walkthrough
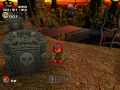
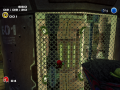
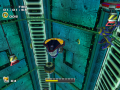
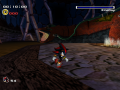
Tails first starts by being dropped down a long shaft to a small locked room. Destroying the enemies will open the door and reveal hallways and small rooms that lead to a vertical shaft that can be ascended by using upreels. At the top there’s a larger hallway that oversees space and after this, there’s the first Point Marker.
Past this there’s another identical hallway with dynamites packs attached to doors, and beyond there are two doors. The one on the right is locked, and the switch to open it is located behind some wooden containers located after the one on front. Past the locked door there’s a outside Ark section. To the beginning and left, there’s a small platform that has a Mystic Melody. Activating will make some platforms appear, that lead to a vertical elevator. It leads up to a level above of the Ark, with a hallway and a second outside section that leads to a small room protected by lasers. Back at the first outside section in the main path, there’s another hallway that oversees the outside and the second outside section mirroring the path above. Dropping down will reveal a rocket that will destroy the wall of cages leading to another hallway similar to the one before and a room with a trap. The switch to deactivate is under the gas tank beyond it, some springs will take Tails to the top of the trap where a set of uprails are. At the top there’s the second Point Marker.
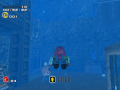
Beyond there’s another hallway surveying the outside with some Artificial Chaos and then past this there’s a room with a radioactive pit. Some of the platforms here will sink below some lasers, but it’s possible to stand between them. At the end there’s the third Point Marker.
Past this there are two doors, the one on front will not open even if the enemies are destroyed but the one on the right will, revealing an outside section like a maze of some sorts. At the end of the lower level there’s the switch that opens the door that was locked before, but it contains nothing of importance. Climbing up the platform maze will eventually lead to another hallway and the fourth Point Marker.
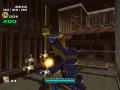
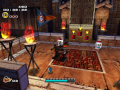
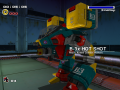
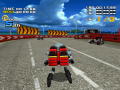
Past this there’s another outside section. There's a bridge that leads to the north, with a switch that opens the door below, where the Bazooka upgrade is. If the dynamite packs are blown up and the bridge disappears, there's another way to access the room, which is by dropping to the arena below and activate the switch there and then riding up through springs and elevators. It's also worth mentioning that there's a room in the middle of the south wall with some item boxes. Beyond the wall of steel containers below and to the north there’s a hallway and the fifth Point Marker.
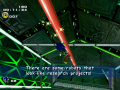
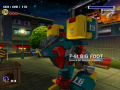
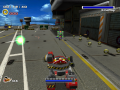
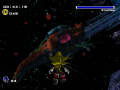
From this point forward, there’s yet another outside section, this time with an upwards draft of some sort, and where Tails needs to navigate through the void filled with enemies to the door in the distance. Past this there’s a vertical shaft leading downwards, filled with enemies and lasers crossing. At the bottom there’s a small platform which will secure the Cyclone into place and Tails must hit the vital points to render it's defenses useless. After doing so, the hatch will open, and the goal will be visible above some stairs.
Enemies
Locations
Animals
| Animal | Number | Location |
|---|---|---|
| 3 (2) | Beginning: Under the gas tank to the left where Tails first starts. Switches to a Warthog inside a cage on the upreel room in Hard Mode. First Point Marker: Circling over the suspended trap on the right. Switches to the right spring path in Hard Mode. Third Point Marker: on the left railing at the top of the outside section platform maze. | |
| 2 | First Point Marker: Over the right rail on the first outside section. Fifth Point Marker: To the left of the outside section, close in line with the Hornets. | |
| 1 | Fourth Point Marker: Circling one of the radioactive tubes past the hallway with the steel container wall and before the medical item box. | |
| 1 (2) | Fourth Point Marker: Wandering on the southwest part of the bottom platform at the outside section. | |
| Random | 8 | Beginning: In a pipe under the gas tank at the bottom of the uprail room. Beginning: In a pipe close to the ceiling and over the left containers at the end of the hallway before the Point Marker. First Point Marker: Inside one of the wooden containers at the first switch room. Second Point Marker: Inside one of the wooden boxes in the radioactive pit room. Third Point Marker: In a pipe located at the platform next to the last upreel on the outside platform maze section. Fourth Point Marker: In a pipe located at the southeast wall right past the wall of steel containers. Fourth Point Marker: Inside a wooden containers at the northeast of the hallway past the wall of steel containers. Fifth Point Marker: In a pipe to the left of the Goal. |
| Total | 15 |
- The level specific animal (third Chao container) is a Dragon.
Big the Cat
After using the Bazooka to clear out the wall of metal boxes, you'll run down a hallway. Big is on the outside of the ARK, in the third left window, looking to the inside and waving.
Chao containers
- First Point Marker: Amongst the wooden containers in the room with the switch.
- Second Point Marker: Amongst the steel containers to the right in the radioactive pit room.
- Third Point Marker: Beyond the locked door, whose switch is in the outside platform maze area.
Gold Beetle
The Gold Beetle can be found after the fifth Point Marker, at the beginning of the updraft section.
Comparisons
| |
Main article: Sonic Adventure 2/Comparisons/Eternal Engine |
References
| Sonic Adventure 2 / Sonic Adventure 2: Battle | |
|---|---|
|
Main page (SA2B|2012) Manuals (SA2B) Development (SA2B) |
show;hide
2 Player Mode: Mini-games: Dr. Eggman's Robots: GUN Robots: Ghosts: Hero: Dark: Both: Final: Dreamcast Prereleases: SA2B Prereleases: Books:
Music: Songs: "Live & Learn" | "It Doesn't Matter" | "Believe in Myself" | "Unknown from M.E." | "Throw It All Away" | "E.G.G.M.A.N." | "Fly in the Freedom" | "Escape from the City" | "Kick the Rock!" | "A Ghost's Pumpkin Soup" | "Dive into the Mellow" | "Deeper" | "Space Trip Steps" | "Rhythm and Balance" | "The Supernatural" | "For True Story" | "Supporting Me" |