
Sonic Adventure 2 objects
From Sonic Retro
Contents
Rings


Like in the majority of Sonic games, rings appear scattered across every level and boss arenas, with the exact same survival function as previous titles. In contrast to previous games, there's no score tally at the end of the level for Ring Bonus; rather, each ring collected scores 10 points immediately (with the exception of rings recovered after a hit and rings rug up from the ground, which award no points). They appear clumped together inside item boxes and collecting sets of hundreds will award an extra life, as usual. For shooting levels (Tails and Eggman), survival is a consequence of a health bar, and each ring collected will recover some lost health. One ring recovers 1/70 the span of the health bar, or 1/80 for Eggman after collecting the Protection Armor.
Every level has a prespecified ring total for missions 1 and 4, and another for mission 5 (the total is meant to correspond to the number of rings in the level, and usually does, but can be off in either direction in some levels). Collecting enough rings in the level to match or exceed this total will award an A-Rank to that mission, regardless of the score. When rings are awarded at checkpoints, dug up from the ground, or thrown by enemies who would otherwise throw bombs, the required total goes up by the same amount, in order to prevent scalping several hundred rings from the ground in a hunting stage for an easy A.
- The shiny rings from Sonic Adventure are present as well, always appearing as a result from a switch or a Mystic Melody ruin, but they do not disappear with time.´
- Hitting a Point Marker within a specific range of rings collected will award rings.
Since Big the Cat is not present in levels in the Gamecube version, sometimes a ring will be in its corresponding place. Even though it’s not obtainable in some cases, the ring is factored into the required A-rank total in every case where it appears.
Point Marker


Like in the majority of Sonic games, Point Markers appear scattered across every level, with the exact same function but this time with added bonus per number of rings collected. Hunting levels do not have checkpoints but finding one of the items the character is looking for will serve as a save state, but will not award any bonus.
- 20-39 rings collected - 5 rings bonus
- 40-59 rings collected - 10 ring bonus
- 60-79 rings collected - 20 ring bonus
- 80-89 rings collected - Speed Shoes
- 90 or more rings collected - Green Barrier, or Magnetic Barrier if you already have a Barrier
Containers
These are cubic boxes, of various materials and functions, that appear scattered across every level and some boss arenas. Some might be in blocking paths, others hiding item boxes or animals. Destroying any container awards 20 points, except in Crazy Gadget where they score nothing because the containers in that level are an entirely different object (because of their reaction to gravity switches) and they were never given a point value as such.
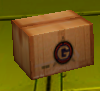
- Wooden container – Made of brown wood, they’re the most basic and common container. It can be smashed easily with no upgrades.
- Steel container – Made of grey steel. It can be smashed after a specific power-up per character.
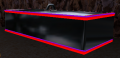
- Indestructible container – Made of some kind of black material. It cannot be destroyed.
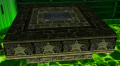
- Cage – Cubic shaped and made of bars. It can be destroyed by missiles or placed Kiki bombs.
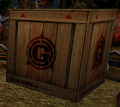
Wooden Container
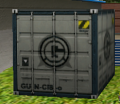
Steel Container
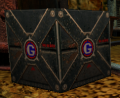
Indestructible Container
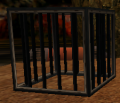
Cage


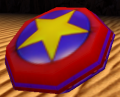
Chao containers

The Chao Containers are a light blue colour and there are always three of these containers per stage, except Green Hill which only has one. Destroying one awards 20 points, even in Crazy Gadget, and will release a Chao Key. If the player already has a Chao Key, the next Chao container will release one copy of every non-rare small animal available in the stage instead, and the container after that will release one copy of the stage's designated rare small animal (Unicorn, Dragon, Phoenix, Half-Fish, Skeleton Dog, or Bat). If the player finishes a stage in possession of a Chao Key, then they will go to Chao World before returning to the story or the level select screen, and unlock the ability to enter Chao World from the level select menu with the character they used, if they haven't already done so. If the player exits the level through the pause menu, the Chao Key will be lost.
Characters
Omochao

Omochao will act as a guide throughout the game and can be found at various locations inside each stage. Touching it will make them follow the character around, giving an advice of some sort. As a character fails a boss fight, one will usually appear with some advice as well. Any speed or hunting type characters can hold them, but Omochaos don't like it and will whine about it immediately. A character can throw Omochaos at enemies to destroy them, just like any item. The Omochao will whine about it but it will not be destroyed (though it can be out of it for a couple of seconds).
Big the Cat

Big the Cat has cameos in every single level on the Dreamcast version, doing an activity of some sort (fishing and jumping are the most common). He appears once per level (except White Jungle where he appears twice; Weapon's Bed in Hard Mode where he has a second appearance; Route 101, Route 280, and Green Hill, with no appearances; and Cannon's Core, appearing once for every character). He's usually at an unreachable place, but there are some who can be reachable. Sometimes, he switches positions slightly or changes locations completely in Hard Mode.
Big also appears in one boss, the first one against Shadow. He's down below in a cage part of the ground.
These cameos were removed from the Gamecube version and sometimes, a ring will be in his place instead, which might be obtainable or not. Even so, Big can be seen in some cutscenes by pressing ![]()
![]() endlessly.
endlessly.
Big the Cat cameo in the Gamecube version
Lost Chao
The third mission for every level is to find a Chao hidding somewhere on the level. Most of the time, the Mystic Melody upgrade is needed. The Chao wil either be confused and crying while not found (as in, the character not touching it), or jump in happiness with a heart on top of it's head when found.

Lost Chao

Found Chao


Small animals

There's a total of 21 types of small animals that can be found inside Badniks, inside the second and third Chao containers, and in several locations in each stage. Their function is for Chao raising, just like in Sonic Adventure.
There's always five different types in each stage, with four being common animals (Running, Flying, Power and Swimming) found everywhere and in the second Chao container, and the fifth being a rare or special animal (Ghost and Legendary, with the exception of the Bat which is treated as common), found in hidden or difficult to reach locations and in the third Chao container.
Collecting small animals awards no points, but collecting any small animal other than one released from a Badnik or Chao container will add to a running tally for the stage, and if this puts the stage's tally up to a designated maximum value (20 when playing as Sonic or Shadow, 15 as Tails or Eggman, and 10 as Knuckles or Rouge), it's awarded an extra life.
Items
Chaos Drives

GUN robots will drop a Chaos Drive when destroyed. Their function is for Chao raising. Additionally, collecting a Chaos drive awards 10 points, and in the case of Tails and Eggman, recovers the same amount of health as a ring does.
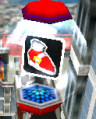
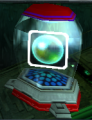
Item boxes
Like in the majority of Sonic games, item boxes appear scattered across every level and boss arenas, for holding items. The same spherical and transparent containers from Sonic Adventure are used, albeit they’re slightly redesigned. The number of items and their bonus is the same, though there’s no random ring box and there’s a new first-aid kit one. Dying will respawn every item, except the extra-life, which will appear as a blank container. By contrast, restarting from the pause menu will respawn everything including extra lives. Note that the point values aren't awarded for items dug up from the ground. It should be noted that there are item boxes that are hidden from normal view, for Knuckles and Rouge, and only accessible by using the Sunglasses or Treasure Scope respectively.
- High-Speed shoes - Increases speed for 15 seconds. (200 points)
- Invincibility - 15 seconds of invincibility. (200 points)
- Ring box - 5, 10 or 20 rings. (10 points times the number of rings)
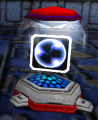
- Shield - a green spherical barrier that will protects the character from damage one time only. (200 points)
- Magnetic shield - a blue spherical barrier that will protects the character from damage one time only and attract nearby rings. (200 points)
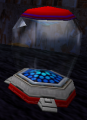
- Extra-life - Adds an extra life to the total number of lives. The item is the drawing of the character's head. (200 points)
- Blank container - Takes the place of any collected extra life after dying. Has no effect, but can still be the target of a homing attack or lock-on. (0 points)
- Health - Fully restores the health bar of the walkers (Tails and Dr. Eggman stages only). (200 points)
- Bomb - Destroys all onscreen enemies. (200 points)
Giant red balloons also work as item boxes, though the prize is not visible. Knuckles and Rouge can also dig into the ground and occasionally pull out any item box rewards, except Invincibility and Health (ring boxes are also removed during mission 2).
Speed Shoes
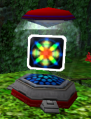
Invincibility
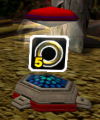
5 rings

10 rings
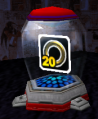
20 rings
Shield
Magnetic Shield

Extra-life
Blank

Health
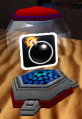
Bomb


Hunting Stage objects
These are always a set of three objects that either Knuckles or Rouge need to find to complete their levels. Collecting any of these objects awards 500 points, and possibly bonus points on top of that depending on how quickly it was collected after the previous item, and how many hint monitors were used.
- Chaos Emeralds - These are only present in one stage, Security Hall. The first is the red, the second the purple and the third is light blue.
- Gate Keys - These are present in two stages, Death Chamber and Egg Quarters. They both open the doors to the core of Eggman's base. This is the only object besides the Master Emerald shards that Knuckles must find.
- Master Emerald shards - By far, the most common objects for the Hunting Stages. These are pieces of the Master Emerald that Knuckles shattered at the beginning of the game.

Red Chaos Emerald

Purple Chaos Emerald

Cyan Chaos Emerald
Gate Key

Master Emerald shard


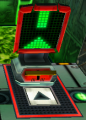
There're also radar monitors, which are television-like objects that will give hints as to where the hunting objects are (only three per location). In Mad Space, the hints are reversed (either by reversing the order of letters or reversing the meaning). There are monitors that are hidden from normal view, for Knuckles and Rouge, and only accessible by using the Sunglasses or Treasure Scope respectively.

Level progression
- Dash pannel - Hitting it will give an instant speed boost.
- Jump plate - large dash panels with an angle, which will launch the character over large gaps.
- Springs - standard ones with variable range and elongated ones that have a short range.
- Upreel / Downreel - Holding onto them will permit vertical movement.

Dash pannel
Jump plate
Standard spring

Elongated spring
Upreel / Downreel handle


- Dynamite - Packs that will explode if locked on (Tails and Dr. Eggman only). This might help progression (Hidden Base) or impede it (Eternal Engine).
- Missile - Standing on the green button will fire a missile. Sometimes, the missile needs to be armed by hitting a switch nearby.
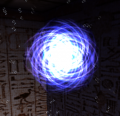
- Rocket - Inherited from Sonic Adventure, riding it will access different parts of the level that would be unreachable otherwise (shortcuts as well).
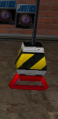
- Weight - Large, flat weights that fall when a character nears it which may serve as a trap or a way to reach higher platforms. Some have a switch that will disarm it nearby. The edges of these traps will flash red while they’re armed, but will stay completely black when disarmed.

Dynamite

Missile
Rocket
Weight trap


Switches
- Ball switch- Found in many levels, will make trails of rings or missiles appear most of the time, but it has other uses, like switching the trains in Pumpkin Hill and the water levels in Aquatic Mine.
- Gravity switch - Pulling the lever will change the gravity in Crazy Gadget.
- Time switch - Hitting it will temporarily stop time in Cannon's Core.
- Hourglass - Flipping the hourglass will open locked doors in Pyramid Cave and Death Chamber for a short time.
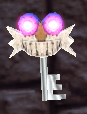
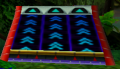
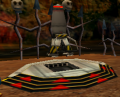
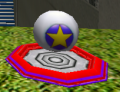
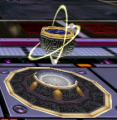
- Mystic Melody ruin - Somewhat inherited from Sonic Adventure, since they are themed as the Knuckles' tribe. There's always at least one per stage and they can be activated with the Mystic Melody upgrade, which will make platforms, warp holes, rings and even springs appear. They're mostly used for Mission 3 (find the Lost Chao).
Ball Switch
Gravity Switch
Time Switch
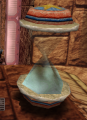
Hourglass
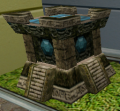
Mystic Melody ruin
Mystic Melody warp
Mystic Melody platform


Other

- Emblems - These are inherited from Sonic Adventure. There are 180 emblems to collect, which will unlock Green Hill. They can also be used to access rare eggs in the Chao Black Market.
- Hero: 80 (1 per mission), 3 (1 per A-Rank character), 1 (ending)
- Hero: 70 (1 per mission), 3 (1 per A-Rank character), 1 (ending)
- Last: 5 (1 per Cannon's Core mission), 1 (ending)
- Mini Games: 10 (Chao Race), 3 (Kart Race), 3 (Boss)
- Pipe - These are scattered across the stages, always containing one small animal that counts toward of the counter. It will be released if the character whistles. Some stages contain other scenery that serves the same function as a pipe but looks different.
- Stage projectile - Level-specific items scattered across the stages that the characters can pick up. They can be thrown at enemies to destroy them, and some may release small animals when picked up for the first time.
- Goal - Signals the end of the level for running and shooting levels. Hunting levels will be over as the third piece of whatever they're looking for is collected and there is no Goal.
- Back Ring - Replaces the Goal Ring in missions 2 and 3 of Sonic, Shadow, Tails, and Eggman stages, as those stages can't be completed simply by reaching the end. The Back Ring will send the character back to the start of the level with all rings, enemies, and other objects respawned, and with their score, time, and ring counters intact. As Knuckles and Rouge have no Goal Ring, a Back Ring will appear at the level's starting point in mission 2 (except in Mad Space) if the character ever takes damage, so as to prevent a scenario where the mission can't be completed because Knuckles or Rouge doesn't have rings and there aren't 100 remaining to collect in the stage. An additional Back Ring, this one functioning even in Mad Space, can be created at the location of the stage's lost Chao if the character takes damage while that location is within draw distance. There is no Back Ring in mission 3 of Knuckles or Rouge stages.

Pipe
Stage projectile (Security Hall)

Goal ring

Back ring


