Difference between revisions of "Egg Carrier (Sonic Adventure)"
From Sonic Retro
BSonirachi (talk | contribs) m |
BSonirachi (talk | contribs) m |
||
| Line 25: | Line 25: | ||
===Area A - Deck=== | ===Area A - Deck=== | ||
| − | + | {{comparison | |
| − | + | | image1=Eggcarrier_(folded)_map.png | |
| − | + | | image2=Eggcarrier_(extended)_map.png | |
| − | + | | game1=Wings folded | |
| − | + | | game2=Wings extended (Attack Mode) | |
| + | }} | ||
{| | {| | ||
|[[Image:Eggcarrier_map_a.png|150px]] | |[[Image:Eggcarrier_map_a.png|150px]] | ||
Revision as of 08:27, 28 April 2018
| |
Sonic Adventure |
| Levels |
| Egg Carrier |
| show;hide
|
| Egg Carrier |
|---|
| Adventure Field stage, Sonic Adventure |
| Level theme: flying fortress |
| ← Mystic Ruins |


- This article deals with the Egg Carrier as a stage in Sonic Adventure. For more on other versions of the ship, and its expanded storyline role across the series, see Egg Carrier.
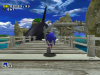
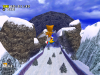
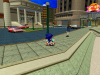
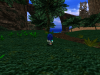
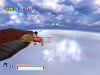
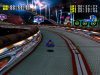
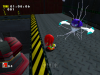
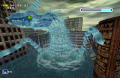
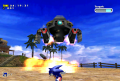
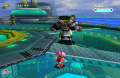
The Egg Carrier serves as one of three Adventure Fields in Sonic Adventure, along with Mystic Ruins and Station Square. Individual Action Stage levels are in turn accessed from these overworld areas; namely Hot Shelter and Sky Deck for the Egg Carrier. Sky Chase Act 1 and later Act 2 are also levels involving the Egg Carrier, where the player controls the Tornado biplane on approach to the skyship.
Two separate versions of this near invincible vessel were constructed. The first ends up floating 20 miles off the coast of the Mystic Ruins near Tails' workshop and can be accessed through a watermill raft in the Mystic Ruins and a small vessel in Station Square. The second Egg Carrier was destroyed by Perfect Chaos who fired an aquatic ionization beam which disrupted engine function and thus caused it to crash. But since the Egg Carrier's formidable cannon was activated and fully charged, it caused the second Egg Carrier to explode. The second Egg Carrier was said by Dr. Eggman to have been created just in case Chaos rebelled.
Contents
Areas
In Sonic Adventure, the Egg Carrier is capable of transforming into two modes: one suited for attack, with its wings spread out, and another with its wings folded. The first form's extended wings made it impossible to get to the bridge without going through the Sky Deck first. The switch is made automatically from the second to the first once Sonic sets afoot on the Egg Carrier with Tails to retrieve Amy. He later switches it back to its original shape after completing Sky Deck, so he can pursue Eggman further, after defeating E-102 Gamma. It's worth noting that according to each transformation, water capacities, the heights, the springs and several Eggman-shaped cannons that shoot Sonic (they won't open for other characters) will change.
Area A - Deck
| Wings folded |
|---|
_map.png)
| Wings extended (Attack Mode) |
|---|
_map.png)

|
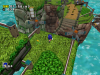
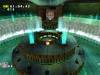
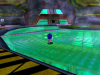
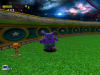
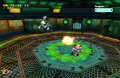
The deck of the Egg Carrier with its wings folded allows movement without interruption. This is where the Central Dome is located, where everyone but Sonic and Tails fight their final boss. On the deck aisles, there are two ramps that lead back to the other two Adventure Fields: Station Square (2) and Mystic Ruins (3). Also in one of the aisles, there's a Monorail Station (4) that leads to the bridge (G). To the back of the deck, there is a mast with two platforms that serve as some kind of crow's nest, the entrances to the Radar Room (5), the Captain's Room (D), the Pool room (E) and a pod that leads to the Bridge (G). The bottom landing cannons and the ones around the Central Dome shoot Sonic to the middle of it, while the ones to the back shoot him to the middle mast platform. The black boxes near some of the cannons on the Central Dome can be destroyed by Knuckles' punch. As a curiosity, the blown-up glass Central Dome is completely reconstructed and running once the fallen Egg Carrier is visited for the first time. |
Area B - Forward Deck

|
The deck of the Egg Carrier with its wings spread is divided into two areas: the forward deck and rear deck. The only way to access the rear deck from the front deck is by means of the Sky Deck, which leads to the Bridge (G) or by using the Monorail, that also leads to the bridge (not running when Sonic and Tails first arrive at the Egg Carrier). The forward deck is composed of the Central Dome (1), boat landings leading to Station Square (2) and Mystic Ruins (3), the Monorail Station (4) mentioned above, and the Sky Deck entrance (5) for Sonic and Tails. The bottom and back landing cannons here shoot Sonic to the Sky Deck entrance and those to the front send him to the aisle landing strips, while the ones around the Central Dome send him to the opposite side of the large rotating platform at the top of the ship's mast (destroying black boxes if they're there). |
Area C - Rear Deck

|
The deck of the Egg Carrier with its wings spread is divided into two areas: the forward deck and rear deck. The only way to access the forward deck from the rear deck is by means of the Bridge and then using the Monorail. The rear deck is composed off the Radar Room (1), the Pool room entrance (E), the entrance to Eggman's Personal Quarters (F) and the Free Floating Platform (2) that leads to the Bridge (G). The two Eggman cannons launch Sonic to the top of the quarter's roof. For some bizarre reason, there are several 10-ring boxes; two to the utmost back of the vessel and one below the highest platform. Only Tails can reach the top of the higher platform. |
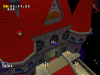
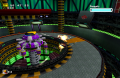
Area D - Captain's Room

|
This small room is where the transformation switch is, between the rails of the Captain's seat. Standing on the seat makes it go back in forth on these rails. When Sonic arrives from Eggman's quaters (F), the seat is always over the switch, which is pushed to the front when the wings are spread. |
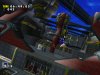
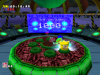
Area E - Pool

|
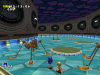
The swimming pool is one of Eggman's extravagances. It's accessed through the deck (A), in either transformation of the Egg Carrier (rear deck for wings spread). The pool is full of water before Eggman spreads the Egg Carrier's wings out when Sonic first arrives. Once it's in attack mode, the water will be drained and the door accessing a very small room (1) that leads to Sky Deck for Knuckles will be open. When he finishes said level, he'll return here. There are six 10-ring boxes and an Emblem on higher platforms and in the Sky Deck's entrance room. |
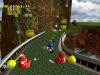
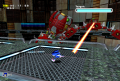
Area F - Eggman's Personal Quarters

|
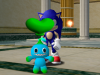
These quirky living arrangements have two entrances from the rear deck of the Egg Carrier (C), which is impossible to reach when the wings are spread out. Going through the bottom landing door at the right of the structure leads to an hexagonal room with two locked doors and a ring switch button (they do not spawn like in Station Square's equivalents). Using the Light Dash will lead to the Captain's Room through the ceiling, albeit there's no visible hole or moving latches there. Going through the door in the balcony on the first story of the structure leads to Eggman's Study. There is a switch here that drops Eggman's wall bed down, revealing an Emblem. A door leads to the hexagonal room described above, and this time both doors are left unlocked. The second door leads to Eggman's Playroom which contains a lot of funny gadgets, but only the Eggpods are somewhat interactable. |
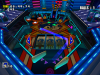
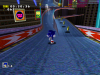
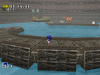
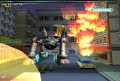
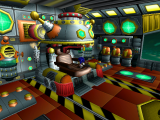
Area G - Bridge

|
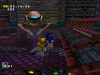
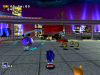
The bridge is accessed through the deck by a pod (C) or through Sky Deck for Sonic and Tails. Locations of interest include the a setting of buttons that open the entrances to the Torture Chamber (2), where the Hedgehog Hammer mini-game is and a door that leads to the Prison Room (1), and the Hot Shelter entrance (9), along with the Chao Garden Portal (4) that is accessed by spelling Eggman's name on the buttons (5), the Free Floating Platform (6) that leads to the deck, the Monorail Station (7), the Weapon's Storage (8) where Gamma's Jet Booster is, and the the Water Reserve (3) where Gamma's Laser Blaster upgrade is. The latter is full of water, and is therefore not available while the wings are spread, and only accessible after the Egg Carrier crashes and folds its wings by default; since they alternate (not the case after it crashes), it may have some connection with the Pool's draining. As an additional curiosity, the robot maids that clean the Bridge are still doing their jobs after the Egg Carrier crashes. |
Gallery
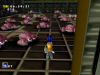
Area D
Captain's Room.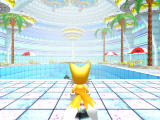
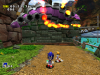
Area E
Pool Room.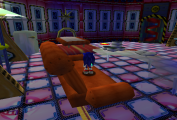
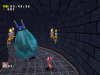
Area F
Eggman's Personal Quarters (Study).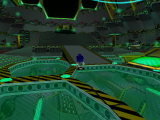
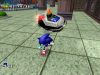
Area G
Bridge.


| Sonic Adventure / Sonic Adventure DX: Director's Cut | |
|---|---|
|
Main page (SADX|2010) Manuals (SADX) Development (SADX) |
show;hide
Adventure Fields: Sub-games: Dreamcast Prereleases: DX Prereleases: 2010 Prereleases: Books:
Comics: Music: Songs: "Open Your Heart" | "It Doesn't Matter" | "Believe in Myself" | "Unknown from M.E." | "My Sweet Passion" | "Lazy Days ~Livin' in Paradise~" |