
Difference between revisions of "Gaia Gate"
From Sonic Retro
m (→Gameplay) |
m (→Item Doors) |
||
| Line 40: | Line 40: | ||
===[[Apotos]] - First Continent=== | ===[[Apotos]] - First Continent=== | ||
Room 1 - Door to the left<br> | Room 1 - Door to the left<br> | ||
| − | (requires 33 | + | (requires 33 Sun Medals and 23 Moon Medals) |
{| class="prettytable" style="width:auto;" | {| class="prettytable" style="width:auto;" | ||
|[[File:OneUpBoxUnleashed.png|40px]] | |[[File:OneUpBoxUnleashed.png|40px]] | ||
| Line 50: | Line 50: | ||
Room 2 - First door to the right<br> | Room 2 - First door to the right<br> | ||
| − | (requires 43 | + | (requires 43 Sun Medals and 45 Moon Medals) |
{| class="prettytable" style="width:auto;" | {| class="prettytable" style="width:auto;" | ||
|[[File:OneUpBoxUnleashed.png|40px]] | |[[File:OneUpBoxUnleashed.png|40px]] | ||
| Line 63: | Line 63: | ||
Room 3 - Second door to the right<br> | Room 3 - Second door to the right<br> | ||
| − | (requires 14 | + | (requires 14 Sun Medals and 14 Moon Medals) |
{| class="prettytable" style="width:auto;" | {| class="prettytable" style="width:auto;" | ||
|[[File:ItemBoxUnleashed.png|40px]] | |[[File:ItemBoxUnleashed.png|40px]] | ||
| Line 77: | Line 77: | ||
===[[Mazuri]] - First Continent=== | ===[[Mazuri]] - First Continent=== | ||
Room 1 - Door to the left<br> | Room 1 - Door to the left<br> | ||
| − | (requires 14 | + | (requires 14 Sun Medals and 15 Moon Medals) |
{| class="prettytable" style="width:auto;" | {| class="prettytable" style="width:auto;" | ||
|[[File:ItemBoxUnleashed.png|40px]] | |[[File:ItemBoxUnleashed.png|40px]] | ||
| Line 87: | Line 87: | ||
Room 2 - First door to the right<br> | Room 2 - First door to the right<br> | ||
| − | (requires 55 | + | (requires 55 Sun Medals and 46 Moon Medals) |
{| class="prettytable" style="width:auto;" | {| class="prettytable" style="width:auto;" | ||
|[[File:SecretMissionBoxUnleashed.png|40px]] | |[[File:SecretMissionBoxUnleashed.png|40px]] | ||
| Line 100: | Line 100: | ||
Room 3 - Second door to the right<br> | Room 3 - Second door to the right<br> | ||
| − | (requires 87 | + | (requires 87 Sun Medals and 69 Moon Medals) |
{| class="prettytable" style="width:auto;" | {| class="prettytable" style="width:auto;" | ||
|[[File:ItemBoxUnleashed.png|40px]] | |[[File:ItemBoxUnleashed.png|40px]] | ||
| Line 114: | Line 114: | ||
===[[Spagonia]] - Second Continent=== | ===[[Spagonia]] - Second Continent=== | ||
Room 1 - First door to the left<br> | Room 1 - First door to the left<br> | ||
| − | (requires 93 | + | (requires 93 Sun Medals and 69 Moon Medals) |
{| class="prettytable" style="width:auto;" | {| class="prettytable" style="width:auto;" | ||
|[[File:ItemBoxUnleashed.png|40px]] | |[[File:ItemBoxUnleashed.png|40px]] | ||
| Line 127: | Line 127: | ||
Room 2 - Second door to the left<br> | Room 2 - Second door to the left<br> | ||
| − | (requires 75 | + | (requires 75 Sun Medals and 52 Moon Medals) |
{| class="prettytable" style="width:auto;" | {| class="prettytable" style="width:auto;" | ||
|[[File:SecretMissionBoxUnleashed.png|40px]] | |[[File:SecretMissionBoxUnleashed.png|40px]] | ||
| Line 140: | Line 140: | ||
Room 3 - First door to the right<br> | Room 3 - First door to the right<br> | ||
| − | (requires 95 | + | (requires 95 Sun Medals and 69 Moon Medals) |
{| class="prettytable" style="width:auto;" | {| class="prettytable" style="width:auto;" | ||
|- | |- | ||
| Line 157: | Line 157: | ||
Room 4 - Second door to the right<br> | Room 4 - Second door to the right<br> | ||
| − | (requires 23 | + | (requires 23 Sun Medals and 15 Moon Medals) |
{| class="prettytable" style="width:auto;" | {| class="prettytable" style="width:auto;" | ||
|[[File:SecretMissionBoxUnleashed.png|40px]] | |[[File:SecretMissionBoxUnleashed.png|40px]] | ||
| Line 174: | Line 174: | ||
===[[Chun-nan]] - Third Continent=== | ===[[Chun-nan]] - Third Continent=== | ||
Room 1 - First door to the left<br> | Room 1 - First door to the left<br> | ||
| − | (requires 89 | + | (requires 89 Sun Medals and 69 Moon Medals) |
{| class="prettytable" style="width:auto;" | {| class="prettytable" style="width:auto;" | ||
|[[File:ItemBoxUnleashed.png|40px]] | |[[File:ItemBoxUnleashed.png|40px]] | ||
| Line 187: | Line 187: | ||
Room 2 - Second door to the left<br> | Room 2 - Second door to the left<br> | ||
| − | (requires 86 | + | (requires 86 Sun Medals and 60 Moon Medals) |
{| class="prettytable" style="width:auto;" | {| class="prettytable" style="width:auto;" | ||
|[[File:SecretMissionBoxUnleashed.png|40px]] | |[[File:SecretMissionBoxUnleashed.png|40px]] | ||
| Line 200: | Line 200: | ||
Room 3 - First door to the right<br> | Room 3 - First door to the right<br> | ||
| − | (requires 33 | + | (requires 33 Sun Medals and 34 Moon Medals) |
{| class="prettytable" style="width:auto;" | {| class="prettytable" style="width:auto;" | ||
|[[File:ItemBoxUnleashed.png|40px]] | |[[File:ItemBoxUnleashed.png|40px]] | ||
| Line 216: | Line 216: | ||
Room 4 - Second door to the right<br> | Room 4 - Second door to the right<br> | ||
| − | (requires 33 | + | (requires 33 Sun Medals and 21 Moon Medals) |
{| class="prettytable" style="width:auto;" | {| class="prettytable" style="width:auto;" | ||
|[[File:OneUpBoxUnleashed.png|40px]] | |[[File:OneUpBoxUnleashed.png|40px]] | ||
| Line 230: | Line 230: | ||
===[[Holoska]] - Fourth Continent=== | ===[[Holoska]] - Fourth Continent=== | ||
Room 1 - Door to the left<br> | Room 1 - Door to the left<br> | ||
| − | (requires 90 | + | (requires 90 Sun Medals and 69 Moon Medals) |
{| class="prettytable" style="width:auto;" | {| class="prettytable" style="width:auto;" | ||
|[[File:ItemBoxUnleashed.png|40px]] | |[[File:ItemBoxUnleashed.png|40px]] | ||
| Line 246: | Line 246: | ||
Room 2 - First door to the right<br> | Room 2 - First door to the right<br> | ||
| − | (requires 23 | + | (requires 23 Sun Medals and 21 Moon Medals) |
{| class="prettytable" style="width:auto;" | {| class="prettytable" style="width:auto;" | ||
|[[File:ItemBoxUnleashed.png|40px]] | |[[File:ItemBoxUnleashed.png|40px]] | ||
| Line 259: | Line 259: | ||
Room 3 - Second door to the right<br> | Room 3 - Second door to the right<br> | ||
| − | (requires 60 | + | (requires 60 Sun Medals and 46 Moon Medals) |
{| class="prettytable" style="width:auto;" | {| class="prettytable" style="width:auto;" | ||
|[[File:OneUpBoxUnleashed.png|40px]] | |[[File:OneUpBoxUnleashed.png|40px]] | ||
| Line 273: | Line 273: | ||
===[[Shamar]] - Fifth Continent=== | ===[[Shamar]] - Fifth Continent=== | ||
Room 1 - First door to the left<br> | Room 1 - First door to the left<br> | ||
| − | (requires 43 | + | (requires 43 Sun Medals and 52 Moon Medals) |
{| class="prettytable" style="width:auto;" | {| class="prettytable" style="width:auto;" | ||
|[[File:SecretMissionBoxUnleashed.png|40px]] | |[[File:SecretMissionBoxUnleashed.png|40px]] | ||
| Line 289: | Line 289: | ||
Room 2 - Second door to the left<br> | Room 2 - Second door to the left<br> | ||
| − | (requires 96 | + | (requires 96 Sun Medals and 69 Moon Medals) |
{| class="prettytable" style="width:auto;" | {| class="prettytable" style="width:auto;" | ||
|[[File:ItemBoxUnleashed.png|40px]] | |[[File:ItemBoxUnleashed.png|40px]] | ||
| Line 302: | Line 302: | ||
Room 3 - First door to the right<br> | Room 3 - First door to the right<br> | ||
| − | (requires 68 | + | (requires 68 Sun Medals and 56 Moon Medals) |
{| class="prettytable" style="width:auto;" | {| class="prettytable" style="width:auto;" | ||
|[[File:SecretMissionBoxUnleashed.png|40px]] | |[[File:SecretMissionBoxUnleashed.png|40px]] | ||
| Line 318: | Line 318: | ||
Room 4 - Second door to the right<br> | Room 4 - Second door to the right<br> | ||
| − | (requires 70 | + | (requires 70 Sun Medals and 59 Moon Medals) |
{| class="prettytable" style="width:auto;" | {| class="prettytable" style="width:auto;" | ||
|[[File:ItemBoxUnleashed.png|40px]] | |[[File:ItemBoxUnleashed.png|40px]] | ||
| Line 335: | Line 335: | ||
===[[Adabat]] - Sixth Continent=== | ===[[Adabat]] - Sixth Continent=== | ||
Room 1 - First door to the left<br> | Room 1 - First door to the left<br> | ||
| − | (requires 99 | + | (requires 99 Sun Medals and 69 Moon Medals) |
{| class="prettytable" style="width:auto;" | {| class="prettytable" style="width:auto;" | ||
|[[File:ItemBoxUnleashed.png|40px]] | |[[File:ItemBoxUnleashed.png|40px]] | ||
| Line 354: | Line 354: | ||
Room 2 - Second door to the left<br> | Room 2 - Second door to the left<br> | ||
| − | (requires 80 | + | (requires 80 Sun Medals and 60 Moon Medals) |
{| class="prettytable" style="width:auto;" | {| class="prettytable" style="width:auto;" | ||
|[[File:SecretMissionBoxUnleashed.png|40px]] | |[[File:SecretMissionBoxUnleashed.png|40px]] | ||
| Line 370: | Line 370: | ||
Room 3 - First door to the right<br> | Room 3 - First door to the right<br> | ||
| − | (requires 97 | + | (requires 97 Sun Medals and 69 Moon Medals) |
{| class="prettytable" style="width:auto;" | {| class="prettytable" style="width:auto;" | ||
|[[File:ItemBoxUnleashed.png|40px]] | |[[File:ItemBoxUnleashed.png|40px]] | ||
| Line 386: | Line 386: | ||
Room 4 - Second door to the right<br> | Room 4 - Second door to the right<br> | ||
| − | (requires 80 | + | (requires 80 Sun Medals and 69 Moon Medals) |
{| class="prettytable" style="width:auto;" | {| class="prettytable" style="width:auto;" | ||
|[[File:SecretMissionBoxUnleashed.png|40px]] | |[[File:SecretMissionBoxUnleashed.png|40px]] | ||
Revision as of 13:44, 28 January 2024
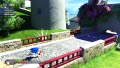
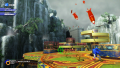
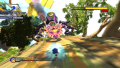
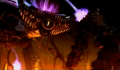
| Apotos Gaia Gate |
|---|
| Hub level, Sonic Unleashed |

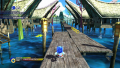
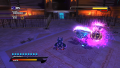
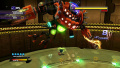
Gaia Gates serve as the explorable hub areas in the PS2 and Wii versions of Sonic Unleashed. Talking to certain townsfolk in each village will earn the player a tablet, granting him or her access to that continent's Gaia Gate. From there, the player can then enter a stage or find items hidden in each room of the Gaia Gate.
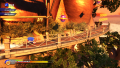
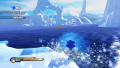
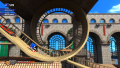
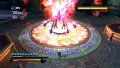
Every Gaia Gate has its own theme corresponding to the continent it represents. The gates are all connected and the player can select another gate by stepping on one of the glowing pads in the room to the left of each gate. Apotos is the only Gaia Gate that doesn't cause Sonic to transform into the Werehog in the lobby area, while Eggmanland is the only continent that lacks a Gaia Gate entirely.
Contents
Gameplay
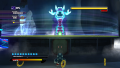
Sun Tablets unlock Day Stages (Sun Doors), Moon Tablets unlock Night Stages (Moon Doors), and Planet Tablets unlock Boss Stages (Planet Doors).

|

|

|
| Sun Tablet | Moon Tablet | Planet Tablet |
Each continent has a number assigned to it. Apotos and Mazuri are the only zones to share the same continent (First Continent), as they are part of the same planet shard. Apotos is also the only zone that lacks a Planet Door, while Mazuri is the only that lacks both a Sun Door and a Moon Door.

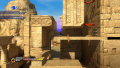
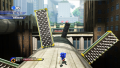
To find hidden Items such as extra lives (1-ups) and bonus missions (Secret Missions), the player must have enough Sun and Moon Medals to open a Item Door in the Gaia Gate. Upon collecting all of the items in a room behind one of the doors, a small notification will appear onscreen.
Item Doors
Apotos - First Continent
Room 1 - Door to the left
(requires 33 Sun Medals and 23 Moon Medals)
| 2 1-ups | |
| Secret Soundtrack 12 |
Room 2 - First door to the right
(requires 43 Sun Medals and 45 Moon Medals)
| 1-up | |
| Secret Mission 14 | |
| Secret Illustration 96 |
Room 3 - Second door to the right
(requires 14 Sun Medals and 14 Moon Medals)
| Secret Soundtrack 31 | |
| Secret Soundtrack 47 | |
| Secret Soundtrack 4 |
Mazuri - First Continent
Room 1 - Door to the left
(requires 14 Sun Medals and 15 Moon Medals)
| Secret Illustration 63 | |
| 1-up |
Room 2 - First door to the right
(requires 55 Sun Medals and 46 Moon Medals)
| Secret Mission 15 | |
| Secret Mission 8 | |
| Secret Mission 16 |
Room 3 - Second door to the right
(requires 87 Sun Medals and 69 Moon Medals)
| Secret Illustration 95 | |
| Secret Soundtrack 2 | |
| Secret Soundtrack 29 |
Spagonia - Second Continent
Room 1 - First door to the left
(requires 93 Sun Medals and 69 Moon Medals)
| Secret Soundtrack 27 | |
| Secret Movie 22 | |
| Secret Movie 26 |
Room 2 - Second door to the left
(requires 75 Sun Medals and 52 Moon Medals)
| Secret Mission 12 | |
| Secret Illustration 62 | |
| Secret Mission 4 |
Room 3 - First door to the right
(requires 95 Sun Medals and 69 Moon Medals)
| Secret Movie 34 | |
| Secret Movie 30 | |
| Secret Movie 24 | |
| Secret Soundtrack 25 |
Room 4 - Second door to the right
(requires 23 Sun Medals and 15 Moon Medals)
| Secret Mission 1 | |
| Secret Soundtrack 6 | |
| Secret Mission 3 | |
| 1-up |
Chun-nan - Third Continent
Room 1 - First door to the left
(requires 89 Sun Medals and 69 Moon Medals)
| Secret Movie 29 | |
| Secret Movie 28 | |
| Secret Soundtrack 28 |
Room 2 - Second door to the left
(requires 86 Sun Medals and 60 Moon Medals)
| Secret Mission 19 | |
| 1-up | |
| Secret Soundtrack 07 |
Room 3 - First door to the right
(requires 33 Sun Medals and 34 Moon Medals)
| Secret Soundtrack 26 | |
| Secret Soundtrack 18 | |
| Secret Soundtrack 20 | |
| 1-up |
Room 4 - Second door to the right
(requires 33 Sun Medals and 21 Moon Medals)
| 1-up | |
| Secret Soundtrack 48 | |
| Secret Soundtrack 11 |
Holoska - Fourth Continent
Room 1 - Door to the left
(requires 90 Sun Medals and 69 Moon Medals)
| Secret Movie 23 | |
| Secret Movie 25 | |
| Secret Soundtrack 24 | |
| Secret Mission 17 |
Room 2 - First door to the right
(requires 23 Sun Medals and 21 Moon Medals)
| Secret Soundtrack 5 | |
| 2 1-Ups | |
| Secret Soundtrack 14 |
Room 3 - Second door to the right
(requires 60 Sun Medals and 46 Moon Medals)
| 2 1-Ups | |
| Secret Soundtrack 15 | |
| Secret Soundtrack 17 |
Shamar - Fifth Continent
Room 1 - First door to the left
(requires 43 Sun Medals and 52 Moon Medals)
| Secret Mission 5 | |
| Secret Mission 7 | |
| Secret Mission 9 | |
| Secret Mission 18 |
Room 2 - Second door to the left
(requires 96 Sun Medals and 69 Moon Medals)
| Secret Movie 27 | |
| Secret Movie 32 | |
| Secret Soundtrack 30 |
Room 3 - First door to the right
(requires 68 Sun Medals and 56 Moon Medals)
| Secret Mission 22 | |
| Secret Movie 19 | |
| Secret Illustration 3 | |
| Secret Illustration 40 |
Room 4 - Second door to the right
(requires 70 Sun Medals and 59 Moon Medals)
| Secret Soundtrack 21 | |
| Secret Mission 23 | |
| Secret Illustration 89 | |
| Secret Mission 11 |
Adabat - Sixth Continent
Room 1 - First door to the left
(requires 99 Sun Medals and 69 Moon Medals)
| Secret Soundtrack 3 | |
| Secret Soundtrack 16 | |
| Secret Movie 31 | |
| Secret Mission 28 | |
| Secret Document 33 |
Room 2 - Second door to the left
(requires 80 Sun Medals and 60 Moon Medals)
| Secret Mission 20 | |
| Secret Mission 24 | |
| Secret Illustration 92 | |
| Secret Mission 21 |
Room 3 - First door to the right
(requires 97 Sun Medals and 69 Moon Medals)
| Secret Soundtrack 46 | |
| Secret Soundtrack 23 | |
| Secret Movie 33 | |
| Secret Movie 35 |
Room 4 - Second door to the right
(requires 80 Sun Medals and 69 Moon Medals)
| Secret Mission 27 | |
| Secret Mission 26 | |
| Secret Illustration 61 |
| Sonic Unleashed | |
|---|---|
|
Main page Manuals Development |
show;hide
|


| Locations in the Sonic the Hedgehog game series | |
|---|---|
| Islands | Christmas Island | South Island | West Side Island | Angel Island | Cocoa Island | Flicky Island | Prison Island | Onyx Island | Southern Island | Starfall Islands | Northstar Islands |
| Landmarks / Buildings | Never Lake | Mt. Mobius | Emerald Shrine | Super Labyrinth | Tails' Workshop | Babylon Garden | Gaia Gate |
| Regions / Nations | Eggman Empire | Station Square | Mystic Ruins | United Federation | Central City | Soleanna | Monopole | City | Mystic Jungle |
| Vessels | Death Egg | Death Egg II | Egg Carrier | Space Colony ARK | Eggman Fleet |
| Planets / Planetoids | Mobius | Little Planet | Black Comet | Interstellar Amusement Park | Lost Hex |
| Dimensions | Special Stage | Maginaryworld | Sol Dimension | Arabian Nights | Twilight Cage | World of Camelot | White Space | Dreamscape |