
Difference between revisions of "Sonic the Hedgehog 3/Hidden content"
From Sonic Retro
BSonirachi (talk | contribs) |
(→Unofficial codes, Sonic 3 alone: Fixed a few formatting bugs and changed some things around) |
||
| (31 intermediate revisions by 10 users not shown) | |||
| Line 1: | Line 1: | ||
{{back}} | {{back}} | ||
{{Outdated}} | {{Outdated}} | ||
| − | |||
==Level select + [[Debug mode]]== | ==Level select + [[Debug mode]]== | ||
{{HiddenContent | {{HiddenContent | ||
| image1=Sonic3LevelSelect.png | | image1=Sonic3LevelSelect.png | ||
| desc=Right after the [[Sega]] logo's screen darkens and [[Sonic the Hedgehog|Sonic]] starts jumping towards the screen, quickly press {{up}} {{up}} {{down}} {{down}} {{up}} {{up}} {{up}} {{up}}. This code is notoriously hard to do, due to the [[#SEGA screen technical details|weird frame windows]], but if performed correctly, the [[Ring]] collection sound will play. In the ''[[Sonic Jam]]'' version of the game the code is entered on the title screen and no precise timing is required. Press {{down}} twice (or {{Up}} once) to see a "Sound Test" option on the title screen. | | desc=Right after the [[Sega]] logo's screen darkens and [[Sonic the Hedgehog|Sonic]] starts jumping towards the screen, quickly press {{up}} {{up}} {{down}} {{down}} {{up}} {{up}} {{up}} {{up}}. This code is notoriously hard to do, due to the [[#SEGA screen technical details|weird frame windows]], but if performed correctly, the [[Ring]] collection sound will play. In the ''[[Sonic Jam]]'' version of the game the code is entered on the title screen and no precise timing is required. Press {{down}} twice (or {{Up}} once) to see a "Sound Test" option on the title screen. | ||
| + | |||
| + | An alternative way to unlock the level select, which can be performed on real hardware, is to activate the [[Sonic the Hedgehog 2 (16-bit)/Hidden content#Level select|level select]] in ''[[Sonic the Hedgehog 2 (16-bit)|Sonic the Hedgehog 2]]'', then remove the ''Sonic 2'' cartridge without turning the power off, insert the ''Sonic 3'' cartridge, and reset. | ||
Pressing {{C}} on the level select screen increments a counter that determines the players' characters in the Competition mode Zones, with the first controller incrementing the left counter and the second counter incrementing the right: | Pressing {{C}} on the level select screen increments a counter that determines the players' characters in the Competition mode Zones, with the first controller incrementing the left counter and the second counter incrementing the right: | ||
| Line 53: | Line 54: | ||
{{UnusedTable|type=Art| | {{UnusedTable|type=Art| | ||
{{UnusedRow | {{UnusedRow | ||
| − | | | + | | content={{SpriteImage|S3-Sbored.gif}} |
| − | | desc=[[Sonic the Hedgehog|Sonic]] in his signature "waiting" pose, but instead of pointing towards the direction he's facing, he falls asleep from boredom instead. Never used in-game. | + | | desc=[[Sonic the Hedgehog|Sonic]] in his signature "waiting" pose, but instead of pointing towards the direction he's facing, he falls asleep from boredom instead. Never used in-game. ''[[Sonic Origins]]'' uses this animation when Sonic has been left idle for nearly a minute, as does the [[Sonic Jam (Game.com)|Game.com version of ''Sonic Jam'']]. A modified version of this animation exists in ''[[Sonic X (Leapster game)|Sonic X]]'' for the Leapster. |
}} | }} | ||
{{UnusedRow | {{UnusedRow | ||
| − | | | + | | content={{SpriteImage|S3-Swhistle.gif}} |
| − | | desc=Sonic whistling. Not used in-game. {{LinkRetro|topic=9730|title=Speculation}} reveals that this animation may have been paired with a "Help-Item" mentioned in | + | | desc=Sonic whistling. Not used in-game. {{LinkRetro|topic=9730|title=Speculation}} reveals that this animation may have been paired with a "Help-Item" mentioned in an article from German magazine [[sega:Sega Magazin|Sega Magazin]]{{fileref|SegaMagazin DE 03.pdf|page=81}}. Sonic would have broken the monitor, used the whistling animation, and then Tails would fly in from out-of-screen to carry Sonic around as he pleased, similar to a second player controlling Tails while holding the first player. A whistle sound which is probably related to this can be heard when breaking S-monitors and at the beginning of [[Doomsday Zone]]. It was also used in the Game.com version of ''Sonic Jam''. |
}} | }} | ||
{{UnusedRow | {{UnusedRow | ||
| − | | | + | | content={{SpriteImage|Sonic3SonicAltDeath.png}} |
| desc=A black & white version of Sonic's death sprite, similar to the one seen in the previous two games. It's still not used. | | desc=A black & white version of Sonic's death sprite, similar to the one seen in the previous two games. It's still not used. | ||
}} | }} | ||
{{UnusedRow | {{UnusedRow | ||
| − | | | + | | content={{SpriteImage|Sonic3 Unused Sonic FBZ.gif}}{{SpriteImage|Sonic 3 alone Unused Tails FBZ.gif}} |
| desc=These animations would later be used for [[Flying Battery Zone]]'s monkey bars in ''[[Sonic & Knuckles]]''. | | desc=These animations would later be used for [[Flying Battery Zone]]'s monkey bars in ''[[Sonic & Knuckles]]''. | ||
}} | }} | ||
{{UnusedRow | {{UnusedRow | ||
| − | | | + | | content={{SpriteImage|Sonic 3 Unused Sonic holdon Vertical.gif}}{{SpriteImage|Sonic 3 alone Unused Tails horizontal hold.gif}} |
| desc=These animations would later be used for Knuckles' wind trap in ''[[Sonic & Knuckles]]''. | | desc=These animations would later be used for Knuckles' wind trap in ''[[Sonic & Knuckles]]''. | ||
}} | }} | ||
{{UnusedRow | {{UnusedRow | ||
| − | | | + | | content={{SpriteImage|Sonic 3 FBZ Unused.png}}{{SpriteImage|Sonic 3 alone Unused Tails.png}} |
| desc=These sprites would later be used for swinging off the poles in [[Mushroom Hill Zone]] in ''[[Sonic & Knuckles]]''. | | desc=These sprites would later be used for swinging off the poles in [[Mushroom Hill Zone]] in ''[[Sonic & Knuckles]]''. | ||
}} | }} | ||
{{UnusedRow | {{UnusedRow | ||
| − | | | + | | content={{SpriteImage|Sonic 3 alone unused sonic sprite.png}}{{SpriteImage|Sonic 3 alone unused Tails sprite SOZ.png}} |
| desc=These sprites would later be used for cascading down the towers in [[Sandopolis Zone]] in ''[[Sonic & Knuckles]]''. | | desc=These sprites would later be used for cascading down the towers in [[Sandopolis Zone]] in ''[[Sonic & Knuckles]]''. | ||
}} | }} | ||
{{UnusedRow | {{UnusedRow | ||
| − | | | + | | content={{SpriteImage|Tailsanim1.gif}} |
| desc=Leftover animation from the [[continue]] screen in ''[[Sonic the Hedgehog 2 (16-bit)|Sonic 2]]''. | | desc=Leftover animation from the [[continue]] screen in ''[[Sonic the Hedgehog 2 (16-bit)|Sonic 2]]''. | ||
}} | }} | ||
{{UnusedRow | {{UnusedRow | ||
| − | | | + | | content={{SpriteImage|Sonic 3 unused data slect Knuckles.png}} |
| desc=Knuckles on the Data Select screen. This can be seen when trying to play as Knuckles in ''Sonic 3''. | | desc=Knuckles on the Data Select screen. This can be seen when trying to play as Knuckles in ''Sonic 3''. | ||
}} | }} | ||
{{UnusedRow | {{UnusedRow | ||
| − | | | + | | content={{SpriteImage|Sonic 3 Unused Knuckles Continue sprites.gif}} |
| desc=Leftover sprites for Knuckles on the continue screen. Later used in ''[[Sonic & Knuckles]]''. | | desc=Leftover sprites for Knuckles on the continue screen. Later used in ''[[Sonic & Knuckles]]''. | ||
}} | }} | ||
{{UnusedRow | {{UnusedRow | ||
| − | | | + | | content={{SpriteImage|Sonic 3 unused Knuckles text.png}} |
| desc=Knuckles text which would have been used upon Act and Special Stage completion. This can be seen in-game by [[#Knuckles|making a save file for "Knuckles"]]. | | desc=Knuckles text which would have been used upon Act and Special Stage completion. This can be seen in-game by [[#Knuckles|making a save file for "Knuckles"]]. | ||
}} | }} | ||
{{UnusedRow | {{UnusedRow | ||
| − | | | + | | content={{SpriteImage|Sonic3 unused Knuckles icon.png}} |
| desc=Knuckles's life icon also remains in the game, albeit unused. It would later be used in ''[[Sonic & Knuckles]]''. | | desc=Knuckles's life icon also remains in the game, albeit unused. It would later be used in ''[[Sonic & Knuckles]]''. | ||
}} | }} | ||
{{UnusedRow | {{UnusedRow | ||
| − | | | + | | content={{SpriteImage|Sonic3-knuxmini.png}} |
| desc=Unused Gliding/Climbing animations exist for [[Knuckles]] in two-player mode, even though he doesn't have the ability to glide or climb while in two-player. | | desc=Unused Gliding/Climbing animations exist for [[Knuckles]] in two-player mode, even though he doesn't have the ability to glide or climb while in two-player. | ||
}} | }} | ||
{{UnusedRow | {{UnusedRow | ||
| − | | | + | | content={{SpriteImage|Minideathegg.png|2}} |
| desc=Smaller rendition of the [[Death Egg]]. It seems to be part of [[Game Secrets:Sonic & Knuckles#Lost Sprites|a Death Egg hologram projector]] which was also unused in ''[[Sonic & Knuckles]]''. | | desc=Smaller rendition of the [[Death Egg]]. It seems to be part of [[Game Secrets:Sonic & Knuckles#Lost Sprites|a Death Egg hologram projector]] which was also unused in ''[[Sonic & Knuckles]]''. | ||
}} | }} | ||
{{UnusedRow | {{UnusedRow | ||
| − | | | + | | content={{SpriteImage|Sonic3pgn.png}} |
| desc=Diagonal frames of the [[Penguinator]] from [[IceCap Zone]]. These can be seen for a split second if they are placed on the large hill at the beginning of Act 1 using debug mode. | | desc=Diagonal frames of the [[Penguinator]] from [[IceCap Zone]]. These can be seen for a split second if they are placed on the large hill at the beginning of Act 1 using debug mode. | ||
}} | }} | ||
{{UnusedRow | {{UnusedRow | ||
| − | | | + | | content={{SpriteImage|Sonic3eggmanpanic.png}} |
| desc=Unused running frame where [[Eggman]] has a different facial expression. | | desc=Unused running frame where [[Eggman]] has a different facial expression. | ||
}} | }} | ||
{{UnusedRow | {{UnusedRow | ||
| − | | | + | | content= |
| desc=Eggman sprites normally used for the [[Barrier Eggman (Sonic & Knuckles)|Barrier Eggman]] mini-boss. | | desc=Eggman sprites normally used for the [[Barrier Eggman (Sonic & Knuckles)|Barrier Eggman]] mini-boss. | ||
}} | }} | ||
{{UnusedRow | {{UnusedRow | ||
| − | | | + | | content={{SpriteImage|Sonic3 MD Sprite FBZ2BossHeads.png}} |
| desc=Eggman sprites used for the [[Hang Mobile]]. While these would be used in ''Sonic & Knuckles'', one of the sprites would remain unused during the actual boss fight due to a coding error. | | desc=Eggman sprites used for the [[Hang Mobile]]. While these would be used in ''Sonic & Knuckles'', one of the sprites would remain unused during the actual boss fight due to a coding error. | ||
}} | }} | ||
{{UnusedRow | {{UnusedRow | ||
| − | | | + | | content={{SpriteImage|Sonic3 MD Sprite TornadoShadow.gif}} |
| desc=Graphics for a shadow found among the graphics for the [[Tornado]] in [[Angel Island Zone]]. This may have appeared under the Tornado as it approached the island. | | desc=Graphics for a shadow found among the graphics for the [[Tornado]] in [[Angel Island Zone]]. This may have appeared under the Tornado as it approached the island. | ||
}} | }} | ||
{{UnusedRow | {{UnusedRow | ||
| − | | | + | | content={{SpriteImage|Sonic3 MD Sprite UnusedButton.png}} |
| desc=A button-like object that is loaded early on in the space used for the burning Angel Island Zone stage graphics. | | desc=A button-like object that is loaded early on in the space used for the burning Angel Island Zone stage graphics. | ||
}} | }} | ||
{{UnusedRow | {{UnusedRow | ||
| − | | | + | | content={{SpriteImage|Sonic3 MD Sprite CNZLightbulb.png}} |
| desc=This lightbulb is normally found in [[Carnival Night Zone]] Act 2 when Knuckles switches off the power, but it has an unused function: if it becomes submerged in water, it will explode and display the sprite seen on the right. Since it isn't placed anywhere that gets submerged in water, it is never seen in normal play, requiring the player to use debug mode to place it in water and see it there. | | desc=This lightbulb is normally found in [[Carnival Night Zone]] Act 2 when Knuckles switches off the power, but it has an unused function: if it becomes submerged in water, it will explode and display the sprite seen on the right. Since it isn't placed anywhere that gets submerged in water, it is never seen in normal play, requiring the player to use debug mode to place it in water and see it there. | ||
}} | }} | ||
{{UnusedRow | {{UnusedRow | ||
| − | | | + | | content={{SpriteImage|Sonic3 MD Sprite ICZTeleporter.png}} |
| desc=The teleporter normally used by Knuckles at the start of [[IceCap Zone]] Act 1. | | desc=The teleporter normally used by Knuckles at the start of [[IceCap Zone]] Act 1. | ||
}} | }} | ||
{{UnusedRow | {{UnusedRow | ||
| − | | | + | | content={{SpriteImage|Sonic3 MD Sprite ICZBoulder.png}} |
| desc=A large ice boulder that appears to have been meant for IceCap Zone. | | desc=A large ice boulder that appears to have been meant for IceCap Zone. | ||
}} | }} | ||
{{UnusedRow | {{UnusedRow | ||
| − | | | + | | content= |
| desc=This sprite is actually used by the [[Beam Rocket]], but it is obscured and cannot be seen. | | desc=This sprite is actually used by the [[Beam Rocket]], but it is obscured and cannot be seen. | ||
}} | }} | ||
{{UnusedRow | {{UnusedRow | ||
| − | | | + | | content= |
| desc=The bomb used by [[Eggrobo]] in cutscenes in ''Sonic & Knuckles'' and ''Sonic 3 & Knuckles''. | | desc=The bomb used by [[Eggrobo]] in cutscenes in ''Sonic & Knuckles'' and ''Sonic 3 & Knuckles''. | ||
}} | }} | ||
{{UnusedRow | {{UnusedRow | ||
| − | | | + | | content= |
| − | | desc=The attachment on the [[Egg Mobile]] which Eggrobo would use to drop a bomb on Knuckles in [[Launch Base Zone]] Act 2. This graphic was used in the ''[[Sonic the Hedgehog 3C (prototype 0408)|Sonic 3C 0408]]'', ''[[Sonic the Hedgehog 3C (prototype 0517)|Sonic 3C 0517]]'' and ''[[Sonic & Knuckles (prototype | + | | desc=The attachment on the [[Egg Mobile]] which Eggrobo would use to drop a bomb on Knuckles in [[Launch Base Zone]] Act 2. This graphic was used in the ''[[Sonic the Hedgehog 3C (prototype 0408)|Sonic 3C 0408]]'', ''[[Sonic the Hedgehog 3C (prototype 0517)|Sonic 3C 0517]]'' and ''[[Sonic & Knuckles (prototype; 1994-05-25)|Sonic & Knuckles 0525]]'' prototypes, but is not used in the final ''Sonic 3 & Knuckles''. |
}} | }} | ||
{{UnusedRow | {{UnusedRow | ||
| − | | | + | | content= |
| desc=Graphics and palette data for the yellow spheres from the ''Sonic & Knuckles'' [[Special Stage (Sonic the Hedgehog 3 & Knuckles)|Special Stages]]. While they are loaded every time the player enters a Special Stage, coding doesn't exist for them yet and thus cannot be encountered. | | desc=Graphics and palette data for the yellow spheres from the ''Sonic & Knuckles'' [[Special Stage (Sonic the Hedgehog 3 & Knuckles)|Special Stages]]. While they are loaded every time the player enters a Special Stage, coding doesn't exist for them yet and thus cannot be encountered. | ||
}} | }} | ||
{{UnusedRow | {{UnusedRow | ||
| − | | | + | | content={{SpriteImage|Sonic 3 Flying Battery icon.PNG}}{{SpriteImage|FBZicon.png}} |
| − | | desc=An unused Data Select icon for [[Flying Battery Zone]], from the days when ''Sonic 3'' and ''Sonic & Knuckles'' were to be a single game. The ''Sonic 3'' icon can be found in both the PC and [[Mega Drive]] versions of ''Sonic 3'', and can be viewed by hacking the SRAM for the game to access level slot $04, or by using the [[sega:Action Replay (Mega Drive)|PAR]] codes | + | | desc=An unused Data Select icon for [[Flying Battery Zone]], from the days when ''Sonic 3'' and ''Sonic & Knuckles'' were to be a single game. The ''Sonic 3'' icon can be found in both the PC and [[Mega Drive]] versions of ''Sonic 3'', and can be viewed by hacking the SRAM for the game to access level slot $04, or by using the [[sega:Action Replay (Mega Drive)|PAR]] codes {{hex|00C324:601E}} and {{hex|00C338:6002}} to view the icon in a completed game save slot while scrolling through the levels. The ''[[Sonic 3 & Knuckles]]'' icon is displayed here for comparison. |
}} | }} | ||
{{UnusedRow | {{UnusedRow | ||
| − | | | + | | content={{SpriteImage|Sonic3 MD Sprite CompetitionMarkers.png|3}} |
| desc=Icons originally used to track the players' progress in Competition mode, leftover from the [[Sonic the Hedgehog 3 (prototype; 1993-11-03)|November 3rd prototype]]. | | desc=Icons originally used to track the players' progress in Competition mode, leftover from the [[Sonic the Hedgehog 3 (prototype; 1993-11-03)|November 3rd prototype]]. | ||
}} | }} | ||
{{UnusedRow | {{UnusedRow | ||
| − | | | + | | content= |
| desc=An unknown graphic that may resemble some kind of medal for Competition mode. No known palette exists for this graphic. | | desc=An unknown graphic that may resemble some kind of medal for Competition mode. No known palette exists for this graphic. | ||
}} | }} | ||
{{UnusedRow | {{UnusedRow | ||
| − | | | + | | content={{SpriteImage|S3-signpost-unused.png}} |
| − | | desc=Leftover signpost sprites | + | | desc=Leftover signpost sprites from the [[Sonic the Hedgehog 3 (prototype; 1993-11-03)|November 3rd prototype]] that remain in both the final game and Sonic and Knuckles. |
}} | }} | ||
}} | }} | ||
| Line 182: | Line 183: | ||
{{UnusedTable|type=Art| | {{UnusedTable|type=Art| | ||
{{UnusedRow | {{UnusedRow | ||
| − | | | + | | content={{SpriteImage|Sonic3K MD Sprite Monitors.png|crop_width=28|crop_x=140}} |
| desc=An "S" [[monitor]], which transforms Sonic into [[Super Sonic]] when broken. | | desc=An "S" [[monitor]], which transforms Sonic into [[Super Sonic]] when broken. | ||
}} | }} | ||
{{UnusedRow | {{UnusedRow | ||
| − | | | + | | content={{SpriteImage|Sonic3 MD Sprite AIZ2BreakableWall.png}} |
| desc=A breakable wall in [[Angel Island Zone]] Act 2, which can only be placed with debug mode and is destroyed with a [[Spin Dash]] on the ground. A similar object is used as a wall that is opened with a switch. | | desc=A breakable wall in [[Angel Island Zone]] Act 2, which can only be placed with debug mode and is destroyed with a [[Spin Dash]] on the ground. A similar object is used as a wall that is opened with a switch. | ||
}} | }} | ||
{{UnusedRow | {{UnusedRow | ||
| − | | | + | | content={{SpriteImage|Sonic3 MD Sprite CNZButton.png}} |
| desc=A button of unknown purpose. It can be placed in either Act of [[Carnival Night Zone]] via debug mode, but it doesn't appear to do anything. Also unused in ''Sonic 3 & Knuckles''. | | desc=A button of unknown purpose. It can be placed in either Act of [[Carnival Night Zone]] via debug mode, but it doesn't appear to do anything. Also unused in ''Sonic 3 & Knuckles''. | ||
}} | }} | ||
{{UnusedRow | {{UnusedRow | ||
| − | | | + | | content={{SpriteImage|Sonic3 MD Sprite CNZDebugRing.png|2}} |
| desc=An unknown [[Ring]]-like object that appears to spawn slope collision when placed. It is placeable in Carnival Night Zone. | | desc=An unknown [[Ring]]-like object that appears to spawn slope collision when placed. It is placeable in Carnival Night Zone. | ||
}} | }} | ||
{{UnusedRow | {{UnusedRow | ||
| − | | | + | | content={{SpriteImage|Sonic3 MD Sprite ICZBreakableBlock.png}} |
| desc=A glowing block that can be placed in either Act of [[IceCap Zone]] via debug mode. Jumping on it destroys it like the ice blocks. Also unused in ''Sonic 3 & Knuckles''. | | desc=A glowing block that can be placed in either Act of [[IceCap Zone]] via debug mode. Jumping on it destroys it like the ice blocks. Also unused in ''Sonic 3 & Knuckles''. | ||
}} | }} | ||
{{UnusedRow | {{UnusedRow | ||
| − | | | + | | content={{SpriteImage|Sonic3 MD Sprite CompetitionSpikes.png}} |
| desc=A set of [[Spikes (obstacle)|spikes]] for Competition Mode. However, spikes do not appear in any of the five Zones, but they can be placed with debug mode. | | desc=A set of [[Spikes (obstacle)|spikes]] for Competition Mode. However, spikes do not appear in any of the five Zones, but they can be placed with debug mode. | ||
}} | }} | ||
| Line 222: | Line 223: | ||
====Others==== | ====Others==== | ||
| − | {{UnusedTable|type=Art| | + | {{UnusedTable|type=Art|ids=yes|offsets=yes| |
{{UnusedRow | {{UnusedRow | ||
| − | | | + | | content={{SpriteImage|Sonic3K MD Sprite Monitors.png|crop_width=28}} |
| − | | desc=A blank monitor that harms the player when broken. Set a monitor subtype to | + | | desc=A blank monitor that harms the player when broken. Set a monitor subtype to {{hex|00}} to view it in-game. |
}} | }} | ||
{{UnusedRow | {{UnusedRow | ||
| − | | | + | | content= |
| + | | id= | ||
| + | | offset= | ||
| desc=Knuckles' version of the [[Drill Mobile]] for [[Marble Garden Zone]] Act 2. It functions identically to how it does in ''Sonic 3 & Knuckles'', except it is invincible. | | desc=Knuckles' version of the [[Drill Mobile]] for [[Marble Garden Zone]] Act 2. It functions identically to how it does in ''Sonic 3 & Knuckles'', except it is invincible. | ||
}} | }} | ||
{{UnusedRow | {{UnusedRow | ||
| − | | | + | | content={{SpriteImage|S3RSC.png}} |
| − | | desc=A [[spring]] that moves up and down, which was intended for [[Flying Battery Zone]] | + | | id=3D |
| + | | offset= | ||
| + | | desc=A [[spring]] that moves up and down, which was intended for [[Flying Battery Zone]]. | ||
}} | }} | ||
{{UnusedRow | {{UnusedRow | ||
| − | | | + | | content={{SpriteImage|Blaster.png}} |
| + | | id= | ||
| + | | offset= | ||
| desc=[[Blaster]], who is intended for [[Flying Battery Zone]] with leftover code, and can be placed with debug mode if the game is hacked to load Flying Battery Zone. Its projectiles can be destroyed like regular [[Badnik]]s. | | desc=[[Blaster]], who is intended for [[Flying Battery Zone]] with leftover code, and can be placed with debug mode if the game is hacked to load Flying Battery Zone. Its projectiles can be destroyed like regular [[Badnik]]s. | ||
}} | }} | ||
{{UnusedRow | {{UnusedRow | ||
| − | | | + | | content={{SpriteImage|Technosqueek.png}} |
| + | | id= | ||
| + | | offset= | ||
| desc=[[Technosqueek]], who is intended for [[Flying Battery Zone]] with leftover code, and can be placed with debug mode if the game is hacked to load Flying Battery Zone. For some reason, placing a sideways one will crash the game. | | desc=[[Technosqueek]], who is intended for [[Flying Battery Zone]] with leftover code, and can be placed with debug mode if the game is hacked to load Flying Battery Zone. For some reason, placing a sideways one will crash the game. | ||
}} | }} | ||
{{UnusedRow | {{UnusedRow | ||
| − | | | + | | content= |
| + | | id= | ||
| + | | offset= | ||
| desc=Owing to its removal, Flying Battery Zone still retains its bosses within the ROM. [[Gapsule]] is nearly identical to its appearance in ''Sonic & Knuckles'', albeit with a slightly different palette. It can be found by hacking the game to load Flying Battery Zone Act 1 and exploring the level. | | desc=Owing to its removal, Flying Battery Zone still retains its bosses within the ROM. [[Gapsule]] is nearly identical to its appearance in ''Sonic & Knuckles'', albeit with a slightly different palette. It can be found by hacking the game to load Flying Battery Zone Act 1 and exploring the level. | ||
}} | }} | ||
{{UnusedRow | {{UnusedRow | ||
| − | | | + | | content= |
| + | | id= | ||
| + | | offset= | ||
| desc=The [[Barrier Eggman (Sonic & Knuckles)|Barrier Eggman]] sub-boss for Flying Battery Zone Act 2. It functions nearly identically to how it does in ''Sonic & Knuckles'', except it has no sound effects. For reasons unknown, it is not actually placed in Act 2. | | desc=The [[Barrier Eggman (Sonic & Knuckles)|Barrier Eggman]] sub-boss for Flying Battery Zone Act 2. It functions nearly identically to how it does in ''Sonic & Knuckles'', except it has no sound effects. For reasons unknown, it is not actually placed in Act 2. | ||
}} | }} | ||
{{UnusedRow | {{UnusedRow | ||
| − | | | + | | content= |
| + | | id= | ||
| + | | offset= | ||
| desc=The [[Hang Mobile]] boss for Flying Battery Zone Act 2. It is slightly different in terms of coding and has no sound effects. | | desc=The [[Hang Mobile]] boss for Flying Battery Zone Act 2. It is slightly different in terms of coding and has no sound effects. | ||
}} | }} | ||
{{UnusedRow | {{UnusedRow | ||
| − | | | + | | content={{SpriteImage|sonic3-eggmanlost.png}} |
| − | | desc=An unused Eggman object discovered by [[User:Nemesis|Nemesis]] that isn't called by any routine. It appears to be nothing more than Eggman flying away towards the horizon. It may have been intended for the cutscene after defeating the [[Launch Base Zone bosses#Big Arm|Big Arm]] fight as the object is located between the LBZ2 bosses and the falling Death Egg in the ROM, and its animation somewhat fits with the way the Death Egg falls, however the Death Egg noticeably falls on the opposite direction of where Eggman goes in the actual game. This can be re-enabled using the PAR code | + | | id= |
| + | | offset= | ||
| + | | desc=An unused Eggman object discovered by [[User:Nemesis|Nemesis]] that isn't called by any routine. It appears to be nothing more than Eggman flying away towards the horizon. It may have been intended for the cutscene after defeating the [[Launch Base Zone bosses#Big Arm|Big Arm]] fight as the object is located between the LBZ2 bosses and the falling Death Egg in the ROM, and its animation somewhat fits with the way the Death Egg falls, however the Death Egg noticeably falls on the opposite direction of where Eggman goes in the actual game. This can be re-enabled using the PAR code {{hex|05165A:04F2}}{{ref|https://s3unlocked.blogspot.com/2018/01/youre-going-to-pay-for-this.html}}. | ||
| + | |||
| + | The object and its associated sprites were later used in ''Sonic Origins''. | ||
}} | }} | ||
{{UnusedRow | {{UnusedRow | ||
| − | | | + | | content={{SpriteImage|SnKSball.gif}} |
| − | | desc=A flashing S gumball for the [[Bonus Stage (Sonic the Hedgehog 3 & Knuckles)|Gumball Machine Bonus Stage]], which can also be seen hidden behind the other gumballs inside the machine. If the gumball object's subtype is manually set to | + | | id= |
| + | | offset= | ||
| + | | desc=A flashing S gumball for the [[Bonus Stage (Sonic the Hedgehog 3 & Knuckles)|Gumball Machine Bonus Stage]], which can also be seen hidden behind the other gumballs inside the machine. If the gumball object's subtype is manually set to {{hex|08}}, it'll use a unique item collection routine that sets a RAM address to {{hex|07}}, which has nothing to do with super transformations and is cleared on level load.{{ref|https://s3unlocked.blogspot.com/2017/11/super-gum.html}} | ||
}} | }} | ||
{{UnusedRow | {{UnusedRow | ||
| − | | | + | | content={{SpriteImage|S3ArrowLift.png}} |
| − | | desc=A glitched platform that appears to belong to [[Launch Base Zone]], as its graphics appear to be the most correct there | + | | id=12 |
| + | | offset=$1C6A0 | ||
| + | | desc=A glitched platform that appears to belong to [[Launch Base Zone]], as its graphics appear to be the most correct there. | ||
}} | }} | ||
{{UnusedRow | {{UnusedRow | ||
| − | | | + | | content= |
| − | | desc=A seesaw-like cannon that locks the player in the center of the object, and propels them extremely far when pressing a button | + | | id=1A |
| + | | offset=$1DFCE | ||
| + | | desc=A seesaw-like cannon that locks the player in the center of the object, and propels them extremely far when pressing a button. | ||
}} | }} | ||
{{UnusedRow | {{UnusedRow | ||
| − | | | + | | content= |
| − | | desc=A strange, spinning object that hurts the player when jumped on, and swings when hit from underneath | + | | id=1C |
| + | | offset=$1E6C6 | ||
| + | | desc=A strange, spinning object that hurts the player when jumped on, and swings when hit from underneath. | ||
}} | }} | ||
{{UnusedRow | {{UnusedRow | ||
| − | | | + | | content= |
| − | | desc=A Launch Base Zone platform that can be grabbed from underneath | + | | id=1D |
| + | | offset=$1C228 | ||
| + | | desc=A Launch Base Zone platform that can be grabbed from underneath. | ||
}} | }} | ||
{{UnusedRow | {{UnusedRow | ||
| − | | | + | | content= |
| − | | desc=An object originally used in ''[[Sonic the Hedgehog (16-bit)|Sonic 1]]'' and ''[[Sonic the Hedgehog 2 (16-bit)|Sonic 2]]'' to damage the player when they touched lava, except it no longer functions here. Its size can be changed by altering its subtype. | + | | id=27 |
| + | | offset= | ||
| + | | desc=An object originally used in ''[[Sonic the Hedgehog (16-bit)|Sonic 1]]'' and ''[[Sonic the Hedgehog 2 (16-bit)|Sonic 2]]'' to damage the player when they touched lava, except it no longer functions here. Its size can be changed by altering its subtype. | ||
| + | }} | ||
| + | }} | ||
| + | |||
| + | ===Level chunks=== | ||
| + | ====Angel Island Zone==== | ||
| + | {{gallery | ||
| + | |||
| + | }} | ||
| + | |||
| + | ====Hydrocity Zone==== | ||
| + | {{gallery | ||
| + | |||
| + | }} | ||
| + | |||
| + | ====Marble Garden Zone==== | ||
| + | {{gallery | ||
| + | |||
}} | }} | ||
| + | |||
| + | ====Carnival Night Zone==== | ||
| + | {{gallery | ||
| + | |||
| + | }} | ||
| + | |||
| + | ====IceCap Zone==== | ||
| + | {{gallery | ||
| + | |||
| + | }} | ||
| + | |||
| + | ====Launch Base Zone==== | ||
| + | {{gallery | ||
| + | |||
}} | }} | ||
===Audio=== | ===Audio=== | ||
====Music==== | ====Music==== | ||
| − | {{UnusedTable|type=Audio| | + | {{UnusedTable|type=Audio|ids=yes| |
{{UnusedRow | {{UnusedRow | ||
| − | | | + | | content= |
| − | | desc=[[Flying Battery Zone]] Act 1 | + | | id=09 |
| + | | desc=[[Flying Battery Zone]] Act 1. The loop point in the "echo" track of the lead instrument is set slightly later than the rest of the tracks. This leads to the song falling further and further out of sync each time the song loops. This was fixed in ''Sonic & Knuckles'' and ''Sonic 3 & Knuckles''. | ||
}} | }} | ||
{{UnusedRow | {{UnusedRow | ||
| − | | | + | | content= |
| − | | desc=Flying Battery Zone Act 2 | + | | id=0A |
| + | | desc=Flying Battery Zone Act 2. | ||
}} | }} | ||
{{UnusedRow | {{UnusedRow | ||
| − | | | + | | content= |
| − | | desc=[[Mushroom Hill Zone|Mushroom Hill/Valley Zone]] Act 1 | + | | id=0F |
| + | | desc=[[Mushroom Hill Zone|Mushroom Hill/Valley Zone]] Act 1. | ||
}} | }} | ||
{{UnusedRow | {{UnusedRow | ||
| − | | | + | | content= |
| − | | desc=Mushroom Hill/Valley Zone Act 2 | + | | id=10 |
| + | | desc=Mushroom Hill/Valley Zone Act 2. | ||
}} | }} | ||
{{UnusedRow | {{UnusedRow | ||
| − | | | + | | content= |
| − | | desc=[[Sandopolis Zone]] Act 1 | + | | id=11 |
| + | | desc=[[Sandopolis Zone]] Act 1. | ||
}} | }} | ||
{{UnusedRow | {{UnusedRow | ||
| − | | | + | | content= |
| − | | desc=Sandopolis Zone Act 2 | + | | id=12 |
| + | | desc=Sandopolis Zone Act 2. | ||
}} | }} | ||
{{UnusedRow | {{UnusedRow | ||
| − | | | + | | content= |
| − | | desc=[[Lava Reef Zone]] Act 1 | + | | id=13 |
| + | | desc=[[Lava Reef Zone]] Act 1. | ||
}} | }} | ||
{{UnusedRow | {{UnusedRow | ||
| − | | | + | | content= |
| − | | desc=Lava Reef Zone Act 2/[[Hidden Palace Zone (Sonic & Knuckles)|Hidden Palace Zone]] | + | | id=14 |
| + | | desc=Lava Reef Zone Act 2/[[Hidden Palace Zone (Sonic & Knuckles)|Hidden Palace Zone]]. | ||
}} | }} | ||
{{UnusedRow | {{UnusedRow | ||
| − | | | + | | content= |
| − | | desc=[[Sky Sanctuary Zone]] | + | | id=15 |
| + | | desc=[[Sky Sanctuary Zone]]. | ||
}} | }} | ||
{{UnusedRow | {{UnusedRow | ||
| − | | | + | | content= |
| − | | desc=[[Death Egg Zone (Sonic & Knuckles)|Death Egg Zone]] Act 1 | + | | id=16 |
| + | | desc=[[Death Egg Zone (Sonic & Knuckles)|Death Egg Zone]] Act 1. | ||
}} | }} | ||
{{UnusedRow | {{UnusedRow | ||
| − | | | + | | content= |
| − | | desc=Death Egg Zone Act 2 | + | | id=17 |
| + | | desc=Death Egg Zone Act 2. | ||
}} | }} | ||
{{UnusedRow | {{UnusedRow | ||
| − | | | + | | content= |
| − | | desc=''Sonic & Knuckles'' Act 1 Boss | + | | id=18 |
| + | | desc=''Sonic & Knuckles'' Act 1 Boss. Not totally unused as it can be heard while fighting the [[Big Shaker]] or [[Screw Mobile]] by jumping out of the water after the drowning music starts. | ||
}} | }} | ||
{{UnusedRow | {{UnusedRow | ||
| − | | | + | | content= |
| − | | desc=[[The Doomsday Zone]] | + | | id=1A |
| + | | desc=[[The Doomsday Zone]]. | ||
}} | }} | ||
{{UnusedRow | {{UnusedRow | ||
| − | | | + | | content= |
| − | | desc=[[Bonus Stage (Sonic the Hedgehog 3 & Knuckles)|Glowing Spheres Bonus Stage]] | + | | id=1B |
| + | | desc=[[Bonus Stage (Sonic the Hedgehog 3 & Knuckles)|Glowing Spheres Bonus Stage]]. | ||
}} | }} | ||
{{UnusedRow | {{UnusedRow | ||
| − | | | + | | content= |
| − | | desc=[[Bonus Stage (Sonic the Hedgehog 3 & Knuckles)|Slot Machine Bonus Stage]] | + | | id=1D |
| + | | desc=[[Bonus Stage (Sonic the Hedgehog 3 & Knuckles)|Slot Machine Bonus Stage]]. | ||
}} | }} | ||
}} | }} | ||
| Line 352: | Line 429: | ||
====Sound effects==== | ====Sound effects==== | ||
Many of these sound effects would see use in ''Sonic & Knuckles'' and ''Sonic 3 & Knuckles'', though some of these sounds would also be unused there. | Many of these sound effects would see use in ''Sonic & Knuckles'' and ''Sonic 3 & Knuckles'', though some of these sounds would also be unused there. | ||
| − | {{UnusedTable|type=Audio| | + | {{UnusedTable|type=Audio|ids=yes| |
{{UnusedRow | {{UnusedRow | ||
| − | | | + | | content=[[File:Sonic3 MD Sound3Aand71.ogg]] |
| − | | | + | | id=3A, 71 |
| + | | desc=[[Shield]] sound leftover from ''[[Sonic the Hedgehog 2 (16-bit)|Sonic the Hedgehog 2]]'' | ||
}} | }} | ||
{{UnusedRow | {{UnusedRow | ||
| − | | | + | | content=[[File:Sonic3 MD Sound40.ogg]] |
| − | | desc= | + | | id=40 |
| + | | desc=Unused; an electric zap heard among the Shield sound effects. This sound would later be used for the [[Thunder Shield]] in ''[[Sonic Generations]]'' and ''[[Sonic Lost World]]'', and for the [[Phantom Egg]]'s barrier in ''[[Sonic Mania]]''. | ||
}} | }} | ||
{{UnusedRow | {{UnusedRow | ||
| − | | | + | | content=[[File:Sonic3 MD Sound53.ogg]] |
| − | | desc= | + | | id=53 |
| + | | desc=Laser charging sound, used for the [[Barrier Eggman (Sonic & Knuckles)|Barrier Eggman]] mini-boss and the jumping spike balls in Lava Reef Zone Act 2. | ||
}} | }} | ||
{{UnusedRow | {{UnusedRow | ||
| − | | | + | | content=[[File:Sonic3 MD Sound54.ogg]] |
| − | | desc= | + | | id=54 |
| + | | desc=Laser firing sound, used for the Barrier Eggman mini-boss. | ||
}} | }} | ||
{{UnusedRow | {{UnusedRow | ||
| − | | | + | | content=[[File:Sonic3 MD Sound55.ogg]] |
| − | | desc= | + | | id=55 |
| + | | desc=Used for the pushable bricks in Sandopolis Zone as they ride across small black wheels. | ||
}} | }} | ||
{{UnusedRow | {{UnusedRow | ||
| − | | | + | | content=[[File:Sonic3 MD Sound5A.ogg]] |
| − | | desc= | + | | id=5A |
| + | | desc=Unused; sounds like something revving up. This would later be used in ''[[Sonic 3D: Flickies' Island]]''. | ||
}} | }} | ||
{{UnusedRow | {{UnusedRow | ||
| − | | | + | | content=[[File:Sonic3 MD Sound5C.ogg]] |
| − | | desc= | + | | id=5C |
| + | | desc=The sound of [[Mecha Sonic (Sonic & Knuckles boss)|Mecha Sonic]] short-circuiting after its defeat. | ||
}} | }} | ||
{{UnusedRow | {{UnusedRow | ||
| − | | | + | | content=[[File:Sonic3 MD Sound69.ogg]] |
| − | | desc= | + | | id=69 |
| + | | desc=Used when pushing bricks in Sandopolis Zone. | ||
}} | }} | ||
{{UnusedRow | {{UnusedRow | ||
| − | | | + | | content=[[File:Sonic3 MD Sound6B.ogg]] |
| − | | desc= | + | | id=6B |
| + | | desc=Unknown, possibly unused; sounds like a higher-pitched version of the sound heard when hitting an R, Up or Down block in the ''[[Sonic the Hedgehog (16-bit)|Sonic 1]]'' [[Special Stage (Sonic the Hedgehog 16-bit)|Special Stage]]. | ||
}} | }} | ||
{{UnusedRow | {{UnusedRow | ||
| − | | | + | | content=[[File:Sonic3 MD Sound6D.ogg]] |
| − | | desc= | + | | id=6D |
| + | | desc=Unused; sounds like a door closing. | ||
}} | }} | ||
{{UnusedRow | {{UnusedRow | ||
| − | | | + | | content=[[File:Sonic3 MD Sound7A.ogg]] |
| − | | desc= | + | | id=7A |
| + | | desc=The sound of the [[Hot Mobile]] emerging from lava. | ||
}} | }} | ||
{{UnusedRow | {{UnusedRow | ||
| − | | | + | | content=[[File:Sonic3 MD Sound7C.ogg]] |
| − | | desc= | + | | id=7C |
| + | | desc=Used by the magnetised platforms in Flying Battery Zone. | ||
}} | }} | ||
{{UnusedRow | {{UnusedRow | ||
| − | | | + | | content=[[File:Sonic3 MD Sound7D.ogg]] |
| − | | desc= | + | | id=7D |
| + | | desc=Unused; sounds like mild rattling. | ||
}} | }} | ||
{{UnusedRow | {{UnusedRow | ||
| − | | | + | | content=[[File:Sonic3 MD Sound84.ogg]] |
| − | | desc= | + | | id=84 |
| + | | desc=Unused; sounds like something charging up. Only seems to be referenced in some Zone with a high level ID which is composed of garbage data. | ||
}} | }} | ||
{{UnusedRow | {{UnusedRow | ||
| − | | | + | | content=[[File:Sonic3 MD Sound85.ogg]] |
| − | | desc= | + | | id=85 |
| + | | desc=Unused; sounds like it would have been used in cooperation with sound {{hex|84}}. | ||
}} | }} | ||
{{UnusedRow | {{UnusedRow | ||
| − | | | + | | content=[[File:Sonic3 MD Sound87.ogg]] |
| − | | desc= | + | | id=87 |
| + | | desc=The sound for bouncing on a mushroom in Mushroom Hill Zone. | ||
}} | }} | ||
{{UnusedRow | {{UnusedRow | ||
| − | | | + | | content=[[File:Sonic3 MD Sound88.ogg]] |
| − | | desc= | + | | id=88 |
| + | | desc=The sound for operating the pulley lifts in Mushroom Hill Zone. | ||
}} | }} | ||
{{UnusedRow | {{UnusedRow | ||
| − | | | + | | content=[[File:Sonic3 MD Sound89.ogg]] |
| − | | desc= | + | | id=89 |
| + | | desc=The sound used by the [[Jet Mobile]]'s weather-altering satellite dish. | ||
}} | }} | ||
{{UnusedRow | {{UnusedRow | ||
| − | | | + | | content=[[File:Sonic3 MD Sound8A.ogg]] |
| − | | desc= | + | | id=8A |
| + | | desc=The sound the [[Hyudoro]] from Sandopolis Zone make when they vanish. | ||
}} | }} | ||
{{UnusedRow | {{UnusedRow | ||
| − | | | + | | content=[[File:Sonic3 MD Sound8B.ogg]] |
| − | | desc= | + | | id=8B |
| + | | desc=The sound of [[Hey Ho]] chopping a log. | ||
}} | }} | ||
{{UnusedRow | {{UnusedRow | ||
| − | | | + | | content=[[File:Sonic3 MD Sound8C.ogg]] |
| − | | desc= | + | | id=8C |
| + | | desc=The sound of Hey Ho struggling to chop a log. | ||
}} | }} | ||
{{UnusedRow | {{UnusedRow | ||
| − | | | + | | content=[[File:Sonic3 MD Sound8D.ogg]] |
| − | | desc= | + | | id=8D |
| + | | desc=Unknown, possibly unused; a very quiet sound. | ||
}} | }} | ||
{{UnusedRow | {{UnusedRow | ||
| − | | | + | | content=[[File:Sonic3 MD Sound8E.ogg]] |
| − | | desc= | + | | id=8E |
| + | | desc=Unused; another rev-up sound. ''[[Sonic Origins]]'' uses this sound for the wheel switches in Marble Garden Zone. | ||
}} | }} | ||
{{UnusedRow | {{UnusedRow | ||
| − | | | + | | content=[[File:Sonic3 MD Sound8F.ogg]] |
| − | | desc= | + | | id=8F |
| + | | desc=The sound the door on the pyramid in Sandopolis Zone makes when it opens, and the doors in Lava Reef Zone. | ||
}} | }} | ||
{{UnusedRow | {{UnusedRow | ||
| − | | | + | | content=[[File:Sonic3 MD Sound90.ogg]] |
| − | | desc= | + | | id=90 |
| + | | desc=Door closing sound from Sandopolis Zone, and also the sound of Knuckles hitting the ground after his defeat. | ||
}} | }} | ||
{{UnusedRow | {{UnusedRow | ||
| − | | | + | | content=[[File:Sonic3 MD Sound92.ogg]] |
| − | | desc= | + | | id=92 |
| + | | desc=The sound of a Hyudoro appearing. | ||
}} | }} | ||
{{UnusedRow | {{UnusedRow | ||
| − | | | + | | content=[[File:Sonic3 MD Sound93.ogg]] |
| − | | desc= | + | | id=93 |
| + | | desc=The sound that plays when the armour on the [[Egg Golem]] comes back on. | ||
}} | }} | ||
{{UnusedRow | {{UnusedRow | ||
| − | | | + | | content=[[File:Sonic3 MD Sound95.ogg]] |
| − | | desc= | + | | id=95 |
| + | | desc=The sound of the giant hand appearing in the [[Heat Arms]] fight. | ||
}} | }} | ||
{{UnusedRow | {{UnusedRow | ||
| − | | | + | | content=[[File:Sonic3 MD Sound96.ogg]] |
| − | | desc= | + | | id=96 |
| + | | desc=The sound the giant spikeballs in Lava Reef Zone make when they roll around. | ||
}} | }} | ||
{{UnusedRow | {{UnusedRow | ||
| − | | | + | | content=[[File:Sonic3 MD Sound97.ogg]] |
| − | | desc= | + | | id=97 |
| + | | desc=The sound a [[Toxomister]] makes when it sprays its toxic gases. | ||
}} | }} | ||
{{UnusedRow | {{UnusedRow | ||
| − | | | + | | content=[[File:Sonic3 MD Sound98.ogg]] |
| − | | desc= | + | | id=98 |
| + | | desc=The sound of a falling stalactite in Lava Reef Zone. | ||
}} | }} | ||
{{UnusedRow | {{UnusedRow | ||
| − | | | + | | content=[[File:Sonic3 MD Sound99.ogg]] |
| − | | desc= | + | | id=99 |
| + | | desc=Unused; A small "tick" sound. | ||
}} | }} | ||
{{UnusedRow | {{UnusedRow | ||
| − | | | + | | content=[[File:Sonic3 MD Sound9A.ogg]] |
| − | | desc= | + | | id=9A |
| + | | desc=The sound of the pop-up springs from Sky Sanctuary Zone. | ||
}} | }} | ||
{{UnusedRow | {{UnusedRow | ||
| − | | | + | | content=[[File:Sonic3 MD Sound9B.ogg]] |
| − | | desc= | + | | id=9B |
| + | | desc=The sound of the Egg Golem taking a step forward. | ||
}} | }} | ||
{{UnusedRow | {{UnusedRow | ||
| − | | | + | | content=[[File:Sonic3 MD Sound9C.ogg]] |
| − | | desc= | + | | id=9C |
| + | | desc=The sound that plays when a [[Super Emerald]] awakens. | ||
}} | }} | ||
{{UnusedRow | {{UnusedRow | ||
| − | | | + | | content=[[File:Sonic3 MD Sound9D.ogg]] |
| − | | desc= | + | | id=9D |
| + | | desc=The sound of the missile reticles in the Lava Reef Act 2 boss area. | ||
}} | }} | ||
{{UnusedRow | {{UnusedRow | ||
| − | | | + | | content=[[File:Sonic3 MD Sound9E.ogg]] |
| − | | desc= | + | | id=9E |
| + | | desc=The sound of a platform breaking upon coming into contact with the Hot Mobile. | ||
}} | }} | ||
{{UnusedRow | {{UnusedRow | ||
| − | | | + | | content=[[File:Sonic3 MD SoundA0.ogg]] |
| − | | desc= | + | | id=A0 |
| + | | desc=The sound of the Hot Mobile firing a missile. | ||
}} | }} | ||
{{UnusedRow | {{UnusedRow | ||
| − | | | + | | content=[[File:Sonic3 MD SoundA1.ogg]] |
| − | | desc= | + | | id=A1 |
| + | | desc=Unused; a low-humming, unsettling sound. This sound effect is later used by the [[Hotaru Hi-Watt]] mini-boss in ''Sonic Mania''. | ||
}} | }} | ||
{{UnusedRow | {{UnusedRow | ||
| − | | | + | | content=[[File:Sonic3 MD SoundA2.ogg]] |
| − | | desc= | + | | id=A2 |
| + | | desc=The sound of the speed launchers in Flying Battery Zone and Death Egg Zone. | ||
}} | }} | ||
{{UnusedRow | {{UnusedRow | ||
| − | | | + | | content=[[File:Sonic3 MD SoundA3.ogg]] |
| − | | desc= | + | | id=A3 |
| + | | desc=The sound for Death Egg Zone's swinging platforms. | ||
}} | }} | ||
{{UnusedRow | {{UnusedRow | ||
| − | | | + | | content=[[File:Sonic3 MD SoundA4.ogg]] |
| − | | desc= | + | | id=A4 |
| + | | desc=The sound that Mecha Sonic makes when he goes [[Super Mecha Sonic|super]]. | ||
}} | }} | ||
{{UnusedRow | {{UnusedRow | ||
| − | | | + | | content=[[File:Sonic3 MD SoundA5.ogg]] |
| − | | desc= | + | | id=A5 |
| + | | desc=Unused; sounds like something rising or powering up? | ||
}} | }} | ||
{{UnusedRow | {{UnusedRow | ||
| − | | | + | | content=[[File:Sonic3 MD SoundA6.ogg]] |
| − | | desc= | + | | id=A6 |
| + | | desc=Unused; another dashing noise. | ||
}} | }} | ||
{{UnusedRow | {{UnusedRow | ||
| − | | | + | | content=[[File:Sonic3 MD SoundAE.ogg]] |
| − | | desc= | + | | id=AE |
| + | | desc=The sound used by the seesaw mushroom in Mushroom Hill Zone, and also in the Bonus Stages. | ||
}} | }} | ||
{{UnusedRow | {{UnusedRow | ||
| − | | | + | | content=[[File:Sonic3 MD SoundB5.ogg]] |
| − | | desc= | + | | id=B5 |
| + | | desc=A leftover from ''Sonic 1'' that was used for the breakable diamonds in the Special Stage. | ||
}} | }} | ||
{{UnusedRow | {{UnusedRow | ||
| − | | | + | | content=[[File:Sonic3 MD SoundBC.ogg]] |
| − | | desc= | + | | id=BC |
| + | | desc=Unused? Possible waterfall sound effect. | ||
}} | }} | ||
{{UnusedRow | {{UnusedRow | ||
| − | | | + | | content=[[File:Sonic3 MD SoundC2.ogg]] |
| − | | desc= | + | | id=C2 |
| + | | desc=The sound of the flamethrowers in Flying Battery Zone and Lava Reef Zone. | ||
}} | }} | ||
{{UnusedRow | {{UnusedRow | ||
| − | | | + | | content=[[File:Sonic3 MD SoundC4.ogg]] |
| − | | desc= | + | | id=C4 |
| + | | desc=The sound [[Red Eye]] makes when it gets angry. | ||
}} | }} | ||
{{UnusedRow | {{UnusedRow | ||
| − | | | + | | content=[[File:Sonic3 MD SoundC5.ogg]] |
| − | | desc= | + | | id=C5 |
| + | | desc=Unused; sounds like it would be used in coordination with sound {{hex|C4}}. ''Sonic Origins'' uses this sound when Red Eye stops firing its laser. | ||
}} | }} | ||
{{UnusedRow | {{UnusedRow | ||
| − | | | + | | content=[[File:Sonic3 MD SoundCA.ogg]] |
| − | | desc= | + | | id=CA |
| + | | desc=The sound of the light beam transportation systems in Death Egg Zone. | ||
}} | }} | ||
{{UnusedRow | {{UnusedRow | ||
| − | | | + | | content=[[File:Sonic3 MD SoundCE.ogg]] |
| − | | desc= | + | | id=CE |
| + | | desc=The gusts of wind from Mushroom Hill Zone. Also used in Knuckles' ending after Super Mecha Sonic explodes. | ||
}} | }} | ||
{{UnusedRow | {{UnusedRow | ||
| − | | | + | | content=[[File:Sonic3 MD SoundCF.ogg]] |
| − | | desc= | + | | id=CF |
| + | | desc=A louder version of {{hex|CE}} that might be unused even in ''Sonic 3 & Knuckles''. | ||
}} | }} | ||
{{UnusedRow | {{UnusedRow | ||
| − | | | + | | content=[[File:Sonic3 MD SoundD1.ogg]] |
| − | | desc= | + | | id=D1 |
| + | | desc=Possibly unused; another very faint sound that may sound like static. | ||
}} | }} | ||
{{UnusedRow | {{UnusedRow | ||
| − | | | + | | content=[[File:Sonic3 MD SoundD3.ogg]] |
| − | | desc= | + | | id=D3 |
| + | | desc=The sound used by the Death Egg as it flies through Sky Sanctuary Zone. | ||
}} | }} | ||
{{UnusedRow | {{UnusedRow | ||
| − | | | + | | content=[[File:Sonic3 MD SoundD4.ogg]] |
| − | | desc= | + | | id=D4 |
| + | | desc=Used by the bouncing puzzle room in Death Egg Zone. | ||
}} | }} | ||
{{UnusedRow | {{UnusedRow | ||
| − | | | + | | content=[[File:Sonic3 MD SoundD5.ogg]] |
| − | | desc= | + | | id=D5 |
| + | | desc=Used when the lava falls from Lava Reef Zone. Repeatedly pressing the {{C}} button when playing this sound in the Sound Test makes it play longer. | ||
}} | }} | ||
{{UnusedRow | {{UnusedRow | ||
| − | | | + | | content=[[File:Sonic3 MD SoundD6.ogg]] |
| − | | desc= | + | | id=D6 |
| + | | desc=Unknown/unused; rumbling/electric sound? | ||
}} | }} | ||
{{UnusedRow | {{UnusedRow | ||
| − | | | + | | content=[[File:Sonic3 MD SoundD7.ogg]] |
| − | | desc= | + | | id=D7 |
| + | | desc=The sound of the elevators in Lava Reef Zone and Death Egg Zone. | ||
}} | }} | ||
{{UnusedRow | {{UnusedRow | ||
| − | | | + | | content=[[File:Sonic3 MD SoundD8.ogg]] |
| − | | desc= | + | | id=D8 |
| + | | desc=Unused; sounds like a screeching warning siren. Repeatedly pressing the {{C}} button when playing this sound in the Sound Test makes it play longer. | ||
}} | }} | ||
{{UnusedRow | {{UnusedRow | ||
| − | | | + | | content=[[File:Sonic3 MD SoundD9.ogg]] |
| − | | desc= | + | | id=D9 |
| + | | desc=The sound the electromagnets in Flying Battery Zone and the black gravity spheres in Death Egg Zone make. | ||
}} | }} | ||
{{UnusedRow | {{UnusedRow | ||
| − | | | + | | content=[[File:Sonic3 MD SoundDA.ogg]] |
| − | | desc= | + | | id=DA |
| + | | desc=The sound of the wind trap Knuckles activates in Mushroom Hill Zone. | ||
}} | }} | ||
{{UnusedRow | {{UnusedRow | ||
| − | | | + | | content=[[File:Sonic3 MD SoundDC-DF.ogg]] |
| − | | | + | | id=DC-DF |
| + | | desc=All of these sound IDs are duplicates of {{hex|DB}} (heard when running across water in [[Hydrocity Zone]]) and are likely placeholders. ''Sonic & Knuckles'' replaces {{hex|DC}} with its credits medley. | ||
}} | }} | ||
}} | }} | ||
| Line 708: | Line 848: | ||
===Launch Base Zone Act 1 water levels=== | ===Launch Base Zone Act 1 water levels=== | ||
{{HiddenContent | {{HiddenContent | ||
| − | | image1= | + | | image1=Water_in_Launch_base_zone_act_1.png |
| − | | desc=Launch Base Zone Act 1 has five spots that raise or lower the water level, suggesting that it may have had water in it like Act 2.{{ref|https://tcrf.net/Sonic_the_Hedgehog_3#Water_Levels_in_Launch_Base_Zone_Act_1}} To re-enable the water, use patch code '''FFF730:0100 and change the VDP '''0x04''' to '''0x14'''. The water levels can be found in the ROM at address '''0x5350''': | + | | desc=Launch Base Zone Act 1 has five spots that raise or lower the water level, suggesting that it may have had water in it like Act 2.{{ref|https://tcrf.net/Sonic_the_Hedgehog_3#Water_Levels_in_Launch_Base_Zone_Act_1}} To re-enable the water, use patch code '''FFF730:0100''' and change the VDP '''0x04''' to '''0x14'''. The water levels can be found in the ROM at address '''0x5350''': |
*The first level exists at ROM address '''0x51EE''' and is supposed to raise the water level to '''0A80''', but it doesn't work. | *The first level exists at ROM address '''0x51EE''' and is supposed to raise the water level to '''0A80''', but it doesn't work. | ||
*The second level starts at coordinates '''0000''' to '''0E00''' and raises the water to '''0B00'''. | *The second level starts at coordinates '''0000''' to '''0E00''' and raises the water to '''0B00'''. | ||
| Line 715: | Line 855: | ||
*The fourth level starts at coordinates '''2340''' to '''2C00''' and lowers the level to '''0AC8'''. | *The fourth level starts at coordinates '''2340''' to '''2C00''' and lowers the level to '''0AC8'''. | ||
*The fifth level disappears the water, starting at coordinates '''0AC8''' to '''FFFF'''. | *The fifth level disappears the water, starting at coordinates '''0AC8''' to '''FFFF'''. | ||
| + | }} | ||
| + | |||
| + | ===Competition mode title cards=== | ||
| + | {{HiddenContent | ||
| + | | image1=Sonic3 MD Competition TitleCards1.png | ||
| + | | image2=Sonic3 MD Competition TitleCards2.png | ||
| + | | desc=The title card object has definitions for Competition mode levels that are fully programmed, but hidden behind a flag which is disabled.{{ref|https://s3unlocked.blogspot.com/2017/08/welcome-to-next-level.html}} The following codes can be used to re-enable the title cards: | ||
| + | *'''02CA90:6030''' - Enable 2P zone title cards | ||
| + | *'''02CACA:FE10''' - Pick title card by Current_zone | ||
| + | *'''02CB42:004D''' - Set art_tile instead of render_flags | ||
| + | *'''02CB44:000B''' - Set art_tile instead of render_flags | ||
| + | When enabled, VRAM conflicts with the level graphics will occur which causes the title cards to display incorrectly. | ||
}} | }} | ||
| Line 1,035: | Line 1,187: | ||
*80:No change in movement or direction allowed while on ground | *80:No change in movement or direction allowed while on ground | ||
Add together these hex values for the shield you want<br> | Add together these hex values for the shield you want<br> | ||
| − | Example: 2(Invuln)+10(Fire Shield)+20(Lightning Shield)+40(Water Shield)=72<br> | + | Example: 2(Invuln)+10(Fire Shield)+20(Lightning Shield)+40(Water Shield)<nowiki>=</nowiki>72<br> |
Having just a shield will not protect you from losing rings. | Having just a shield will not protect you from losing rings. | ||
}} | }} | ||
| Line 1,059: | Line 1,211: | ||
*14 - Glowing Spheres - Bonus Stage (incomplete) | *14 - Glowing Spheres - Bonus Stage (incomplete) | ||
*15 - Slot Machine - Bonus Stage (incomplete) | *15 - Slot Machine - Bonus Stage (incomplete) | ||
| − | *16 - Act 1 = Lava Reef boss. Act 2 = Hidden Palace (vastly incomplete) | + | *16 - Act 1 <nowiki>=</nowiki> Lava Reef boss. Act 2 <nowiki>=</nowiki> Hidden Palace (vastly incomplete) |
| − | *17 - Act 1 = Death Egg boss. Act 2 = other Hidden Palace (vastly incomplete) | + | *17 - Act 1 <nowiki>=</nowiki> Death Egg boss. Act 2 <nowiki>=</nowiki> other Hidden Palace (vastly incomplete) |
Garbled in 1P, normal in 2P | Garbled in 1P, normal in 2P | ||
*OE - Azure Lake | *OE - Azure Lake | ||
| Line 1,068: | Line 1,220: | ||
*12 - Endless Mine | *12 - Endless Mine | ||
}} | }} | ||
| − | {{CodeRow|FFF711:??|HUD Display Modifier (00 = Off, 01 = On).}} | + | {{CodeRow|FFF711:??|HUD Display Modifier (00 <nowiki>=</nowiki> Off, 01 <nowiki>=</nowiki> On).}} |
{{CodeRow|FFFF95:00|Special Ring Always Available.}} | {{CodeRow|FFFF95:00|Special Ring Always Available.}} | ||
| + | {{CodeRow|FFF600:00YY|Game Mode Modifier (YY: Mode). | ||
| + | *00 - SEGA Screen (redirects to the Title Screen) | ||
| + | *04 - Title Screen | ||
| + | *08 - Demo | ||
| + | *0C - Level | ||
| + | *10 - Null (redirects to the Title Screen) | ||
| + | *14 - Continue Screen | ||
| + | *18 - Null (redirects to the Title Screen) | ||
| + | *1C - Sonic 2 2P Select Menu | ||
| + | *20 - Credits | ||
| + | *24 - Sonic 2 Options Menu | ||
| + | *28 - Level Select | ||
| + | *2C - Special Stage | ||
| + | *30 - Special Stage | ||
| + | *34 - Special Stage | ||
| + | *38 - Competition Mode Menu | ||
| + | *3C - Competition Mode Player Select | ||
| + | *40 - Competition Mode Level Select | ||
| + | *44 - Competition Mode Results | ||
| + | *48 - Special Stage Results | ||
| + | *4C - Data Select | ||
| + | *50 - Time Attack Results | ||
| + | *8C - Pre-Level}} | ||
| + | }} | ||
}} | }} | ||
Latest revision as of 13:21, 21 April 2024
- Back to: Sonic the Hedgehog 3.

|
This article is outdated. Due to changing events, this article is either no longer correct or needs information added to it to make it complete. Please update it so that it meets current knowledge. |
Contents
- 1 Level select + Debug mode
- 2 All Chaos Emeralds
- 3 Eighth Special Stage
- 4 Night mode
- 5 Unused content
- 6 True level order/Unused levels
- 7 SEGA screen technical details
- 8 Cheat device codes
- 9 References
Level select + Debug mode
Right after the Sega logo's screen darkens and Sonic starts jumping towards the screen, quickly press ![]()
![]()
![]()
![]()
![]()
![]()
![]()
![]() . This code is notoriously hard to do, due to the weird frame windows, but if performed correctly, the Ring collection sound will play. In the Sonic Jam version of the game the code is entered on the title screen and no precise timing is required. Press
. This code is notoriously hard to do, due to the weird frame windows, but if performed correctly, the Ring collection sound will play. In the Sonic Jam version of the game the code is entered on the title screen and no precise timing is required. Press ![]() twice (or
twice (or ![]() once) to see a "Sound Test" option on the title screen.
once) to see a "Sound Test" option on the title screen.
An alternative way to unlock the level select, which can be performed on real hardware, is to activate the level select in Sonic the Hedgehog 2, then remove the Sonic 2 cartridge without turning the power off, insert the Sonic 3 cartridge, and reset.
Pressing ![]() on the level select screen increments a counter that determines the players' characters in the Competition mode Zones, with the first controller incrementing the left counter and the second counter incrementing the right:
on the level select screen increments a counter that determines the players' characters in the Competition mode Zones, with the first controller incrementing the left counter and the second counter incrementing the right:
This cheat also enables debug mode, which is activated by holding ![]() and pressing
and pressing ![]() to choose a level. A Game Genie code for accessing the level select is also available. During gameplay:
to choose a level. A Game Genie code for accessing the level select is also available. During gameplay:
- Press
 +
+ to cycle through all mapping frames of the character when in normal mode.
 - Press to toggle normal and debug mode.
- Press
 to advance forward through the debug object list.
 - Press + to advance backwards through the debug object list.
- Press to place the selected object at the current coordinates.
- Press
- During pause press to fade to black and restart from the level select screen.
- During pause press and hold to enable slow-motion (this proceeds at half-speed for as long as the button is held down).
- During pause press to advance one frame.
- Current coordinates are designated by the top line of hex digits in the HUD.
- Viewport coordinates are designated by the bottom line of hex digits in the HUD.
The check for the sound test code from the 1993-11-03 and Sonic 3C 0408 prototypes (01, 03, 05, 07) remains, but as debug mode is enabled with the level select it is rendered pointless here.
All Chaos Emeralds
Play sounds 02, 04, 05, 06 in the sound test. A Chaos Emerald sound will confirm correct entry.
Eighth Special Stage


Go the level select, play any sound between 00-07, and press ![]() +
+ ![]() on the "Special Stage 2" selection to choose a particular Special Stage. Playing 07 will load an eighth Special Stage layout that is not used in normal play.
on the "Special Stage 2" selection to choose a particular Special Stage. Playing 07 will load an eighth Special Stage layout that is not used in normal play.
This Special Stage consists of a long spiral towards the center. There are no Rings to collect, which will make getting a Perfect Bonus impossible. Clearing this Special Stage awards a grey Chaos Emerald that has no special effect in-game, and does not appear on the results tally in any form other than a score increase.
Night mode

Enable the level select, then select a Zone and press ![]() +
+![]() .
.
Unused content
Art
| Art | Description |
|---|---|
| Sonic in his signature "waiting" pose, but instead of pointing towards the direction he's facing, he falls asleep from boredom instead. Never used in-game. Sonic Origins uses this animation when Sonic has been left idle for nearly a minute, as does the Game.com version of Sonic Jam. A modified version of this animation exists in Sonic X for the Leapster. | |
| Sonic whistling. Not used in-game. | |
| A black & white version of Sonic's death sprite, similar to the one seen in the previous two games. It's still not used. | |
| These animations would later be used for Flying Battery Zone's monkey bars in Sonic & Knuckles. | |
| These animations would later be used for Knuckles' wind trap in Sonic & Knuckles. | |
| These sprites would later be used for swinging off the poles in Mushroom Hill Zone in Sonic & Knuckles. | |
| These sprites would later be used for cascading down the towers in Sandopolis Zone in Sonic & Knuckles. | |
| Leftover animation from the continue screen in Sonic 2. | |
| Knuckles on the Data Select screen. This can be seen when trying to play as Knuckles in Sonic 3. | |
| Leftover sprites for Knuckles on the continue screen. Later used in Sonic & Knuckles. | |
| Knuckles text which would have been used upon Act and Special Stage completion. This can be seen in-game by making a save file for "Knuckles". | |
| Knuckles's life icon also remains in the game, albeit unused. It would later be used in Sonic & Knuckles. | |
| Unused Gliding/Climbing animations exist for Knuckles in two-player mode, even though he doesn't have the ability to glide or climb while in two-player. | |
| Smaller rendition of the Death Egg. It seems to be part of a Death Egg hologram projector which was also unused in Sonic & Knuckles. | |
| Diagonal frames of the Penguinator from IceCap Zone. These can be seen for a split second if they are placed on the large hill at the beginning of Act 1 using debug mode. | |
| Unused running frame where Eggman has a different facial expression. | |
| Eggman sprites normally used for the Barrier Eggman mini-boss. | |
| Eggman sprites used for the Hang Mobile. While these would be used in Sonic & Knuckles, one of the sprites would remain unused during the actual boss fight due to a coding error. | |
| Graphics for a shadow found among the graphics for the Tornado in Angel Island Zone. This may have appeared under the Tornado as it approached the island. | |
| A button-like object that is loaded early on in the space used for the burning Angel Island Zone stage graphics. | |
| This lightbulb is normally found in Carnival Night Zone Act 2 when Knuckles switches off the power, but it has an unused function: if it becomes submerged in water, it will explode and display the sprite seen on the right. Since it isn't placed anywhere that gets submerged in water, it is never seen in normal play, requiring the player to use debug mode to place it in water and see it there. | |
| The teleporter normally used by Knuckles at the start of IceCap Zone Act 1. | |
| A large ice boulder that appears to have been meant for IceCap Zone. | |
| This sprite is actually used by the Beam Rocket, but it is obscured and cannot be seen. | |
| The bomb used by Eggrobo in cutscenes in Sonic & Knuckles and Sonic 3 & Knuckles. | |
| The attachment on the Egg Mobile which Eggrobo would use to drop a bomb on Knuckles in Launch Base Zone Act 2. This graphic was used in the Sonic 3C 0408, Sonic 3C 0517 and Sonic & Knuckles 0525 prototypes, but is not used in the final Sonic 3 & Knuckles. | |
| Graphics and palette data for the yellow spheres from the Sonic & Knuckles Special Stages. While they are loaded every time the player enters a Special Stage, coding doesn't exist for them yet and thus cannot be encountered. | |
| An unused Data Select icon for Flying Battery Zone, from the days when Sonic 3 and Sonic & Knuckles were to be a single game. The Sonic 3 icon can be found in both the PC and Mega Drive versions of Sonic 3, and can be viewed by hacking the SRAM for the game to access level slot $04, or by using the PAR codes 00C324:601E and 00C338:6002 to view the icon in a completed game save slot while scrolling through the levels. The Sonic 3 & Knuckles icon is displayed here for comparison. | |
| Icons originally used to track the players' progress in Competition mode, leftover from the November 3rd prototype. | |
| An unknown graphic that may resemble some kind of medal for Competition mode. No known palette exists for this graphic. | |
| Leftover signpost sprites from the November 3rd prototype that remain in both the final game and Sonic and Knuckles. |


Objects
Placeable in edit mode
| Art | Description |
|---|---|
| An "S" monitor, which transforms Sonic into Super Sonic when broken. | |
| A breakable wall in Angel Island Zone Act 2, which can only be placed with debug mode and is destroyed with a Spin Dash on the ground. A similar object is used as a wall that is opened with a switch. | |
| A button of unknown purpose. It can be placed in either Act of Carnival Night Zone via debug mode, but it doesn't appear to do anything. Also unused in Sonic 3 & Knuckles. | |
| An unknown Ring-like object that appears to spawn slope collision when placed. It is placeable in Carnival Night Zone. | |
| A glowing block that can be placed in either Act of IceCap Zone via debug mode. Jumping on it destroys it like the ice blocks. Also unused in Sonic 3 & Knuckles. | |
| A set of spikes for Competition Mode. However, spikes do not appear in any of the five Zones, but they can be placed with debug mode. |
Red revolving spheres

This is a spinning mass of red spheres, placeable by debug mode in the first part of Angel Island Zone Act 1. The spheres look similar to those appearing in the game's Special Stage. When it is placed, many palette and VRAM complications occur in the level, and the game slows down considerably. It can be manipulated with the second controller:
 — Rotates the object vertically.
 — Rotates the object horizontally.
 /
/ — Moves the object up or down.
- / — Changes the object's size.
- — Rotates the object sideways.
 — Toggles automatic rotation.
This object was originally used to test the 3D mechanics of the Special Stage in the November 3rd prototype.
Others
| Art | ID | Offset | Description |
|---|---|---|---|
| A blank monitor that harms the player when broken. Set a monitor subtype to 00 to view it in-game. | |||
| Knuckles' version of the Drill Mobile for Marble Garden Zone Act 2. It functions identically to how it does in Sonic 3 & Knuckles, except it is invincible. | |||
| 3D | A spring that moves up and down, which was intended for Flying Battery Zone. | ||
| Blaster, who is intended for Flying Battery Zone with leftover code, and can be placed with debug mode if the game is hacked to load Flying Battery Zone. Its projectiles can be destroyed like regular Badniks. | |||
| Technosqueek, who is intended for Flying Battery Zone with leftover code, and can be placed with debug mode if the game is hacked to load Flying Battery Zone. For some reason, placing a sideways one will crash the game. | |||
| Owing to its removal, Flying Battery Zone still retains its bosses within the ROM. Gapsule is nearly identical to its appearance in Sonic & Knuckles, albeit with a slightly different palette. It can be found by hacking the game to load Flying Battery Zone Act 1 and exploring the level. | |||
| The Barrier Eggman sub-boss for Flying Battery Zone Act 2. It functions nearly identically to how it does in Sonic & Knuckles, except it has no sound effects. For reasons unknown, it is not actually placed in Act 2. | |||
| The Hang Mobile boss for Flying Battery Zone Act 2. It is slightly different in terms of coding and has no sound effects. | |||
| An unused Eggman object discovered by Nemesis that isn't called by any routine. It appears to be nothing more than Eggman flying away towards the horizon. It may have been intended for the cutscene after defeating the Big Arm fight as the object is located between the LBZ2 bosses and the falling Death Egg in the ROM, and its animation somewhat fits with the way the Death Egg falls, however the Death Egg noticeably falls on the opposite direction of where Eggman goes in the actual game. This can be re-enabled using the PAR code 05165A:04F2[2].
The object and its associated sprites were later used in Sonic Origins. | |||
| A flashing S gumball for the Gumball Machine Bonus Stage, which can also be seen hidden behind the other gumballs inside the machine. If the gumball object's subtype is manually set to 08, it'll use a unique item collection routine that sets a RAM address to 07, which has nothing to do with super transformations and is cleared on level load.[3] | |||
| 12 | $1C6A0 | A glitched platform that appears to belong to Launch Base Zone, as its graphics appear to be the most correct there. | |
| 1A | $1DFCE | A seesaw-like cannon that locks the player in the center of the object, and propels them extremely far when pressing a button. | |
| 1C | $1E6C6 | A strange, spinning object that hurts the player when jumped on, and swings when hit from underneath. | |
| 1D | $1C228 | A Launch Base Zone platform that can be grabbed from underneath. | |
| 27 | An object originally used in Sonic 1 and Sonic 2 to damage the player when they touched lava, except it no longer functions here. Its size can be changed by altering its subtype. |

Level chunks
Angel Island Zone
Hydrocity Zone
Marble Garden Zone
Carnival Night Zone
IceCap Zone
Launch Base Zone
Audio
Music
| Audio | ID | Description |
|---|---|---|
| 09 | Flying Battery Zone Act 1. The loop point in the "echo" track of the lead instrument is set slightly later than the rest of the tracks. This leads to the song falling further and further out of sync each time the song loops. This was fixed in Sonic & Knuckles and Sonic 3 & Knuckles. | |
| 0A | Flying Battery Zone Act 2. | |
| 0F | Mushroom Hill/Valley Zone Act 1. | |
| 10 | Mushroom Hill/Valley Zone Act 2. | |
| 11 | Sandopolis Zone Act 1. | |
| 12 | Sandopolis Zone Act 2. | |
| 13 | Lava Reef Zone Act 1. | |
| 14 | Lava Reef Zone Act 2/Hidden Palace Zone. | |
| 15 | Sky Sanctuary Zone. | |
| 16 | Death Egg Zone Act 1. | |
| 17 | Death Egg Zone Act 2. | |
| 18 | Sonic & Knuckles Act 1 Boss. Not totally unused as it can be heard while fighting the Big Shaker or Screw Mobile by jumping out of the water after the drowning music starts. | |
| 1A | The Doomsday Zone. | |
| 1B | Glowing Spheres Bonus Stage. | |
| 1D | Slot Machine Bonus Stage. |
Sound effects
Many of these sound effects would see use in Sonic & Knuckles and Sonic 3 & Knuckles, though some of these sounds would also be unused there.
| Audio | ID | Description |
|---|---|---|
| 3A, 71 | Shield sound leftover from Sonic the Hedgehog 2 | |
| 40 | Unused; an electric zap heard among the Shield sound effects. This sound would later be used for the Thunder Shield in Sonic Generations and Sonic Lost World, and for the Phantom Egg's barrier in Sonic Mania. | |
| 53 | Laser charging sound, used for the Barrier Eggman mini-boss and the jumping spike balls in Lava Reef Zone Act 2. | |
| 54 | Laser firing sound, used for the Barrier Eggman mini-boss. | |
| 55 | Used for the pushable bricks in Sandopolis Zone as they ride across small black wheels. | |
| 5A | Unused; sounds like something revving up. This would later be used in Sonic 3D: Flickies' Island. | |
| 5C | The sound of Mecha Sonic short-circuiting after its defeat. | |
| 69 | Used when pushing bricks in Sandopolis Zone. | |
| 6B | Unknown, possibly unused; sounds like a higher-pitched version of the sound heard when hitting an R, Up or Down block in the Sonic 1 Special Stage. | |
| 6D | Unused; sounds like a door closing. | |
| 7A | The sound of the Hot Mobile emerging from lava. | |
| 7C | Used by the magnetised platforms in Flying Battery Zone. | |
| 7D | Unused; sounds like mild rattling. | |
| 84 | Unused; sounds like something charging up. Only seems to be referenced in some Zone with a high level ID which is composed of garbage data. | |
| 85 | Unused; sounds like it would have been used in cooperation with sound 84. | |
| 87 | The sound for bouncing on a mushroom in Mushroom Hill Zone. | |
| 88 | The sound for operating the pulley lifts in Mushroom Hill Zone. | |
| 89 | The sound used by the Jet Mobile's weather-altering satellite dish. | |
| 8A | The sound the Hyudoro from Sandopolis Zone make when they vanish. | |
| 8B | The sound of Hey Ho chopping a log. | |
| 8C | The sound of Hey Ho struggling to chop a log. | |
| 8D | Unknown, possibly unused; a very quiet sound. | |
| 8E | Unused; another rev-up sound. Sonic Origins uses this sound for the wheel switches in Marble Garden Zone. | |
| 8F | The sound the door on the pyramid in Sandopolis Zone makes when it opens, and the doors in Lava Reef Zone. | |
| 90 | Door closing sound from Sandopolis Zone, and also the sound of Knuckles hitting the ground after his defeat. | |
| 92 | The sound of a Hyudoro appearing. | |
| 93 | The sound that plays when the armour on the Egg Golem comes back on. | |
| 95 | The sound of the giant hand appearing in the Heat Arms fight. | |
| 96 | The sound the giant spikeballs in Lava Reef Zone make when they roll around. | |
| 97 | The sound a Toxomister makes when it sprays its toxic gases. | |
| 98 | The sound of a falling stalactite in Lava Reef Zone. | |
| 99 | Unused; A small "tick" sound. | |
| 9A | The sound of the pop-up springs from Sky Sanctuary Zone. | |
| 9B | The sound of the Egg Golem taking a step forward. | |
| 9C | The sound that plays when a Super Emerald awakens. | |
| 9D | The sound of the missile reticles in the Lava Reef Act 2 boss area. | |
| 9E | The sound of a platform breaking upon coming into contact with the Hot Mobile. | |
| A0 | The sound of the Hot Mobile firing a missile. | |
| A1 | Unused; a low-humming, unsettling sound. This sound effect is later used by the Hotaru Hi-Watt mini-boss in Sonic Mania. | |
| A2 | The sound of the speed launchers in Flying Battery Zone and Death Egg Zone. | |
| A3 | The sound for Death Egg Zone's swinging platforms. | |
| A4 | The sound that Mecha Sonic makes when he goes super. | |
| A5 | Unused; sounds like something rising or powering up? | |
| A6 | Unused; another dashing noise. | |
| AE | The sound used by the seesaw mushroom in Mushroom Hill Zone, and also in the Bonus Stages. | |
| B5 | A leftover from Sonic 1 that was used for the breakable diamonds in the Special Stage. | |
| BC | Unused? Possible waterfall sound effect. | |
| C2 | The sound of the flamethrowers in Flying Battery Zone and Lava Reef Zone. | |
| C4 | The sound Red Eye makes when it gets angry. | |
| C5 | Unused; sounds like it would be used in coordination with sound C4. Sonic Origins uses this sound when Red Eye stops firing its laser. | |
| CA | The sound of the light beam transportation systems in Death Egg Zone. | |
| CE | The gusts of wind from Mushroom Hill Zone. Also used in Knuckles' ending after Super Mecha Sonic explodes. | |
| CF | A louder version of CE that might be unused even in Sonic 3 & Knuckles. | |
| D1 | Possibly unused; another very faint sound that may sound like static. | |
| D3 | The sound used by the Death Egg as it flies through Sky Sanctuary Zone. | |
| D4 | Used by the bouncing puzzle room in Death Egg Zone. | |
| D5 | Used when the lava falls from Lava Reef Zone. Repeatedly pressing the | |
| D6 | Unknown/unused; rumbling/electric sound? | |
| D7 | The sound of the elevators in Lava Reef Zone and Death Egg Zone. | |
| D8 | Unused; sounds like a screeching warning siren. Repeatedly pressing the | |
| D9 | The sound the electromagnets in Flying Battery Zone and the black gravity spheres in Death Egg Zone make. | |
| DA | The sound of the wind trap Knuckles activates in Mushroom Hill Zone. | |
| DC-DF | All of these sound IDs are duplicates of DB (heard when running across water in Hydrocity Zone) and are likely placeholders. Sonic & Knuckles replaces DC with its credits medley. |
Palettes
| Palette | Description |
|---|---|
| The palettes for Sonic 2's Sega screen, found at offset 08C134. | |
| Sonic and Tails' palette for Sonic 2's title screen, found at offset 08C1B4. | |
| For some reason, the palettes from the level select screen of the Sonic 2 prototypes can be found at offset 08C1D4. | |
| An underwater palette that might have been part of the palette used for the removed water in Launch Base Zone Act 1, found at offset 08CB14. Does not include colours for Sonic and Tails underwater. | |
| An early palette for the Glowing Spheres Bonus Stage, found at offset 08CDB4. It is exactly the same as in the 1993-11-03 and Sonic 3C 0408 prototypes. | |
| An early palette for the Slot Machine Bonus Stage, found at offset 08CE14. It is exactly the same as in the 1993-11-03 prototype, and is quite different from the Sonic 3C and Sonic & Knuckles prototypes. | |
| The palette cycle for the lava in Lava Reef Zone, found at offset 002EFE. It can be seen in-game if Lava Reef is accessed in this game. | |
| The palette cycle for the glowing background in Lava Reef Zone, found at offset 002F7E. It can be seen in-game if Lava Reef is accessed in this game. | |
| Duplicates of palettes used in Angel Island Zone Act 2 and IceCap Zone Act 2 respectively, found at offsets 05275C and 05277C. | |
| Knuckles' player palette used in Sonic & Knuckles and Sonic 3 & Knuckles, found at offset 08C2F6. |
Knuckles


Some data for Knuckles seems to be in the game still. Using Game Genie codes ASCA-AAHC + ASCA-BA9Y created by LocalH, the player can select Knuckles when starting a new game, using Knuckles' unused character select icon. They will still play as Sonic, but Knuckles' Continue icon and name graphic for results tallies will be used, and the goal signpost will stop on Knuckles. The player can create a save file while using the codes, and the unused values will save, therefore they can play as "Knuckles" without needing to use the codes again.
Patch code FFFA81:0001[4] will make some of the bosses use behaviours normally reserved for Knuckles: Fire Breath will shoot bombs, the Screw Mobile will not fly down towards the water when creating a twister, and a spiked pillar will appear when fighting the Tunnelbot. After defeating the Beam Rocket, the game will attempt to play Knuckles' bomb cutscene in a broken form: the bomb will be in a corrupted state, and nothing else happens after the cutscene finishes.
Patch code FFB038:0200[5] adds Knuckles' ability to break through certain barriers to access his exclusive routes, but will disable the Insta-Shield as Knuckles does not have the move. This doesn't work in IceCap Zone and will result in map boundary glitches.
Surfboard intro


An unused intro sequence that was originally used in the November 3rd prototype remains in the ROM, in which Sonic surfs onto Angel Island, rather than riding in on the Tornado and becoming Super Sonic. The object used for this intro can be spawned in Angel Island Zone Act 1 via debug mode, but doing so will corrupt Sonic's sprites as it shares its VRAM address with the Sonic object. The sprites are based on Sonic 2's style, rather than those of the final Sonic 3; also shown here are the sprites used when Sonic jumps off the board:
![]()

This savestate (info) (45 kB) will allow you to see the full sequence in action (thanks to Nemesis). Another way to see the full sequence is to use the following PAR codes created by Fred Bronze[6]:
- 004DF0:0002 + 004DF2:0B0E will enable the intro sequence, but some of the graphics will be wrong as the necessary graphics are no longer in the PLC.
- 05B084:0002 + 05B086:0014 + 05B088:86E0 + 05B08A:A520 + 05B08C:0014 + 05B08E:81A0 + 05B090:7A20 + 05B092:0014 + 05B094:8978 + 05B096:B0A0 + 00477A:7000 will add the required graphics to PLC 0 and make the intro load it.
- Finally, 020D3A:0004 + 020D3C:48B0 will make the intro load the title card and HUD when it finishes.
Launch Base Zone Act 1 water levels

Launch Base Zone Act 1 has five spots that raise or lower the water level, suggesting that it may have had water in it like Act 2.[7] To re-enable the water, use patch code FFF730:0100 and change the VDP 0x04 to 0x14. The water levels can be found in the ROM at address 0x5350:
- The first level exists at ROM address 0x51EE and is supposed to raise the water level to 0A80, but it doesn't work.
- The second level starts at coordinates 0000 to 0E00 and raises the water to 0B00.
- The third level starts at coordinates 0E00 to 2340 and raises the level to 0A00.
- The fourth level starts at coordinates 2340 to 2C00 and lowers the level to 0AC8.
- The fifth level disappears the water, starting at coordinates 0AC8 to FFFF.
Competition mode title cards


The title card object has definitions for Competition mode levels that are fully programmed, but hidden behind a flag which is disabled.[8] The following codes can be used to re-enable the title cards:
- 02CA90:6030 - Enable 2P zone title cards
- 02CACA:FE10 - Pick title card by Current_zone
- 02CB42:004D - Set art_tile instead of render_flags
- 02CB44:000B - Set art_tile instead of render_flags
When enabled, VRAM conflicts with the level graphics will occur which causes the title cards to display incorrectly.


By setting the game's screen mode to $24, the Sonic 2 options menu can be accessed in Sonic 3. Either use the patch code FFF600:2400, or follow the instructions on SCHG How-to:Restore Sonic 2 Menus to Sonic 3. Sonic 2's level select code can be entered here, along with Sonic 3's otherwise pointless debug mode code.
The 2-player menu from Sonic 2 can also be found by setting the screen mode to $1C, or using the patch code FFF600:1C00. Not much can be done in this menu however, each Zone is X'ed out and it plays an error sound when pressing ![]() .
.
Scrolling credits

The game has a unused and unfinished scrolling credits routine. It can be activated by setting the RAM address FA87 to 02 during the credits screen. Just small and large versions of the letters B through F scroll before cutting to the TRY AGAIN/logo as it was not finished. A YouTube video of the scrolling ending credits can be seen here. Normally the credits scrolls through static pages of text.
True level order/Unused levels

The level select menu reveals what the level order may have looked like had Sonic 3 and Sonic & Knuckles not been split into two separate games. The Sonic 3 levels are arranged the same as they are played in the game, but Flying Battery Zone from Sonic & Knuckles can be seen listed in between Carnival Night Zone and IceCap Zone. Following Launch Base Zone two more Sonic & Knuckles levels can be found, Mushroom Hill (which goes by the name Mushroom Valley here), and Sandopolis.
In a commentary found in the Sonic Jam Official Guide book, it was revealed that the transition between Flying Battery Zone and IceCap Zone would have Sonic break off the ship's door and use it as a snowboard.
Also, when a level is highlighted, a level icon from Sonic 2 is shown, with the icons appearing in the Sonic 2 order e.g. Angel Island has the Emerald Hill icon, Hydrocity has the Chemical Plant icon, Marble Garden has the Aquatic Ruin icon. Even the special stage has the Sonic 2 Special Stage icon. It can also be noted that the second '2P VS' level has an icon which resembles the cut Hidden Palace Zone from Sonic 2. However, in the Sonic Jam version of the game only the sound test icon is used.
None of the Zones that would later appear in S&K can be selected normally, including the S&K Bonus Stage selections.

Flying Battery's level slot still contains data, including earlier versions of its bosses!
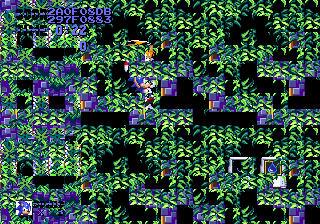
Mushroom Valley's level slot contains an early object layout for both Acts that differs significantly from the final version of Sonic & Knuckles.
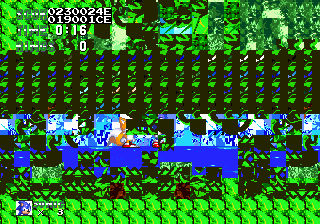
Although not much remains of Sandopolis Zone, it still has a unique start location that differs from the final version of Sonic & Knuckles.


SEGA screen technical details
The following table explains how the frames work on the SEGA screen, describing when the level select cheat code can be entered, when can it not, what frames have input disabled or enabled, and other info.
| Description | Frames in current section | Frames since startup | ||
|---|---|---|---|---|
| 60FPS | 50FPS | 60FPS | 50FPS | |
| Game startup | ||||
| Input disabled | 1 - 9 | 1 - 8 | 1 - 9 | 1 - 8 |
| Input accepted, but ignored | 10 - 30 | 9 - 29 | 10 - 30 | 9 - 29 |
| Input disabled | 31 - 36 | 30 - 34 | 31 - 36 | 30 - 34 |
| Input enabled, but ignored | 37 - 58 | 35 - 56 | 37 - 58 | 35 - 56 |
| Input almost always disabled | 59 - 237 | 57 - 235 | 59 - 237 | 57 - 235 |
| Skipping with |
78 94 110 126 142 158 174 190 206 222 | 76 92 108 124 140 156 172 188 204 220 | N/A | N/A |
| Dark(ening) SEGA screen | ||||
| Input enabled, but ignored | 1 - 10 | 1 - 10 | 238 - 247 | 236 - 245 |
| Input disabled | 11 - 21 | 11 - 20 | 248 - 258 | 246 - 255 |
| Cheat code input can start now | ||||
| Input enabled | 1 - 23 | 1 - 23 | 259 - 281 | 256 - 278 |
| Input disabled | 24 - 25 | 24 | 282 - 283 | 279 |
| Input enabled | 26 - 28 | 25 - 27 | 284 - 286 | 280 - 282 |
| Input disabled | 29 - 39 | 28 - 36 | 287 - 297 | 283 - 291 |
| Input enabled | 40 | 37 | 298 | 292 |
| Input disabled | 41 | 38 | 299 | 293 |
| Input enabled | 42 - 44 | 39 - 41 | 300 - 302 | 294 - 296 |
| Input disabled | 45 - 51 | 42 - 47 | 303 - 309 | 297 - 302 |
| Input enabled | 52 | 48 | 310 | 303 |
| Input disabled | 53 | 49 | 311 | 304 |
| Input enabled | 54 - 56 | 50 - 52 | 312 - 314 | 305 - 307 |
| Input disabled | 57 - 62 | 53 - 57 | 315 - 320 | 308 - 312 |
| Input enabled | 63 | 58 - 61 | 321 | 313 - 316 |
| Input disabled | 64 | 62 - 66 | 322 | 317 - 321 |
| Input enabled | 65 - 67 | 67 - 71 | 323 - 325 | 322 - 326 |
| Input disabled | 68 - 73 | N/A | 326 - 331 | N/A |
| Input enabled | 74 - 78 | N/A | 332 - 336 | N/A |
| Input disabled, code opportunity ended | 79 | 72 | 337 | 327 |
That's the reason why this code is so hard to input: the player has a short time to do it, it starts a small bit after what most people think (it was initially thought that input started when the background was starting to darken, whereas one needs to wait 21 frames, a bit before Sonic starts moving). Additionally, there are several lag frames in which the input isn't accepted.
Extra info
- The RAM address that stores the code's progress is 00FFFFD5.
- The game is only ready to let the SEGA screen be skipped to the darkening part on frame 59 (57 @50FPS) (which, in practical terms means frame 78 (76 @50FPS), seeing as frames 59 - 77 (57 - 75 @50FPS) are lag frames). However, the button can actually be used on frame 58 (56 @50FPS), and the skip will work... but the title screen music will be disabled.[9]
Cheat device codes
These are cheat codes that can only be used with game enhancer devices. Support for these codes is available in most emulators.
Game Genie
Official codes, Sonic 3 alone
| Code | Effect | Reference |
|---|---|---|
| AWHA-CA92 | Don't lose rings. | |
| SCGT-DJYL | Rings worth 2. | |
| SCGT-DNYL | Rings worth 3. | |
| SCGT-DTYL | Rings worth 4. | |
| SCGT-DYYL | Rings worth 5. | |
| SCGT-D2YL | Rings worth 6. | |
| SCGT-D6YL | Rings worth 7. | |
| SCGT-DAYL | Rings worth 8. | |
| KRGT-CAE0 | 75 Rings needed for a free guy. | |
| GLGT-CAE0 | 50 Rings needed for a free guy. | |
| D4GT-CAE0 | 30 Rings needed for a free guy. | |
| CWGT-CAE0 | 20 Rings needed for a free guy. | |
| BLGT-CAE0 | 10 Rings needed for a free guy. | |
| HCGT-DJZY | Get 2 free guys for 100 rings instead of 1. | |
| HCGT-DNZY | Get 3 free guys for 100 rings. | |
| HCGT-DTZY | Get 4 free guys for 100 rings. | |
| HCGT-DYZY | Get 5 free guys for 100 rings. | |
| HCGT-D2ZY | Get 6 free guys for 100 rings. | |
| HCGT-D6ZY | Get 7 free guys for 100 rings. | |
| HCGT-DAZY | Get 8 free guys for 100 rings. | |
| AC5A-CAHN | Super ring powerup worth 0. | |
| A05A-CAHN | Super ring powerup worth 5 instead of 10. | |
| B85A-CAHN | Super ring powerup worth 15. | |
| CW5A-CAHN | Super ring powerup worth 20. | |
| DG5A-CAHN | Super ring powerup worth 25. | |
| D45A-CAHN | Super ring powerup worth 30. | |
| GL5A-CAHN | Super ring powerup worth 50. | |
| NW5A-CAHN | Super ring powerup worth 100 (1-Up every time). | |
| AJZA-CA8N | Super Sonic doesn't lose rings. | |
| AJ3A-CA7A | Infinite lives. | |
| AG4T-AAH4 | Start with 1 life. | |
| AL4T-AAH4 | Start with 2 lives. | |
| A04T-AAH4 | Start with 5 lives. | |
| BL4T-AAH4 | Start with 10 lives. | |
| DG4T-AAH4 | Start with 25 lives. | |
| GL4T-AAH4 | Start with 50 lives. | |
| NR4T-AAH4 | Start with 99 lives. | |
| ACAT-CAB6 | Shield can be activated multiple times. | |
| AJRT-CA8R | Invincibility power-ups last forever. | |
| 986A-CAB6 | Invincibility lasts almost twice as long. | |
| KR6A-CAB6 | Invincibility lasts half as long. | |
| E06A-CAB6 | Invincibility lasts 1/4 as long. | |
| SCFT-BJT4 | Only need 6 chaos emeralds. | |
| SCFT-BNT4 | Only need 4 chaos emeralds. | |
| SCFT-BTT4 | Only need 3 chaos emeralds. | |
| SCFT-B2T4 | Only need 2 chaos emeralds. | |
| ACGA-AA8T | 1 Blue sphere needed for chaos emerald. | |
| TAYA-CRB6 | Bonus jump. | |
| AAYA-CWB6 | Super jump. | |
| AAYA-C0B6 | Mega-jump. | |
| ATST-CA38 | Sonic never drowns. | |
| AA6T-AAXC | Level select menu enabled. | |
| SCGA-BL0N + A4GA-A28T | Blue spheres worth 2. | |
| SCGA-BR0N + A4GA-A28T | Blue spheres worth 3. | |
| SCGA-BW0N + A4GA-A28T | Blue spheres worth 4. | |
| SCGA-B00N + A4GA-A28T | Blue spheres worth 5. | |
| SCGA-B40N + A4GA-A28T | Blue spheres worth 6. | |
| SCGA-B80N + A4GA-A28T | Blue spheres worth 7. | |
| SCGA-BC0N + A4GA-A28T | Blue spheres worth 8. |
Unofficial codes, Sonic 3 alone
| Code | Effect |
|---|---|
| AABT-AN3W | Bypass region lock. |
| ATLA-CARA | Invincibility. |
| AAYT-CAGC | Sonic can use bubble bounce (can’t use a Aqua Shield or become Super Sonic). |
| AAYT-CAY4 | Sonic can use Electric Jump (can’t use Lighting shield or become Super Sonic). |
| AAYT-CAWT | Sonic can Use Fireball Attack (can’t use Fire Shield or become Super Sonic). |
| P42S-8ABL | All Powerful (Invincible, Aqua Breathe, Magnetism). |
| AAYT-CAHR | Become Super Sonic With 0 Emeralds. |
| AAYT-CAH0 | Become Super Sonic With 0 Rings. |
| D3AT-AR2E | 'Sound Test' Menu Enabled. |
| AAZA-CAEY | Don't Use Up Rings To Maintain The Super Sonic Transformation. |
| AE5A-AABL | Enable Debug (If using an emulator, "reset" the game after entering the code). |
| AFLA-CARE | Tails Always Swims. |
| VPLA-CACG | Tails Never Get Tired of Flying. |
| ASCA-AAHC + ASCA-BA9Y | Play as Knuckles (Knuckles appears at the save screen but you will control Sonic). |
Action Replay
Unofficial codes, Sonic 3 alone
| Code | Effect |
|---|---|
| 008630:603C | Red Spheres have no effect in special stages (you can walk through them). |
| 008672:6622 + 00868C:4E75 | White and Red Star Spheres have no effect in special stages (they won't bump you backwards). |
| FFFE12:0009 | Infinite Lives. |
| FFFE20:00C8 | Infinite Rings. |
| FFF710:00 | Rings Multiplier. |
| FFFE24:000F | Stop Timer. |
| FFE438:0001 | Only Need 1 Blue Sphere For Chaos Emerald. |
| FFFFB0:0007 | All Emeralds Collected. |
| FFB02A:006E | All Powerful (Invincible, Aqua Breathe, Magnetism). |
| FFB02B:XX | The value in XX is based on binary, with the following values going to each (unknown values are omitted):
Add together these hex values for the shield you want |
| FFB02F:00 | Never use up shield (Sonic) |
| FFFFFA:0100 | Enable Debug Mode. |
| FFFFD0:0100 | Enable Stage Select. |
| FFFE10:XXYY | Stage/Act Modifier.
Garbled in 1P, normal in 2P
|
| FFF711:?? | HUD Display Modifier (00 = Off, 01 = On). |
| FFFF95:00 | Special Ring Always Available. |
| FFF600:00YY | Game Mode Modifier (YY: Mode).
|
}}
References
- ↑ File:SegaMagazin DE 03.pdf, page 81
- ↑ https://s3unlocked.blogspot.com/2018/01/youre-going-to-pay-for-this.html
- ↑ https://s3unlocked.blogspot.com/2017/11/super-gum.html
- ↑ https://s3unlocked.blogspot.com/2018/01/s3a-harder-bosses-flag.html
- ↑ The Cutting Room Floor: Sonic the Hedgehog 3
- ↑ https://s3unlocked.blogspot.com/2018/01/the-unused-surfboard-intro.html
- ↑ The Cutting Room Floor: Sonic the Hedgehog 3#Water Levels in Launch Base Zone Act 1
- ↑ https://s3unlocked.blogspot.com/2017/08/welcome-to-next-level.html
- ↑ [Title screen without music - Sonic 3; video by Espyo
 Title screen without music - Sonic 3; video by Espyo]
| Sonic the Hedgehog 3 | |
|---|---|
|
Main page (S3&K) Manuals Development |
show;hide
Competition Levels: Sub-Bosses: Level Bosses: Sonic 3C Prototypes: |


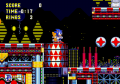
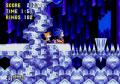
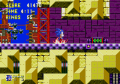
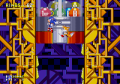


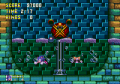
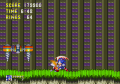
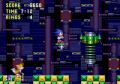
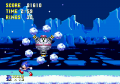
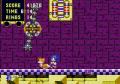
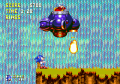
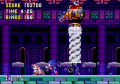
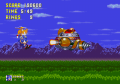
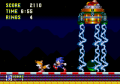
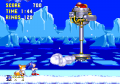
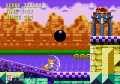


![[9]](#cite_note-.3Cspan_style.3D.22white-space:_nowrap.22.3E.3Cspan_style.3D.22margin-right:_4px.3B.22.3E.3Cdiv_style.3D.22display:inline-block.3B_line-height:0px.3B_height:16px.3B_width:16px.3B_.22.3E.5B.5BFile:Logo-youtube.svg.7C16x16px.7CYouTube.5D.5D.3C.2Fdiv.3E.3C.2Fspan.3E.5Bhttps:.2F.2Fwww.youtube.com.2Fwatch.3Fv.3DoOXqgBok1lQ_Title_screen_without_music_-_Sonic_3.3B_video_by_Espyo.5D.3C.2Fspan.3E-9)