
Difference between revisions of "Sonic the Hedgehog 3 & Knuckles/Maps"
From Sonic Retro
m (→Bonus Stages) |
(adding raw level maps) |
||
| Line 1: | Line 1: | ||
The following are '''''[[Sonic 3 & Knuckles]]'' level maps'''. Click on a thumbnail to pull up a full view. | The following are '''''[[Sonic 3 & Knuckles]]'' level maps'''. Click on a thumbnail to pull up a full view. | ||
| + | |||
| + | Also included are the raw level layouts as they are stored within the game cartridge, without sprites or dynamic level pieces. | ||
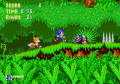
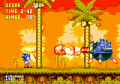
==[[Angel Island Zone]]== | ==[[Angel Island Zone]]== | ||
<gallery> | <gallery> | ||
| − | Image:Ai1map.PNG|Act 1 | + | Image:Ai1map.PNG|Act 1 [[:File:S3 map AIZ1 raw.png|(raw)]] |
| − | Image:Ai2map.PNG|Act 2 | + | Image:Ai2map.PNG|Act 2 [[:File:S3 map AIZ2 raw.png|(raw)]] |
</gallery> | </gallery> | ||
==[[Hydrocity Zone]]== | ==[[Hydrocity Zone]]== | ||
<gallery> | <gallery> | ||
| − | Image:Hc1map.PNG|Act 1 | + | Image:Hc1map.PNG|Act 1 [[:File:S3 map HCZ1 raw.png|(raw)]] |
| − | Image:Hc2map.PNG|Act 2 | + | Image:Hc2map.PNG|Act 2 [[:File:S3 map HCZ2 raw.png|(raw)]] |
</gallery> | </gallery> | ||
==[[Marble Garden Zone]]== | ==[[Marble Garden Zone]]== | ||
<gallery> | <gallery> | ||
| − | Image:Mg1map.PNG|Act 1 | + | Image:Mg1map.PNG|Act 1 [[:File:S3 map MGZ1 raw.png|(raw)]] |
| − | Image:Mg2map.PNG|Act 2 | + | Image:Mg2map.PNG|Act 2 [[:File:S3 map MGZ2 raw.png|(raw)]] |
</gallery> | </gallery> | ||
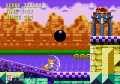
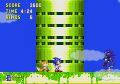
==[[Carnival Night Zone]]== | ==[[Carnival Night Zone]]== | ||
<gallery> | <gallery> | ||
| − | Image:Cn1map.PNG|Act 1 | + | Image:Cn1map.PNG|Act 1 [[:File:S3 map CNZ1 raw.png|(raw)]] |
| − | Image:Cn2map.PNG|Act 2 | + | Image:Cn2map.PNG|Act 2 [[:File:S3 map CNZ2 raw.png|(raw)]] |
</gallery> | </gallery> | ||
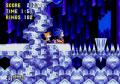
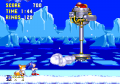
==[[IceCap Zone]]== | ==[[IceCap Zone]]== | ||
<gallery> | <gallery> | ||
| − | Image:Ic1map.PNG|Act 1 | + | Image:Ic1map.PNG|Act 1 [[:File:S3 map ICZ1 raw.png|(raw)]] |
| − | Image:Ic2map.PNG|Act 2 | + | Image:Ic2map.PNG|Act 2 [[:File:S3 map ICZ2 raw.png|(raw)]] |
</gallery> | </gallery> | ||
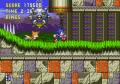
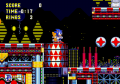
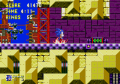
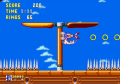
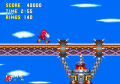
==[[Launch Base Zone]]== | ==[[Launch Base Zone]]== | ||
<gallery> | <gallery> | ||
| − | Image:Lb1map.PNG|Act 1 | + | Image:Lb1map.PNG|Act 1 [[:File:S3 map LBZ1 raw.png|(raw)]] |
| − | Image:Lb2map.PNG|Act 2 | + | Image:Lb2map.PNG|Act 2 [[:File:S3 map LBZ2 raw.png|(raw)]] |
</gallery> | </gallery> | ||
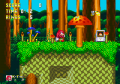
==[[Mushroom Hill Zone]]== | ==[[Mushroom Hill Zone]]== | ||
<gallery> | <gallery> | ||
| − | Image:Mh1map.PNG|Act 1 | + | Image:Mh1map.PNG|Act 1 [[:File:S&K map MHZ1 raw.png|(raw)]] |
| − | Image:Mh2map.PNG|Act 2 | + | Image:Mh2map.PNG|Act 2 [[:File:S&K map MHZ2 raw.png|(raw)]] |
</gallery> | </gallery> | ||
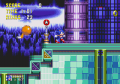
==[[Flying Battery Zone]]== | ==[[Flying Battery Zone]]== | ||
<gallery> | <gallery> | ||
| − | Image:Fb1map.PNG|Act 1 | + | Image:Fb1map.PNG|Act 1 [[:File:S&K map FBZ1 raw.png|(raw)]] |
| − | Image:Fb2map.PNG|Act 2 | + | Image:Fb2map.PNG|Act 2 [[:File:S&K map FBZ2 raw.png|(raw)]] |
</gallery> | </gallery> | ||
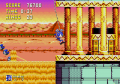
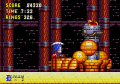
==[[Sandopolis Zone]]== | ==[[Sandopolis Zone]]== | ||
<gallery> | <gallery> | ||
| − | Image:So1map.PNG|Act 1 | + | Image:So1map.PNG|Act 1 [[:File:S&K map SOZ1 raw.png|(raw)]] |
| − | Image:So2map.PNG|Act 2 | + | Image:So2map.PNG|Act 2 [[:File:S&K map SOZ2 raw.png|(raw)]] |
</gallery> | </gallery> | ||
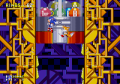
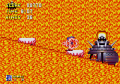
==[[Lava Reef Zone]]== | ==[[Lava Reef Zone]]== | ||
<gallery> | <gallery> | ||
| − | Image:Lr1map.PNG|Act 1 | + | Image:Lr1map.PNG|Act 1 [[:File:S&K map LRZ1 raw.png|(raw)]] |
| − | Image:Lr2map.PNG|Act 2 | + | Image:Lr2map.PNG|Act 2 [[:File:S&K map LRZ2 raw.png|(raw)]] |
| − | Image:Lr3map.PNG|Act 3 | + | Image:Lr3map.PNG|Act 3 [[:File:S&K map LRZ3 raw.png|(raw)]] |
</gallery> | </gallery> | ||
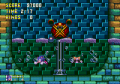
==[[Hidden Palace Zone (SK)|Hidden Palace Zone]]== | ==[[Hidden Palace Zone (SK)|Hidden Palace Zone]]== | ||
<gallery> | <gallery> | ||
| − | Image:Hpmap.PNG| | + | Image:Hpmap.PNG|Act 1 [[:File:S&K map HPZ raw.png|(raw)]] |
</gallery> | </gallery> | ||
==[[Sky Sanctuary Zone]]== | ==[[Sky Sanctuary Zone]]== | ||
<gallery> | <gallery> | ||
| − | Image:Ss1map.PNG|Act 1 | + | Image:Ss1map.PNG|Act 1 [[:File:S&K map SSZ1 raw.png|(raw)]] |
| − | Image:Ss2map.PNG|Act 2 ( | + | Image:Ss2map.PNG|Act 2 [[:File:S&K map SSZ2 raw.png|(raw)]] |
</gallery> | </gallery> | ||
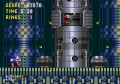
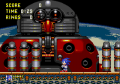
==[[Death Egg Zone (SK)|Death Egg Zone]]== | ==[[Death Egg Zone (SK)|Death Egg Zone]]== | ||
<gallery> | <gallery> | ||
| − | Image:De1map.PNG|Act 1 | + | Image:De1map.PNG|Act 1 [[:File:S&K map DEZ1 raw.png|(raw)]] |
| − | Image:De2map.PNG|Act 2 | + | Image:De2map.PNG|Act 2 [[:File:S&K map DEZ2 raw.png|(raw)]] |
</gallery> | </gallery> | ||
| Line 86: | Line 88: | ||
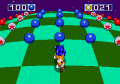
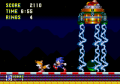
==[[Bonus Stage (Sonic 3 & Knuckles)|Bonus Stages]]== | ==[[Bonus Stage (Sonic 3 & Knuckles)|Bonus Stages]]== | ||
<gallery> | <gallery> | ||
| − | Image:S3 map Bonus.png|[[Bonus Stage (Sonic 3 & Knuckles)#Gumball Machine|Gumball Machine stage]] | + | Image:S3 map Bonus.png|[[Bonus Stage (Sonic 3 & Knuckles)#Gumball Machine|Gumball Machine stage]] [[:File:S3 map Bonus raw.png|(raw)]] |
| − | Image:Gsmap.PNG|[[Bonus Stage (Sonic 3 & Knuckles)#Glowing Spheres|Glowing Spheres stage]] | + | Image:Gsmap.PNG|[[Bonus Stage (Sonic 3 & Knuckles)#Glowing Spheres|Glowing Spheres stage]] [[:File:S&K map Bonus raw.png|(raw)]] |
Image:S&KFinal SlotMachineMap.png|[[Bonus Stage (Sonic 3 & Knuckles)#Rotating Maze/Slot Machine|Slot Machine stage]] | Image:S&KFinal SlotMachineMap.png|[[Bonus Stage (Sonic 3 & Knuckles)#Rotating Maze/Slot Machine|Slot Machine stage]] | ||
</gallery> | </gallery> | ||
| Line 93: | Line 95: | ||
==2-Player Zones== | ==2-Player Zones== | ||
<gallery> | <gallery> | ||
| − | Image:Almap.PNG|[[Azure Lake Zone]] | + | Image:Almap.PNG|[[Azure Lake Zone]] [[:File:S3 map ALZ raw.png|(raw)]] |
| − | Image:Bpmap.PNG|[[Balloon Park Zone]] | + | Image:Bpmap.PNG|[[Balloon Park Zone]] [[:File:S3 map BPZ raw.png|(raw)]] |
| − | Image:Cgmap.PNG|[[Chrome Gadget Zone]] | + | Image:Cgmap.PNG|[[Chrome Gadget Zone]] [[:File:S3 map CGZ raw.png|(raw)]] |
| − | Image:Dpmap.PNG|[[Desert Palace Zone]] | + | Image:Dpmap.PNG|[[Desert Palace Zone]] [[:File:S3 map DPZ raw.png|(raw)]] |
| − | Image:Emmap.PNG|[[Endless Mine Zone]] | + | Image:Emmap.PNG|[[Endless Mine Zone]] [[:File:S3 map EMZ raw.png|(raw)]] |
</gallery> | </gallery> | ||
Revision as of 13:27, 20 October 2018
The following are Sonic 3 & Knuckles level maps. Click on a thumbnail to pull up a full view.
Also included are the raw level layouts as they are stored within the game cartridge, without sprites or dynamic level pieces.
Contents
- 1 Angel Island Zone
- 2 Hydrocity Zone
- 3 Marble Garden Zone
- 4 Carnival Night Zone
- 5 IceCap Zone
- 6 Launch Base Zone
- 7 Mushroom Hill Zone
- 8 Flying Battery Zone
- 9 Sandopolis Zone
- 10 Lava Reef Zone
- 11 Hidden Palace Zone
- 12 Sky Sanctuary Zone
- 13 Death Egg Zone
- 14 The Doomsday Zone
- 15 Bonus Stages
- 16 2-Player Zones
- 17 Special Stages
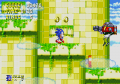
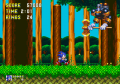
Angel Island Zone
Hydrocity Zone
Marble Garden Zone
Carnival Night Zone
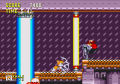
IceCap Zone
Launch Base Zone
Mushroom Hill Zone
Flying Battery Zone
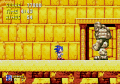
Sandopolis Zone
Lava Reef Zone
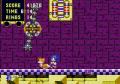
Hidden Palace Zone
- Hpmap.PNG
Act 1 (raw)
Sky Sanctuary Zone
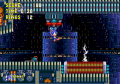
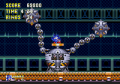
Death Egg Zone
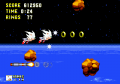
The Doomsday Zone

Act 1
Bonus Stages
- Gsmap.PNG

2-Player Zones
- Almap.PNG
- Bpmap.PNG
- Cgmap.PNG
- Dpmap.PNG
- Emmap.PNG
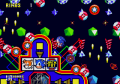
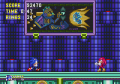
Special Stages
- S3SS1.png
Sonic 3
1st special stage - S3SS2.png
Sonic 3
2nd special stage - S3SS3.png
Sonic 3
3rd special stage - S3SS4.png
Sonic 3
4th special stage - S3SS5.png
Sonic 3
5th special stage - S3SS6.png
Sonic 3
6th special stage - S3SS7.png
Sonic 3
7th special stage - S3SS8.png
Sonic 3
8th special stage 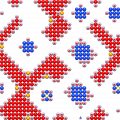
Sonic & Knuckles
1st special stage
Sonic & Knuckles
2nd special stage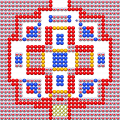
Sonic & Knuckles
3rd special stage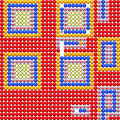
Sonic & Knuckles
4th special stage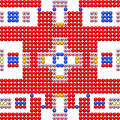
Sonic & Knuckles
5th special stage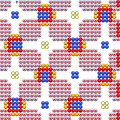
Sonic & Knuckles
6th special stage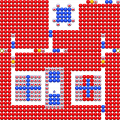
Sonic & Knuckles
7th special stage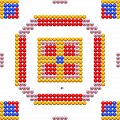
Sonic & Knuckles
8th special stage


| Sonic the Hedgehog 3 | |
|---|---|
|
Main page (S3&K) Manuals Development |
show;hide
Competition Levels: Sub-Bosses: Level Bosses: Sonic 3C Prototypes: |


| Sonic & Knuckles | |
|---|---|
|
Main page (S3&K|KiS2|Blue Sphere) Manuals Development |
show;hide
Sub-Bosses: Level Bosses: Books:
Comics: Music: |


