
Difference between revisions of "SAdv3Omni"
From Sonic Retro
BSonirachi (talk | contribs) |
BSonirachi (talk | contribs) |
||
| (11 intermediate revisions by 2 users not shown) | |||
| Line 4: | Line 4: | ||
| titlescreen=SonicAdvance3_title.png | | titlescreen=SonicAdvance3_title.png | ||
| mapspage=yes | | mapspage=yes | ||
| + | | comparisonspage=yes | ||
| + | | creditspage=yes | ||
| magazinepage=yes | | magazinepage=yes | ||
| + | | receptionpage=yes | ||
| promopage=yes | | promopage=yes | ||
| manualpage=yes | | manualpage=yes | ||
| hiddencontentpage=yes | | hiddencontentpage=yes | ||
| developmentpage=yes | | developmentpage=yes | ||
| − | | | + | | bugspage=yes |
| − | | | + | | techpage=yes |
| icon1=Levels | | icon1=Levels | ||
| content1= | | content1= | ||
| Line 64: | Line 67: | ||
| content3= | | content3= | ||
{{#vardefine:thumbsize|120px}}{{#vardefine:thumbwidth| }} | {{#vardefine:thumbsize|120px}}{{#vardefine:thumbwidth| }} | ||
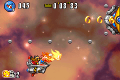
| − | {{OmniThumb|SonicAdvance3 GBA G-merlRoute99.png| | + | {{OmniThumb|SonicAdvance3 GBA G-merlRoute99.png|Gemerl (boss)|Gemerl|aligntop=yes}} |
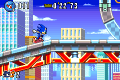
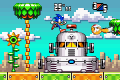
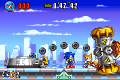
| − | {{OmniThumb|Route 99 Boss.png| | + | {{OmniThumb|Route 99 Boss.png|Egg Hammer 3|aligntop=yes}} |
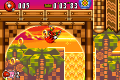
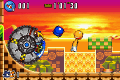
| − | {{OmniThumb|Sunset Hill Boss.png | + | {{OmniThumb|Sunset Hill Boss.png|Egg Ball No.2|aligntop=yes}} |
{{OmniThumb|Ocean Base Boss.png|Egg Foot|aligntop=yes}} | {{OmniThumb|Ocean Base Boss.png|Egg Foot|aligntop=yes}} | ||
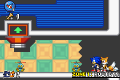
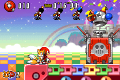
{{OmniThumb|Toy Kingdom Boss.png|Egg Cube|aligntop=yes}} | {{OmniThumb|Toy Kingdom Boss.png|Egg Cube|aligntop=yes}} | ||
| Line 73: | Line 76: | ||
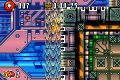
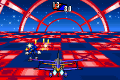
{{OmniThumb|Cyber Track Boss.png|Egg Pinball|aligntop=yes}} | {{OmniThumb|Cyber Track Boss.png|Egg Pinball|aligntop=yes}} | ||
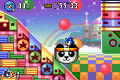
{{OmniThumb|Chaos Angel Boss.png|Egg Gravity|aligntop=yes}} | {{OmniThumb|Chaos Angel Boss.png|Egg Gravity|aligntop=yes}} | ||
| − | {{OmniThumb|Alter Emerald Zone Boss.png| | + | {{OmniThumb|Alter Emerald Zone Boss.png|Hyper Eggrobo|aligntop=yes}} |
{{OmniThumb|Nonagression.png|Ultimate G-merl|aligntop=yes}} | {{OmniThumb|Nonagression.png|Ultimate G-merl|aligntop=yes}} | ||
| icon4=Prereleases | | icon4=Prereleases | ||
| content4= | | content4= | ||
{{#vardefine:thumbsize|120px}}{{#vardefine:thumbwidth| }} | {{#vardefine:thumbsize|120px}}{{#vardefine:thumbwidth| }} | ||
| − | {{OmniThumb| | + | {{OmniThumb|SonicAdvance3 title.png|Sonic Advance 3 (prototype; 2004-03-01)|2004-03-01<br>prototype}} |
| + | {{OmniThumb|SonicAdvance3 GBA JP Title.png|Sonic Advance 3 (demo)|Demo|aligntop=true}} | ||
| icon5=Media | | icon5=Media | ||
| Line 96: | Line 100: | ||
# Bosses | # Bosses | ||
# Prereleases | # Prereleases | ||
| + | # Media | ||
[[Category:Navigational templates (single game)|{{PAGENAME}}]]</noinclude> | [[Category:Navigational templates (single game)|{{PAGENAME}}]]</noinclude> | ||
Latest revision as of 15:48, 16 August 2023
| Sonic Advance 3 | |
|---|---|
|
Main page Manuals |
show;hide
Books:
|


Usage
{{SAdv3Omni|#}}
Substitute # with one of the following numbers depending on which type of article you want to use the template:
- Levels (this is used by default and can be left blank)
- Enemies
- Bosses
- Prereleases
- Media