Difference between revisions of "Sonic the Hedgehog 3C (prototype 0408)/Comparisons/Flying Battery Zone"
From Sonic Retro
BSonirachi (talk | contribs) (Screenshots from the final will be added as soon as possible. I also marked some comparisons for having map comparisons, as I think they'll make these pages less cluttered with screenshots.) |
BSonirachi (talk | contribs) (S3&K Final screenshots get. Still got to do the maps.) |
||
| Line 14: | Line 14: | ||
{{comparison | {{comparison | ||
| image1=S3C0408 MD Comparison FBZ Landmines.png | | image1=S3C0408 MD Comparison FBZ Landmines.png | ||
| − | | image2= | + | | image2=Sonic3&K MD Comparison FBZ Landmines.png |
| + | | game1=''Sonic 3C'' 0408 | ||
| + | | game2=''Sonic 3 & Knuckles'' final | ||
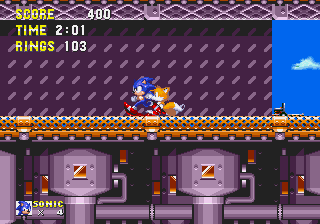
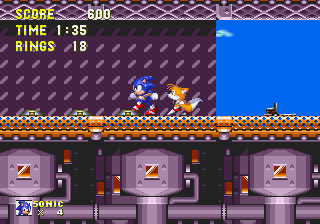
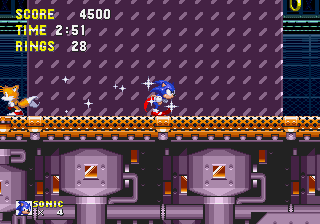
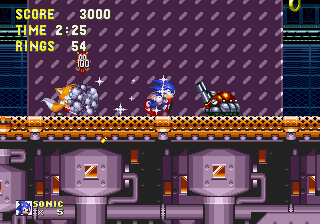
| + | | desc=This corridor has the speed launcher in a different position and is missing a set of landmines. The landmines also make the same sound as an exploding [[Badnik]] in this prototype, while the launcher doesn't make any sounds. | ||
| + | }} | ||
| + | {{comparison | ||
| + | | image1=S3C0408 MD Comparison FBZ HiddenSpring.png | ||
| + | | image2=Sonic3&K MD Comparison FBZ HiddenSpring.png | ||
| game1=''Sonic 3C'' 0408 | | game1=''Sonic 3C'' 0408 | ||
| game2=''Sonic 3 & Knuckles'' final | | game2=''Sonic 3 & Knuckles'' final | ||
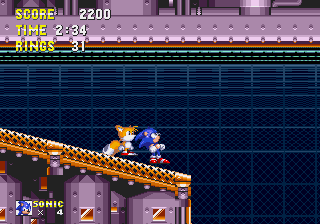
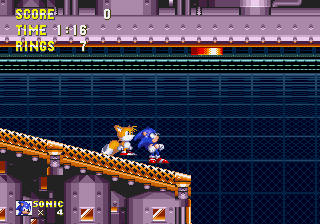
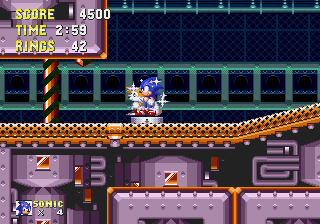
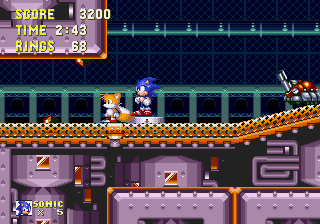
| − | | desc= | + | | desc=The spring that launches the player through the halfpipe here is hidden within the ceiling. It was later pushed out of the ceiling a bit to make it more obvious to the player that it's there. |
}} | }} | ||
{{comparison | {{comparison | ||
| image1=S3C0408 MD Comparison FBZ Missing1UP.png | | image1=S3C0408 MD Comparison FBZ Missing1UP.png | ||
| − | | image2= | + | | image2=Sonic3&K MD Comparison FBZ Missing1UP.png |
| game1=''Sonic 3C'' 0408 | | game1=''Sonic 3C'' 0408 | ||
| game2=''Sonic 3 & Knuckles'' final | | game2=''Sonic 3 & Knuckles'' final | ||
| Line 28: | Line 35: | ||
{{comparison | {{comparison | ||
| image1=S3C0408 MD Comparison FBZ GiantRing1.png | | image1=S3C0408 MD Comparison FBZ GiantRing1.png | ||
| − | | image2= | + | | image2=Sonic3&K MD Comparison FBZ GiantRing1.png |
| game1=''Sonic 3C'' 0408 | | game1=''Sonic 3C'' 0408 | ||
| game2=''Sonic 3 & Knuckles'' final | | game2=''Sonic 3 & Knuckles'' final | ||
| Line 35: | Line 42: | ||
{{comparison | {{comparison | ||
| image1=S3C0408 MD Comparison FBZ GiantRing1Exit.png | | image1=S3C0408 MD Comparison FBZ GiantRing1Exit.png | ||
| − | | image2= | + | | image2=Sonic3&K MD Comparison FBZ GiantRing1Exit.png |
| game1=''Sonic 3C'' 0408 | | game1=''Sonic 3C'' 0408 | ||
| game2=''Sonic 3 & Knuckles'' final | | game2=''Sonic 3 & Knuckles'' final | ||
| Line 42: | Line 49: | ||
{{comparison | {{comparison | ||
| image1=S3C0408 MD Comparison FBZ PushingSpikes.png | | image1=S3C0408 MD Comparison FBZ PushingSpikes.png | ||
| − | | image2= | + | | image2=Sonic3&K MD Comparison FBZ PushingSpikes.png |
| game1=''Sonic 3C'' 0408 | | game1=''Sonic 3C'' 0408 | ||
| game2=''Sonic 3 & Knuckles'' final | | game2=''Sonic 3 & Knuckles'' final | ||
| Line 49: | Line 56: | ||
{{comparison | {{comparison | ||
| image1=S3C0408 MD Comparison FBZ GiantRing2.png | | image1=S3C0408 MD Comparison FBZ GiantRing2.png | ||
| − | | image2= | + | | image2=Sonic3&K MD Comparison FBZ GiantRing2.png |
| game1=''Sonic 3C'' 0408 | | game1=''Sonic 3C'' 0408 | ||
| game2=''Sonic 3 & Knuckles'' final | | game2=''Sonic 3 & Knuckles'' final | ||
| Line 56: | Line 63: | ||
{{comparison | {{comparison | ||
| image1=S3C0408 MD Comparison FBZ MissingLightningShield1.png | | image1=S3C0408 MD Comparison FBZ MissingLightningShield1.png | ||
| − | | image2= | + | | image2=Sonic3&K MD Comparison FBZ LightningShield1.png |
| game1=''Sonic 3C'' 0408 | | game1=''Sonic 3C'' 0408 | ||
| game2=''Sonic 3 & Knuckles'' final | | game2=''Sonic 3 & Knuckles'' final | ||
| Line 71: | Line 78: | ||
{{comparison | {{comparison | ||
| image1=S3C0408 MD Comparison FBZ ExtraSpikeBlock.png | | image1=S3C0408 MD Comparison FBZ ExtraSpikeBlock.png | ||
| − | | image2= | + | | image2=Sonic3&K MD Comparison FBZ ExtraSpikeBlock.png |
| game1=''Sonic 3C'' 0408 | | game1=''Sonic 3C'' 0408 | ||
| game2=''Sonic 3 & Knuckles'' final | | game2=''Sonic 3 & Knuckles'' final | ||
| Line 78: | Line 85: | ||
{{comparison | {{comparison | ||
| image1=S3C0408 MD Comparison FBZ ExtraBlockOuch.png | | image1=S3C0408 MD Comparison FBZ ExtraBlockOuch.png | ||
| − | | image2= | + | | image2=Sonic3&K MD Comparison FBZ ExtraBlockOuch.png |
| game1=''Sonic 3C'' 0408 | | game1=''Sonic 3C'' 0408 | ||
| game2=''Sonic 3 & Knuckles'' final | | game2=''Sonic 3 & Knuckles'' final | ||
| Line 85: | Line 92: | ||
{{comparison | {{comparison | ||
| image1=S3C0408 MD Comparison FBZ Gapsule.png | | image1=S3C0408 MD Comparison FBZ Gapsule.png | ||
| − | | image2= | + | | image2=Sonic3&K MD Comparison FBZ Gapsule.png |
| game1=''Sonic 3C'' 0408 | | game1=''Sonic 3C'' 0408 | ||
| game2=''Sonic 3 & Knuckles'' final | | game2=''Sonic 3 & Knuckles'' final | ||
| − | | desc=[[Gapsule]]'s position is about 16 pixels to the left in comparison to later prototypes and the final. Its coordinates are the same as they were in the remnants of Flying Battery in ''Sonic 3''. | + | | desc=[[Gapsule]]'s position is about 16 pixels to the left in comparison to later prototypes and the final. Its coordinates are the same as they were in the remnants of Flying Battery in ''Sonic 3''. Its palette is also slightly different. |
}} | }} | ||
{{comparison | {{comparison | ||
| image1=S3C0408 MD Comparison FBZ GapsuleSignpost.png | | image1=S3C0408 MD Comparison FBZ GapsuleSignpost.png | ||
| − | | image2= | + | | image2=Sonic3&K MD Comparison FBZ GapsuleSignpost.png |
| game1=''Sonic 3C'' 0408 | | game1=''Sonic 3C'' 0408 | ||
| game2=''Sonic 3 & Knuckles'' final | | game2=''Sonic 3 & Knuckles'' final | ||
| Line 111: | Line 118: | ||
{{comparison | {{comparison | ||
| image1=S3C0408 MD Comparison FBZ MissingTechnosqueek.png | | image1=S3C0408 MD Comparison FBZ MissingTechnosqueek.png | ||
| − | | image2= | + | | image2=Sonic3&K MD Comparison FBZ MissingTechnosqueek.png |
| game1=''Sonic 3C'' 0408 | | game1=''Sonic 3C'' 0408 | ||
| game2=''Sonic 3 & Knuckles'' final | | game2=''Sonic 3 & Knuckles'' final | ||
| Line 118: | Line 125: | ||
{{comparison | {{comparison | ||
| image1=S3C0408 MD Comparison FBZ MonitorChange1.png | | image1=S3C0408 MD Comparison FBZ MonitorChange1.png | ||
| − | | image2= | + | | image2=Sonic3&K MD Comparison FBZ MonitorChange1.png |
| game1=''Sonic 3C'' 0408 | | game1=''Sonic 3C'' 0408 | ||
| game2=''Sonic 3 & Knuckles'' final | | game2=''Sonic 3 & Knuckles'' final | ||
| Line 125: | Line 132: | ||
{{comparison | {{comparison | ||
| image1=S3C0408 MD Comparison FBZ ElevatorNoSpikes1.png | | image1=S3C0408 MD Comparison FBZ ElevatorNoSpikes1.png | ||
| − | | image2= | + | | image2=Sonic3&K MD Comparison FBZ ElevatorSpikes1.png |
| game1=''Sonic 3C'' 0408 | | game1=''Sonic 3C'' 0408 | ||
| game2=''Sonic 3 & Knuckles'' final | | game2=''Sonic 3 & Knuckles'' final | ||
| Line 141: | Line 148: | ||
{{comparison | {{comparison | ||
| image1=S3C0408 MD Comparison FBZ NarrowRide1.png | | image1=S3C0408 MD Comparison FBZ NarrowRide1.png | ||
| − | | image2= | + | | image2=Sonic3&K MD Comparison FBZ NarrowRide1.png |
| game1=''Sonic 3C'' 0408 | | game1=''Sonic 3C'' 0408 | ||
| game2=''Sonic 3 & Knuckles'' final | | game2=''Sonic 3 & Knuckles'' final | ||
| Line 147: | Line 154: | ||
}} | }} | ||
{{comparison | {{comparison | ||
| − | | image1=S3C0408 MD Comparison FBZ | + | | image1=S3C0408 MD Comparison FBZ NarrowRide2.png |
| − | | image2= | + | | image2=Sonic3&K MD Comparison FBZ NarrowRide2.png |
| game1=''Sonic 3C'' 0408 | | game1=''Sonic 3C'' 0408 | ||
| game2=''Sonic 3 & Knuckles'' final | | game2=''Sonic 3 & Knuckles'' final | ||
| Line 173: | Line 180: | ||
{{comparison | {{comparison | ||
| image1=S3C0408 MD Comparison FBZ ElevatorCrush.png | | image1=S3C0408 MD Comparison FBZ ElevatorCrush.png | ||
| − | | image2= | + | | image2=Sonic3&K MD Comparison FBZ ElevatorCrush.png |
| game1=''Sonic 3C'' 0408 | | game1=''Sonic 3C'' 0408 | ||
| game2=''Sonic 3 & Knuckles'' final | | game2=''Sonic 3 & Knuckles'' final | ||
| Line 180: | Line 187: | ||
{{comparison | {{comparison | ||
| image1=S3C0408 MD Comparison FBZ NoBlackOrb.png | | image1=S3C0408 MD Comparison FBZ NoBlackOrb.png | ||
| − | | image2= | + | | image2=Sonic3&K MD Comparison FBZ BlackOrb.png |
| game1=''Sonic 3C'' 0408 | | game1=''Sonic 3C'' 0408 | ||
| game2=''Sonic 3 & Knuckles'' final | | game2=''Sonic 3 & Knuckles'' final | ||
| Line 195: | Line 202: | ||
{{comparison | {{comparison | ||
| image1=S3C0408 MD Comparison FBZ MissingBlaster1.png | | image1=S3C0408 MD Comparison FBZ MissingBlaster1.png | ||
| − | | image2= | + | | image2=Sonic3&K MD Comparison FBZ Blaster1.png |
| game1=''Sonic 3C'' 0408 | | game1=''Sonic 3C'' 0408 | ||
| game2=''Sonic 3 & Knuckles'' final | | game2=''Sonic 3 & Knuckles'' final | ||
| Line 210: | Line 217: | ||
{{comparison | {{comparison | ||
| image1=S3C0408 MD Comparison FBZ MissingBlaster2.png | | image1=S3C0408 MD Comparison FBZ MissingBlaster2.png | ||
| − | | image2= | + | | image2=Sonic3&K MD Comparison FBZ Blaster2.png |
| game1=''Sonic 3C'' 0408 | | game1=''Sonic 3C'' 0408 | ||
| game2=''Sonic 3 & Knuckles'' final | | game2=''Sonic 3 & Knuckles'' final | ||
| Line 217: | Line 224: | ||
{{comparison | {{comparison | ||
| image1=S3C0408 MD Comparison FBZ DoubleDoors.png | | image1=S3C0408 MD Comparison FBZ DoubleDoors.png | ||
| − | | image2= | + | | image2=Sonic3&K MD Comparison FBZ DoubleDoors.png |
| game1=''Sonic 3C'' 0408 | | game1=''Sonic 3C'' 0408 | ||
| game2=''Sonic 3 & Knuckles'' final | | game2=''Sonic 3 & Knuckles'' final | ||
| Line 233: | Line 240: | ||
{{comparison | {{comparison | ||
| image1=S3C0408 MD Comparison FBZ MissingStarPost1.png | | image1=S3C0408 MD Comparison FBZ MissingStarPost1.png | ||
| − | | image2= | + | | image2=Sonic3&K MD Comparison FBZ MissingStarPost1.png |
| game1=''Sonic 3C'' 0408 | | game1=''Sonic 3C'' 0408 | ||
| game2=''Sonic 3 & Knuckles'' final | | game2=''Sonic 3 & Knuckles'' final | ||
| Line 240: | Line 247: | ||
{{comparison | {{comparison | ||
| image1=S3C0408 MD Comparison FBZ MissingLightningShield2.png | | image1=S3C0408 MD Comparison FBZ MissingLightningShield2.png | ||
| − | | image2= | + | | image2=Sonic3&K MD Comparison FBZ LightningShield2.png |
| game1=''Sonic 3C'' 0408 | | game1=''Sonic 3C'' 0408 | ||
| game2=''Sonic 3 & Knuckles'' final | | game2=''Sonic 3 & Knuckles'' final | ||
| Line 247: | Line 254: | ||
{{comparison | {{comparison | ||
| image1=S3C0408 MD Comparison FBZ RemovedDoor.png | | image1=S3C0408 MD Comparison FBZ RemovedDoor.png | ||
| − | | image2= | + | | image2=Sonic3&K MD Comparison FBZ RemovedDoor.png |
| game1=''Sonic 3C'' 0408 | | game1=''Sonic 3C'' 0408 | ||
| game2=''Sonic 3 & Knuckles'' final | | game2=''Sonic 3 & Knuckles'' final | ||
| − | | desc=...A door blocking the elevator opens up, which would be taken out in later builds. On top of that, there is no way for [[Sonic the Hedgehog|Sonic]] to get up here on his own, so to compensate the button was changed to make additional platforms appear to help him reach this spot. | + | | desc=...A door blocking the elevator opens up, which would be taken out in later builds. On top of that, there is no way for [[Sonic the Hedgehog|Sonic]] to get up here on his own, so to compensate the button was changed to make additional platforms appear to help him reach this spot. A bunch of rings were also added here. |
}} | }} | ||
{{comparison | {{comparison | ||
| image1=S3C0408 MD Comparison FBZ GiantRing3.png | | image1=S3C0408 MD Comparison FBZ GiantRing3.png | ||
| − | | image2= | + | | image2=Sonic3&K MD Comparison FBZ GiantRing3.png |
| game1=''Sonic 3C'' 0408 | | game1=''Sonic 3C'' 0408 | ||
| game2=''Sonic 3 & Knuckles'' final | | game2=''Sonic 3 & Knuckles'' final | ||
| Line 261: | Line 268: | ||
{{comparison | {{comparison | ||
| image1=S3C0408 MD Comparison FBZ MissingStarPost2.png | | image1=S3C0408 MD Comparison FBZ MissingStarPost2.png | ||
| − | | image2= | + | | image2=Sonic3&K MD Comparison FBZ MissingStarPost2.png |
| game1=''Sonic 3C'' 0408 | | game1=''Sonic 3C'' 0408 | ||
| game2=''Sonic 3 & Knuckles'' final | | game2=''Sonic 3 & Knuckles'' final | ||
| Line 285: | Line 292: | ||
{{comparison | {{comparison | ||
| image1=S3C0408 MD Comparison FBZ BackgroundMistake.png | | image1=S3C0408 MD Comparison FBZ BackgroundMistake.png | ||
| − | | image2= | + | | image2=Sonic3&K MD Comparison FBZ BackgroundFixed.png |
| game1=''Sonic 3C'' 0408 | | game1=''Sonic 3C'' 0408 | ||
| game2=''Sonic 3 & Knuckles'' final | | game2=''Sonic 3 & Knuckles'' final | ||
| − | | desc=This corridor has no Star Post or spiked blocks, and the electromagnets are non-functioning. As if that wasn't enough, there is an erroneous chunk placement in the background at this point. | + | | desc=This corridor has no Star Post or spiked blocks, and the electromagnets are non-functioning. As if that wasn't enough, there is an erroneous chunk placement in the background at this point. Not only was this corrected later on, the background was also shifted down a bit. |
}} | }} | ||
{{comparison | {{comparison | ||
| image1=S3C0408 MD Comparison FBZ ElevatorNoSpikes2.png | | image1=S3C0408 MD Comparison FBZ ElevatorNoSpikes2.png | ||
| − | | image2= | + | | image2=Sonic3&K MD Comparison FBZ ElevatorSpikes2.png |
| game1=''Sonic 3C'' 0408 | | game1=''Sonic 3C'' 0408 | ||
| game2=''Sonic 3 & Knuckles'' final | | game2=''Sonic 3 & Knuckles'' final | ||
| Line 299: | Line 306: | ||
{{comparison | {{comparison | ||
| image1=S3C0408 MD Comparison FBZ GiantRing4.png | | image1=S3C0408 MD Comparison FBZ GiantRing4.png | ||
| − | | image2= | + | | image2=Sonic3&K MD Comparison FBZ GiantRing4.png |
| game1=''Sonic 3C'' 0408 | | game1=''Sonic 3C'' 0408 | ||
| game2=''Sonic 3 & Knuckles'' final | | game2=''Sonic 3 & Knuckles'' final | ||
| Line 308: | Line 315: | ||
{{comparison | {{comparison | ||
| image1=S3C0408 MD Comparison FBZ MonitorChange2.png | | image1=S3C0408 MD Comparison FBZ MonitorChange2.png | ||
| − | | image2= | + | | image2=Sonic3&K MD Comparison FBZ MonitorChange2.png |
| game1=''Sonic 3C'' 0408 | | game1=''Sonic 3C'' 0408 | ||
| game2=''Sonic 3 & Knuckles'' final | | game2=''Sonic 3 & Knuckles'' final | ||
| Line 332: | Line 339: | ||
{{comparison | {{comparison | ||
| image1=S3C0408 MD Comparison FBZ ExplodingEggmobile.png | | image1=S3C0408 MD Comparison FBZ ExplodingEggmobile.png | ||
| − | | image2= | + | | image2=Sonic3&K MD Comparison FBZ ExplodingEggmobile.png |
| game1=''Sonic 3C'' 0408 | | game1=''Sonic 3C'' 0408 | ||
| game2=''Sonic 3 & Knuckles'' final | | game2=''Sonic 3 & Knuckles'' final | ||
| Line 339: | Line 346: | ||
{{comparison | {{comparison | ||
| image1=S3C0408 MD Comparison FBZ EndCutscene.png | | image1=S3C0408 MD Comparison FBZ EndCutscene.png | ||
| − | | image2= | + | | image2=Sonic3&K MD Comparison FBZ EndCutscene.png |
| game1=''Sonic 3C'' 0408 | | game1=''Sonic 3C'' 0408 | ||
| game2=''Sonic 3 & Knuckles'' final | | game2=''Sonic 3 & Knuckles'' final | ||
Revision as of 20:24, 18 February 2019
Flying Battery Zone is already in place as the eighth Zone in the game, as the decision to move its position had already been made when Sonic the Hedgehog 3 was split into two games. So, as with other Sonic & Knuckles Zones, there are a good number of differences.
Contents
Act 1
Just like in Sonic 3, the echo track of Act 1's music will go off-sync after looping, and will slowly drag more and more behind the lead melody as it continues to play.
| Sonic 3C 0408 |
|---|
| Sonic 3 & Knuckles final |
|---|
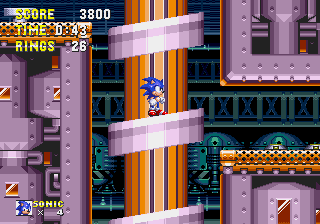
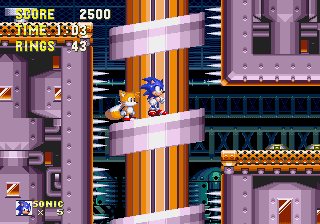
This room before the first set of spinning flamethrowers is pretty empty. Later prototypes and the final added a little bit more danger with a couple of Blasters and some monkey bars.
| Sonic 3C 0408 |
|---|
| Sonic 3 & Knuckles final |
|---|
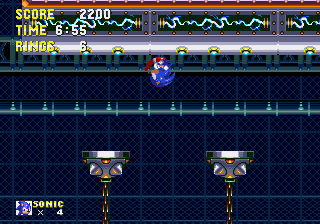
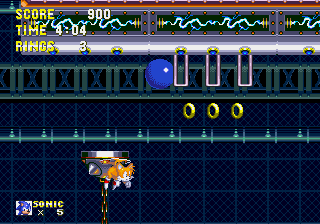
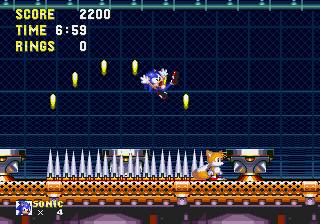
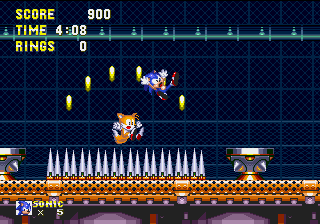
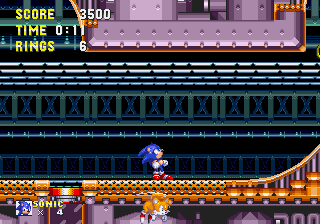
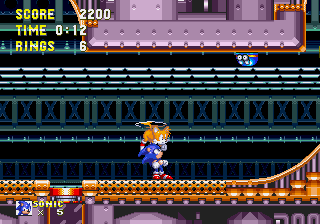
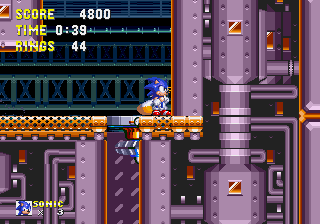
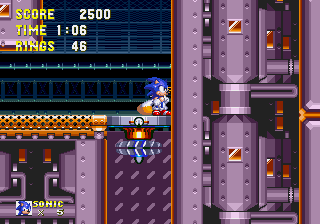
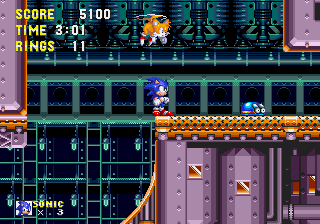
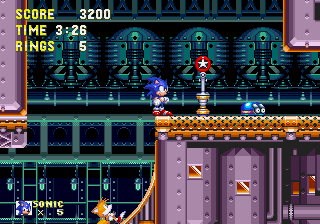
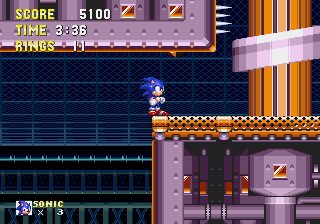
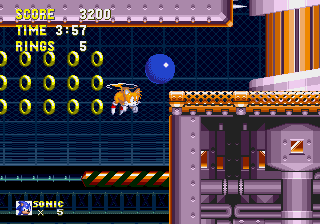
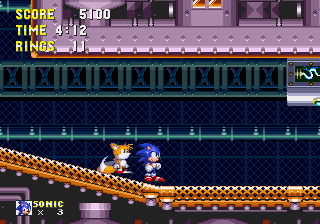
This corridor has the speed launcher in a different position and is missing a set of landmines. The landmines also make the same sound as an exploding Badnik in this prototype, while the launcher doesn't make any sounds.
| Sonic 3C 0408 |
|---|
| Sonic 3 & Knuckles final |
|---|
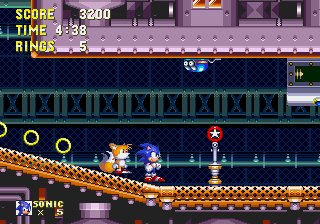
The spring that launches the player through the halfpipe here is hidden within the ceiling. It was later pushed out of the ceiling a bit to make it more obvious to the player that it's there.
| Sonic 3C 0408 |
|---|
| Sonic 3 & Knuckles final |
|---|
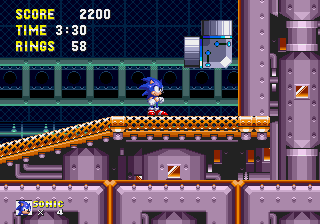
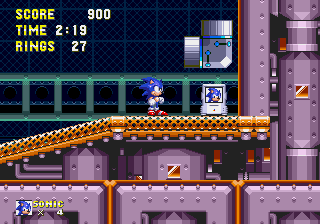
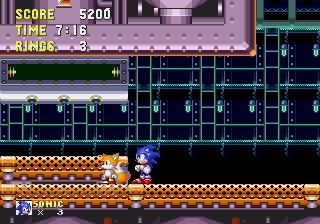
An extra life monitor was added here later on.
| Sonic 3C 0408 |
|---|
| Sonic 3 & Knuckles final |
|---|
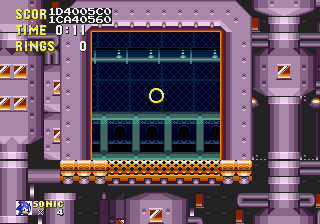
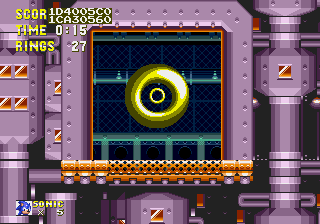
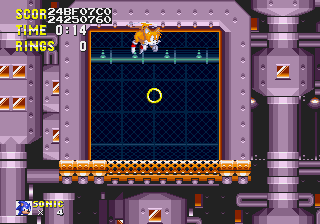
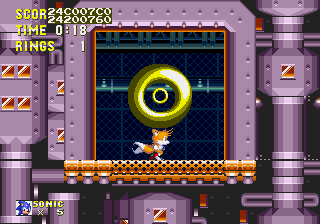
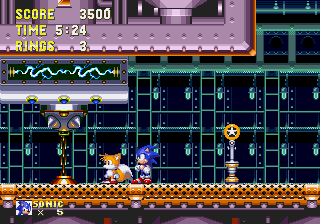
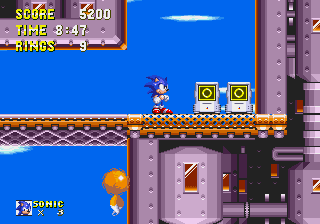
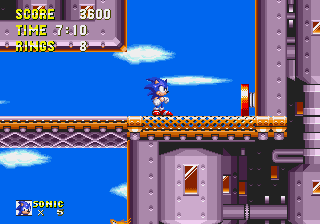
All of the Giant Rings in this zone are missing for some reason. This is the first occurence of a missing Giant Ring, found at coordinates 1D4005C0.
| Sonic 3C 0408 |
|---|
| Sonic 3 & Knuckles final |
|---|
The rings that would be here on the way out from the above Giant Ring are also missing.
| Sonic 3C 0408 |
|---|
| Sonic 3 & Knuckles final |
|---|
This set of spikes that would lead to the second Giant Ring of the Act is completely immovable in this prototype.
| Sonic 3C 0408 |
|---|
| Sonic 3 & Knuckles final |
|---|
The second Giant Ring that is missing, normally found at coordinates 24BF07C0. The rings on the way out are also missing.
| Sonic 3C 0408 |
|---|
| Sonic 3 & Knuckles final |
|---|
The Lightning Shield monitor hidden in this corridor is missing.
| Sonic 3C 0408 |
|---|
| Sonic 3 & Knuckles final |
|---|
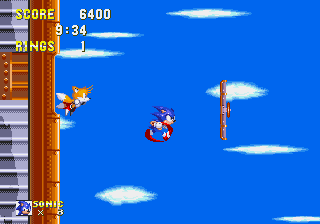
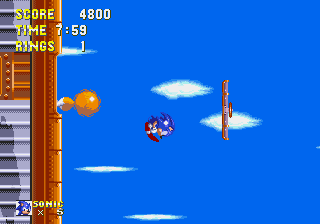
These rings in the sky above the parachuting bombs aren't there in this prototype. Just like the landmines, the bombs make Badnik-popping noises when they explode.
| Sonic 3C 0408 |
|---|
| Sonic 3 & Knuckles final |
|---|
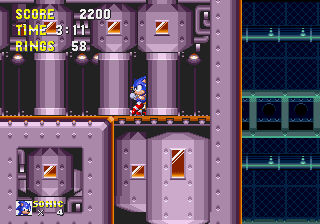
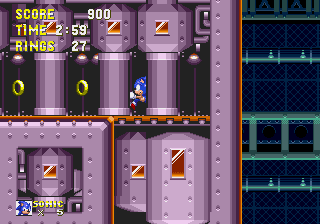
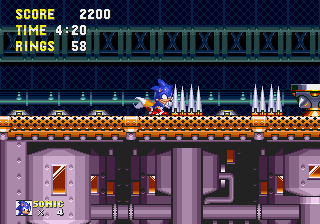
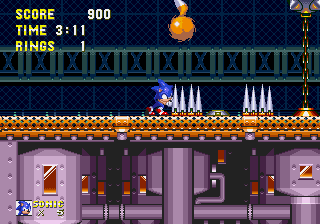
Instead of monkey bars, this set of electromagnets near the end of the Act has a third spiked platform. The electromagnets don't make any sounds, either.
| Sonic 3C 0408 |
|---|
| Sonic 3 & Knuckles final |
|---|
When the electromagnets switch off, this extra spiked platform sinks into a bed of spikes. It was probably for the better that they removed this.
| Sonic 3C 0408 |
|---|
| Sonic 3 & Knuckles final |
|---|
Gapsule's position is about 16 pixels to the left in comparison to later prototypes and the final. Its coordinates are the same as they were in the remnants of Flying Battery in Sonic 3. Its palette is also slightly different.
| Sonic 3C 0408 |
|---|
| Sonic 3 & Knuckles final |
|---|
The signpost overlaps Gapsule's remains in this prototype.
Map

|
| Sonic 3C 0408 |
|---|
| 100% |
| Sonic 3 & Knuckles final |
Act 2
| Sonic 3C 0408 |
|---|
| Sonic 3 & Knuckles final |
|---|
A Technosqueek is missing here.
| Sonic 3C 0408 |
|---|
| Sonic 3 & Knuckles final |
|---|
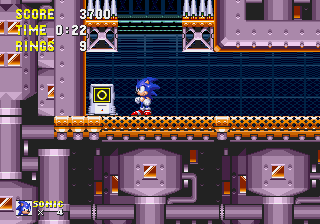
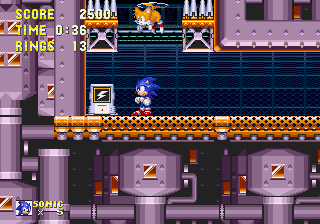
This Super Ring monitor was changed to a Lightning Shield later in development.
| Sonic 3C 0408 |
|---|
| Sonic 3 & Knuckles final |
|---|
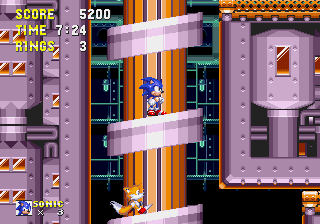
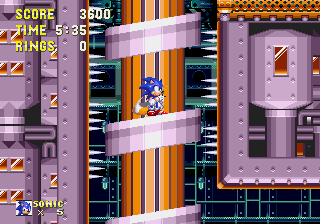
This downward elevator shaft doesn't have spikes lining the walls in this prototype. They were added in later to prevent the player from slipping past.

|
| Sonic 3C 0408 |
|---|

|
| Sonic 3 & Knuckles final |
This hallway that follows the elevator above is empty. It would be decorated with rings, a Technosqueek and a Star Post later on.
| Sonic 3C 0408 |
|---|
| Sonic 3 & Knuckles final |
|---|
Meanwhile, in the alternate path from the second elevator, this platform ride goes down a much narrower shaft.
| Sonic 3C 0408 |
|---|
| Sonic 3 & Knuckles final |
|---|
Should the player ride the right side of the platform, they will clip through the floor, allowing the player to perform a zip. Consequentially, the shaft is wider.

|
| Sonic 3C 0408 |
|---|

|
| Sonic 3 & Knuckles final |
This room is missing a revolving flamethrower and rings, and a block with a yellow spring is present instead of a flip spring.

|
| Sonic 3C 0408 |
|---|

|
| Sonic 3 & Knuckles final |
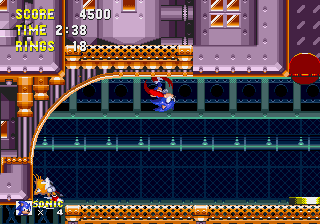
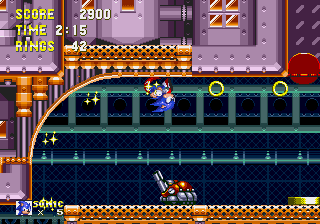
The inverted halfpipe in this room is wider, and there are no objects here. In later prototypes and the final, more dangers and a door were added to the corridor, and some monitors were added to the right.
| Sonic 3C 0408 |
|---|
| Sonic 3 & Knuckles final |
|---|
Strangely, this particular elevator ride does not have a crush object placed at the top, meaning the player will clip through the ceiling and zip through the walls.
| Sonic 3C 0408 |
|---|
| Sonic 3 & Knuckles final |
|---|
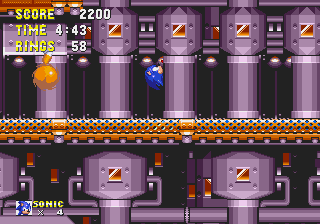
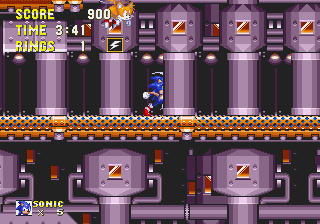
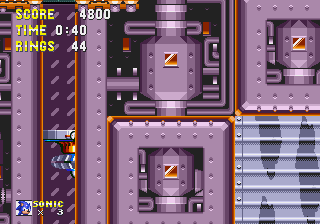
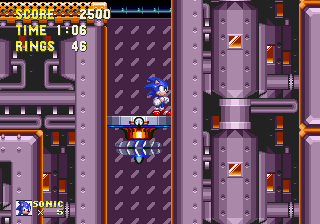
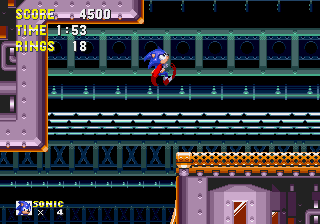
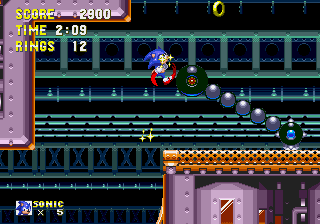
The swinging black orb that would carry the player as they run is absent. In fact...
| Sonic 3C 0408 |
|---|
| Sonic 3 & Knuckles final |
|---|
All of them are missing, even the rings that are placed around them and the Technosqueeks that crawl along the walls are missing.
| Sonic 3C 0408 |
|---|
| Sonic 3 & Knuckles final |
|---|
This room lacks rings and a Blaster compared to the final.
| Sonic 3C 0408 |
|---|
| Sonic 3 & Knuckles final |
|---|
Rings and a revolving flamethrower would be added here later.
| Sonic 3C 0408 |
|---|
| Sonic 3 & Knuckles final |
|---|
More Blasters will be added here later.
| Sonic 3C 0408 |
|---|
| Sonic 3 & Knuckles final |
|---|
This set of double doors found in one of the higher routes does not open completely. Should the player take this route, they will get stuck here.

|
| Sonic 3C 0408 |
|---|

|
| Sonic 3 & Knuckles final |
This corridor is empty in this prototype, and the swinging black orb is missing here, too.
| Sonic 3C 0408 |
|---|
| Sonic 3 & Knuckles final |
|---|
In one of the lower routes, a Star Post is missing.
| Sonic 3C 0408 |
|---|
| Sonic 3 & Knuckles final |
|---|
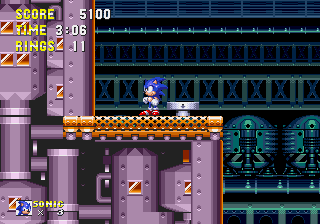
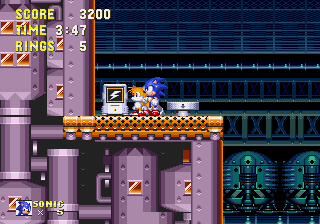
The Lightning Shield monitor is missing from this spot. When the button here is stepped on...
| Sonic 3C 0408 |
|---|
| Sonic 3 & Knuckles final |
|---|
...A door blocking the elevator opens up, which would be taken out in later builds. On top of that, there is no way for Sonic to get up here on his own, so to compensate the button was changed to make additional platforms appear to help him reach this spot. A bunch of rings were also added here.
| Sonic 3C 0408 |
|---|
| Sonic 3 & Knuckles final |
|---|
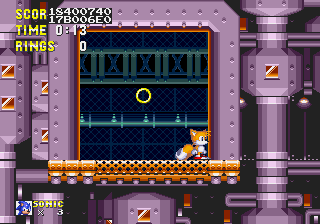
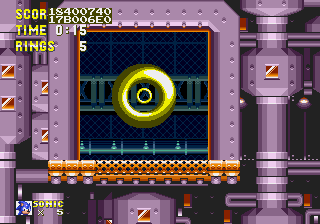
The Giant Rings in Act 2 are also missing, especially this one found at coordinates 18400740.
| Sonic 3C 0408 |
|---|
| Sonic 3 & Knuckles final |
|---|
Rings, a Technosqueek and a Star Post would be added here later.

|
| Sonic 3C 0408 |
|---|

|
| Sonic 3 & Knuckles final |
This large room also had extra spiked blocks that would sink into beds of spikes once the electromagnets turned off, along with extra rings in place of monkey bars.
| Sonic 3C 0408 |
|---|
| Sonic 3 & Knuckles final |
|---|
This room once had a bit of a puzzle to it. To open the door blocking the way, the player needs to press the button next to the flamethrower. Pressing the button next to the door makes a platform appear for the player to climb back up. This was simplified later in development so the player only needs to press the button next to the door.
| Sonic 3C 0408 |
|---|
| Sonic 3 & Knuckles final |
|---|
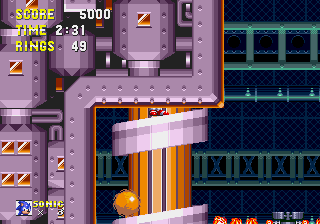
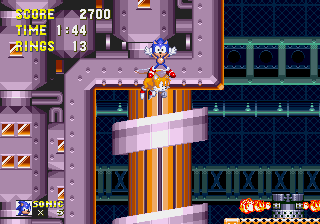
This corridor has no Star Post or spiked blocks, and the electromagnets are non-functioning. As if that wasn't enough, there is an erroneous chunk placement in the background at this point. Not only was this corrected later on, the background was also shifted down a bit.
| Sonic 3C 0408 |
|---|
| Sonic 3 & Knuckles final |
|---|
This upward elevator is also missing its spikes on the walls.
| Sonic 3C 0408 |
|---|
| Sonic 3 & Knuckles final |
|---|
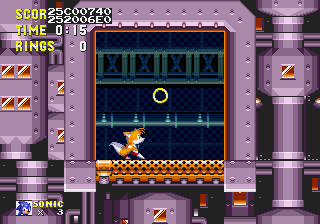
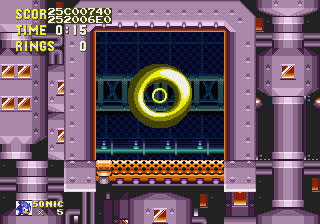
The fourth and final case of a missing Giant Ring at coordinates 25C00740, just before encountering Barrier Eggman.
Additionally, the Barrier Eggman fight is missing most of its sound effects.
| Sonic 3C 0408 |
|---|
| Sonic 3 & Knuckles final |
|---|
The rising floor sequence that comes after Barrier Eggman has some object differences, too. This pair of Super Ring monitors was replaced with a red spring later in development. Additionally, there are no rumbling sounds during the sequence.
| Sonic 3C 0408 |
|---|
| Sonic 3 & Knuckles final |
|---|
All the rings in this part of the sequence are missing, along with the spring. It's still possible to get up without the spring.

|
| Sonic 3C 0408 |
|---|

|
| Sonic 3 & Knuckles final |
Along with missing spikes, rings and a Super Ring monitor, the end of this corridor is a bit more indoors.
| Sonic 3C 0408 |
|---|
| Sonic 3 & Knuckles final |
|---|
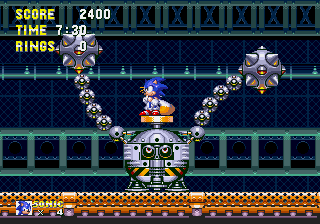
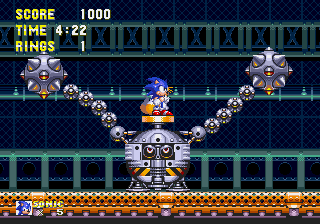
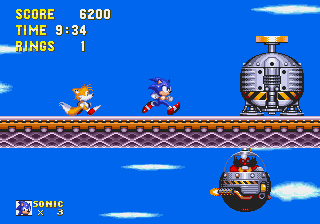
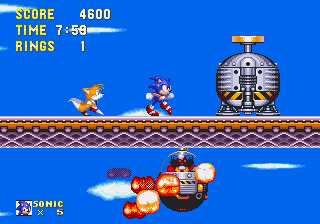
After defeating the Hang Mobile, the Eggmobile stops exploding when Eggman begins to retreat. In the final, the Eggmobile continues to explode.
| Sonic 3C 0408 |
|---|
| Sonic 3 & Knuckles final |
|---|
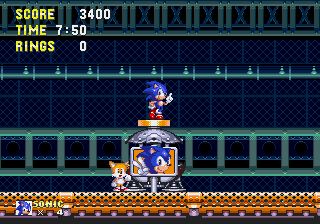
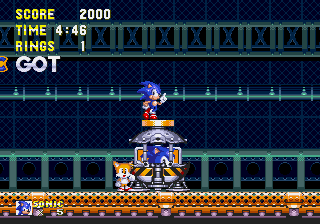
The player's character does not automatically roll when he busts down the door during the transition to Sandopolis Zone. They appear to be rolling in the Sandopolis intro, though.
Map

|
| Sonic 3C 0408 |
|---|
| 100% |
| Sonic 3 & Knuckles final |
References
| Sonic the Hedgehog 3C (prototype 0408), prototype version of Sonic the Hedgehog 3 | |
|---|---|
|
Main page | Comparisons | Maps | Hidden content | |
