Difference between revisions of "Sonic the Hedgehog 2 (Simon Wai prototype)/Comparisons/Metropolis Zone"
From Sonic Retro
m (Text replacement - "{{S2MDOmni}}" to "{{S2SWOmni}}") |
BSonirachi (talk | contribs) m |
||
| Line 1: | Line 1: | ||
{{back|Sonic the Hedgehog 2 (Simon Wai prototype)/Comparisons}} | {{back|Sonic the Hedgehog 2 (Simon Wai prototype)/Comparisons}} | ||
| − | [[Metropolis]] is noticeably unfinished in the Simon Wai prototype. While the layout is mostly there, the | + | [[Metropolis Zone]] is noticeably unfinished in the Simon Wai prototype. While the layout is mostly there, the [[Zone]] has no [[Ring]]s and is filled with navigational glitches, making turning on debug a must. |
| − | The | + | The Zone has a busier background than the final game, making some sections tough to see. |
==Act 1== | ==Act 1== | ||
| Line 10: | Line 10: | ||
| game1=Simon Wai prototype | | game1=Simon Wai prototype | ||
| game2=Final game | | game2=Final game | ||
| − | | desc=While the stage looks promising, it doesn't take long to find a problem. These metal crushers (which exist here instead of a rotating net) cannot crush Sonic and Tails by pushing them into the ceiling - they only kill | + | | desc=While the stage looks promising, it doesn't take long to find a problem. These metal crushers (which exist here instead of a rotating net) cannot crush [[Sonic the Hedgehog|Sonic]] and [[Miles "Tails" Prower|Tails]] by pushing them into the ceiling - they only kill them if they go underneath. |
}} | }} | ||
{{Comparison | {{Comparison | ||
| Line 17: | Line 17: | ||
| game1=Simon Wai prototype | | game1=Simon Wai prototype | ||
| game2=Final game | | game2=Final game | ||
| − | | desc=These pistons don't throw | + | | desc=These pistons are slower, and don't throw the player very high, which means they'll get stuck at this spot without debug. |
}} | }} | ||
{{Comparison | {{Comparison | ||
| Line 24: | Line 24: | ||
| game1=Simon Wai prototype | | game1=Simon Wai prototype | ||
| game2=Final game | | game2=Final game | ||
| − | | desc=Some 3D rotating nets don't work. | + | | desc=Some 3D rotating nets don't work. The player will fall right through this one. |
}} | }} | ||
{{Comparison | {{Comparison | ||
| Line 31: | Line 31: | ||
| game1=Simon Wai prototype | | game1=Simon Wai prototype | ||
| game2=Final game | | game2=Final game | ||
| − | | desc=But this one further down the | + | | desc=But this one further down the Act works fine. |
}} | }} | ||
{{Comparison | {{Comparison | ||
| Line 52: | Line 52: | ||
| game1=Simon Wai prototype | | game1=Simon Wai prototype | ||
| game2=Final game | | game2=Final game | ||
| − | | desc=Make the wrong move at one point and | + | | desc=Make the wrong move at one point and the player will fall down this pit. This highlights one of the Zone's biggest omissions - it doesn't loop indefinitely on the vertical axis. In the final game, pits cannot exist. |
}} | }} | ||
{{Comparison | {{Comparison | ||
| Line 59: | Line 59: | ||
| game1=Simon Wai prototype | | game1=Simon Wai prototype | ||
| game2=Final game | | game2=Final game | ||
| − | | desc=Some time later, the | + | | desc=Some time later, the Act abruptly ends. The length of the level doesn't fall far short of the final, but there's a huge empty void suggesting the boundary wasn't set yet. |
}} | }} | ||
{{Comparison | {{Comparison | ||
| Line 66: | Line 66: | ||
| game1=Simon Wai prototype | | game1=Simon Wai prototype | ||
| game2=Final game | | game2=Final game | ||
| − | | desc=At the very edge of the | + | | desc=At the very edge of the Act is a loopback to the beginning. There's nothing to see here, though. |
}} | }} | ||
| + | ===Map=== | ||
{{Comparison | {{Comparison | ||
| image1=MTZ1Wai.png | | image1=MTZ1Wai.png | ||
| Line 89: | Line 90: | ||
| game1=Simon Wai prototype | | game1=Simon Wai prototype | ||
| game2=Final game | | game2=Final game | ||
| − | | desc=Stand on a platform and | + | | desc=Stand on a platform and the player can be completely submerged without taking damage. |
}} | }} | ||
{{Comparison | {{Comparison | ||
| Line 96: | Line 97: | ||
| game1=Simon Wai prototype | | game1=Simon Wai prototype | ||
| game2=Final game | | game2=Final game | ||
| − | | desc=Once again the level doesn't loop vertically, and a 3D mesh is replaced with a metal tube. This one has no entrance from the left-hand side, so it doesn't work properly. In fact, | + | | desc=Once again the level doesn't loop vertically, and a 3D mesh is replaced with a metal tube. This one has no entrance from the left-hand side, so it doesn't work properly. In fact, Act 2 has no 3D mesh objects at all - the level is designed more around platforming on cogs. |
}} | }} | ||
{{Comparison | {{Comparison | ||
| Line 110: | Line 111: | ||
| game1=Simon Wai prototype | | game1=Simon Wai prototype | ||
| game2=Final game | | game2=Final game | ||
| − | | desc=Like | + | | desc=Like Act 1, the stage stops after a while and presents us with a void. |
}} | }} | ||
{{Comparison | {{Comparison | ||
| Line 117: | Line 118: | ||
| game1=Simon Wai prototype | | game1=Simon Wai prototype | ||
| game2=Final game | | game2=Final game | ||
| − | | desc=But again, | + | | desc=But again, the loopback can be reached on the far right of the stage. |
}} | }} | ||
| + | ===Map=== | ||
{{Comparison | {{Comparison | ||
| image1=MTZ2Wai.png | | image1=MTZ2Wai.png | ||
| Line 133: | Line 135: | ||
| game1=Simon Wai prototype | | game1=Simon Wai prototype | ||
| game2=Final game | | game2=Final game | ||
| − | | desc=Act 3 has the strangest objects in Metropolis Zone - these diagonal lifts. They go up, down, left and right, and follow a specified pattern. The collision surrounding these sections is wonky however, so it's very easy for Sonic and Tails to jump through walls and be crushed. | + | | desc=Act 3 has the strangest objects in Metropolis Zone - these diagonal rhombus-shaped lifts. They go up, down, left and right, and follow a specified pattern. The collision surrounding these sections is wonky however, so it's very easy for Sonic and Tails to jump through walls and be crushed. |
}} | }} | ||
{{Comparison | {{Comparison | ||
| Line 140: | Line 142: | ||
| game1=Simon Wai prototype | | game1=Simon Wai prototype | ||
| game2=Final game | | game2=Final game | ||
| − | | desc=Only two of these squashing machines exist in the final game, and they're tucked away in the bottom left of the third | + | | desc=Only two of these squashing machines exist in the final game, and they're tucked away in the bottom left of the third Act. In the Simon Wai prototype, there are a few more dotted around. |
}} | }} | ||
{{Comparison | {{Comparison | ||
| Line 147: | Line 149: | ||
| game1=Simon Wai prototype | | game1=Simon Wai prototype | ||
| game2=Final game | | game2=Final game | ||
| − | | desc=While all three | + | | desc=While all three Acts have their fair share of layout differences, Act 3 saw the most radical changes from this point foward. Never in the final game will the player see cogs arranged like this. |
}} | }} | ||
{{Comparison | {{Comparison | ||
| Line 154: | Line 156: | ||
| game1=Simon Wai prototype | | game1=Simon Wai prototype | ||
| game2=Final game | | game2=Final game | ||
| − | | desc=Act 3 also has a large gap to cross, but this time it gives | + | | desc=Act 3 also has a large gap to cross, but this time it gives the player a platform. In the final this would take them to the boss, but here it just keeps going until the player dies. |
}} | }} | ||
{{Comparison | {{Comparison | ||
| Line 161: | Line 163: | ||
| game1=Simon Wai prototype | | game1=Simon Wai prototype | ||
| game2=Final game | | game2=Final game | ||
| − | | desc=Though if | + | | desc=Though if the player debugs their way up, they'll find yet another end-of-Act loopback. |
}} | }} | ||
| + | ===Map=== | ||
{{Comparison | {{Comparison | ||
| image1=MTZ3Wai.png | | image1=MTZ3Wai.png | ||
Revision as of 15:30, 12 November 2019
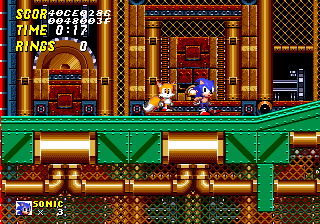
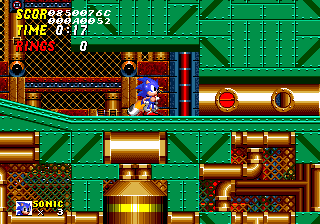
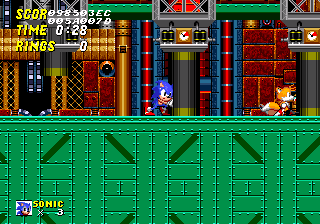
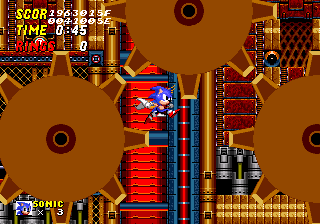
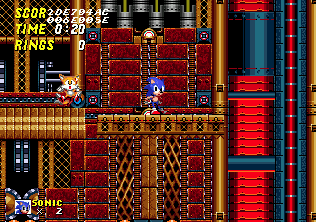
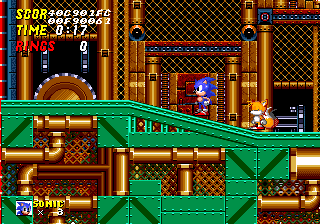
Metropolis Zone is noticeably unfinished in the Simon Wai prototype. While the layout is mostly there, the Zone has no Rings and is filled with navigational glitches, making turning on debug a must.
The Zone has a busier background than the final game, making some sections tough to see.
Act 1
| Simon Wai prototype |
|---|
| Final game |
|---|
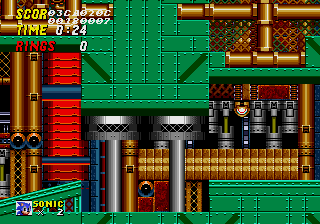
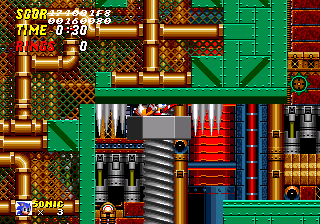
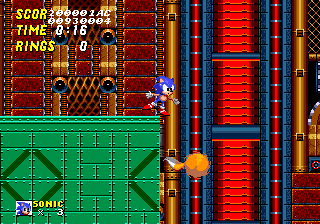
While the stage looks promising, it doesn't take long to find a problem. These metal crushers (which exist here instead of a rotating net) cannot crush Sonic and Tails by pushing them into the ceiling - they only kill them if they go underneath.
| Simon Wai prototype |
|---|
| Final game |
|---|
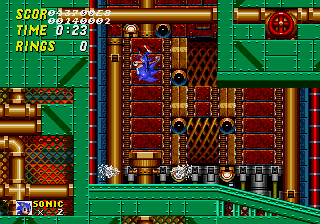
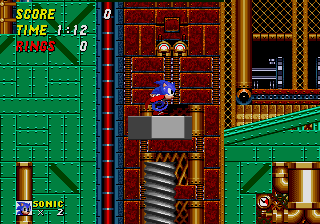
These pistons are slower, and don't throw the player very high, which means they'll get stuck at this spot without debug.
| Simon Wai prototype |
|---|
| Final game |
|---|
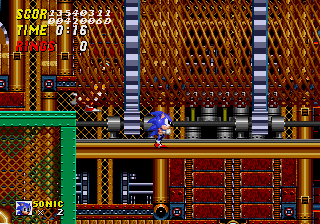
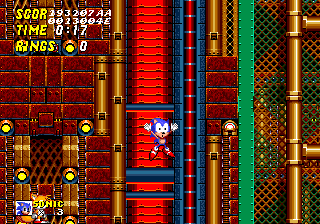
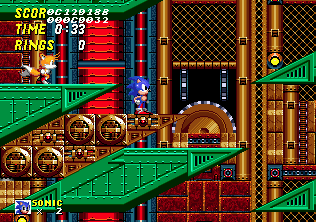
Some 3D rotating nets don't work. The player will fall right through this one.
| Simon Wai prototype |
|---|
| Final game |
|---|
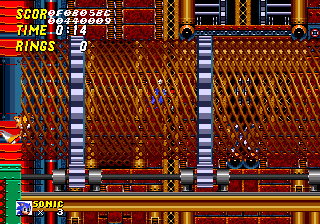
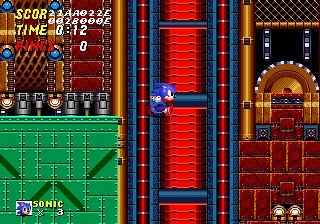
But this one further down the Act works fine.
| Simon Wai prototype |
|---|
| Final game |
|---|
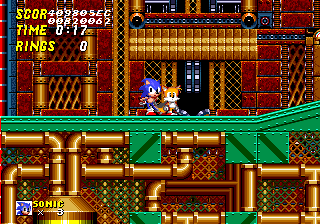
Sonic just can't seem to die.
| Simon Wai prototype |
|---|
| Final game |
|---|
The nut keeps going up.
| Simon Wai prototype |
|---|
| Final game |
|---|
Make the wrong move at one point and the player will fall down this pit. This highlights one of the Zone's biggest omissions - it doesn't loop indefinitely on the vertical axis. In the final game, pits cannot exist.
| Simon Wai prototype |
|---|
| Final game |
|---|
Some time later, the Act abruptly ends. The length of the level doesn't fall far short of the final, but there's a huge empty void suggesting the boundary wasn't set yet.
| Simon Wai prototype |
|---|
| Final game |
|---|
At the very edge of the Act is a loopback to the beginning. There's nothing to see here, though.
Map

|
| Simon Wai prototype |
|---|

|
| Final game |
Act 2
| Simon Wai prototype |
|---|
| Final game |
|---|
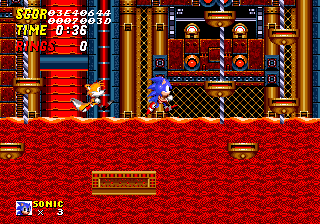
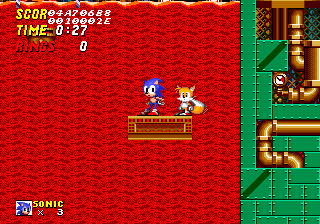
Act 2 introduces lava. It doesn't work.
| Simon Wai prototype |
|---|
| Final game |
|---|
Stand on a platform and the player can be completely submerged without taking damage.
| Simon Wai prototype |
|---|
| Final game |
|---|
Once again the level doesn't loop vertically, and a 3D mesh is replaced with a metal tube. This one has no entrance from the left-hand side, so it doesn't work properly. In fact, Act 2 has no 3D mesh objects at all - the level is designed more around platforming on cogs.
| Simon Wai prototype |
|---|
| Final game |
|---|
Conveyor belts work in Metropolis, unlike Wood Zone and Casino Night Zone.
| Simon Wai prototype |
|---|
| Final game |
|---|
Like Act 1, the stage stops after a while and presents us with a void.
| Simon Wai prototype |
|---|
| Final game |
|---|
But again, the loopback can be reached on the far right of the stage.
Map

|
| Simon Wai prototype |
|---|

|
| Final game |
Act 3
| Simon Wai prototype |
|---|
| Final game |
|---|
Act 3 has the strangest objects in Metropolis Zone - these diagonal rhombus-shaped lifts. They go up, down, left and right, and follow a specified pattern. The collision surrounding these sections is wonky however, so it's very easy for Sonic and Tails to jump through walls and be crushed.
| Simon Wai prototype |
|---|
| Final game |
|---|
Only two of these squashing machines exist in the final game, and they're tucked away in the bottom left of the third Act. In the Simon Wai prototype, there are a few more dotted around.
| Simon Wai prototype |
|---|
| Final game |
|---|
While all three Acts have their fair share of layout differences, Act 3 saw the most radical changes from this point foward. Never in the final game will the player see cogs arranged like this.
| Simon Wai prototype |
|---|
| Final game |
|---|
Act 3 also has a large gap to cross, but this time it gives the player a platform. In the final this would take them to the boss, but here it just keeps going until the player dies.
| Simon Wai prototype |
|---|
| Final game |
|---|
Though if the player debugs their way up, they'll find yet another end-of-Act loopback.
Map

|
| Simon Wai prototype |
|---|

|
| Final game |
References
| Sonic the Hedgehog 2 (Simon Wai prototype), prototype version of Sonic the Hedgehog 2 (16-bit) | |
|---|---|
|
Main page | Comparisons | Maps | Hidden content | Hacking guide | |
