Difference between revisions of "Sonic the Hedgehog 3 (prototype; 1993-11-03)/Comparisons/Launch Base Zone"
From Sonic Retro
(→Act 1) |
BSonirachi (talk | contribs) |
||
| (16 intermediate revisions by 2 users not shown) | |||
| Line 2: | Line 2: | ||
==Act 1== | ==Act 1== | ||
| + | {{Comparison | ||
| + | | image1=Sonic31993-11-03 MD LBZ1 Start.png | ||
| + | | image2=Sonic3 MD LBZ1 Start.png | ||
| + | | game1=Prototype | ||
| + | | game2=Final game | ||
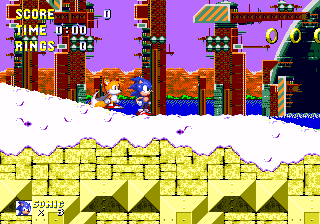
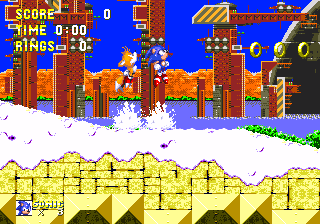
| + | | desc=[[Sonic the Hedgehog|Sonic]] and [[Miles "Tails" Prower|Tails]] do not launch out of the snow at the beginning of the Act. They start standing on top of it. | ||
| + | }} | ||
{{Comparison | {{Comparison | ||
| image1=Notavailable.svg | | image1=Notavailable.svg | ||
| Line 7: | Line 14: | ||
| game1=Prototype | | game1=Prototype | ||
| game2=Final game | | game2=Final game | ||
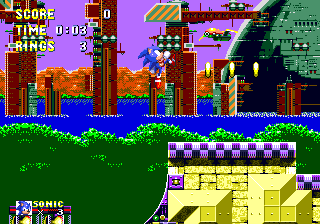
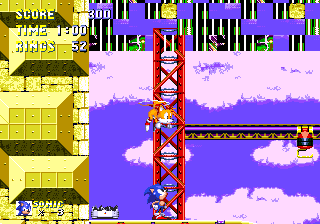
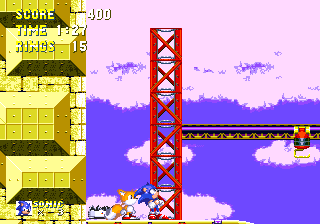
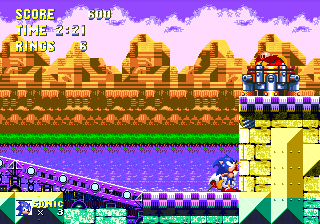
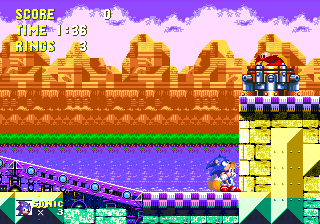
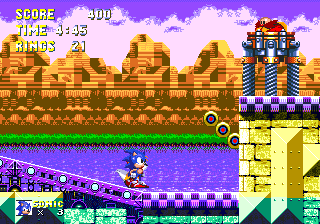
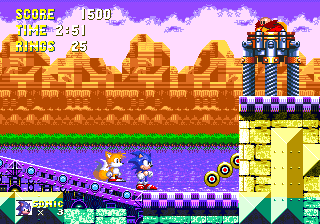
| − | | desc=The background uses a different palette. | + | | desc=The background uses a different palette, featuring a pink sky, darker supports and a green [[Death Egg]]. Though it was changed in the final, the different palette would still persist in the Data Select icon: |
| + | {{SpriteImage|LBZicon.png}} | ||
| + | }} | ||
| + | {{Comparison | ||
| + | | image1=Sonic31993-11-03 MD LBZ1 FlybotPalette.png | ||
| + | | image2=Sonic3 MD LBZ1 FlybotPalette.png | ||
| + | | game1=Prototype | ||
| + | | game2=Final game | ||
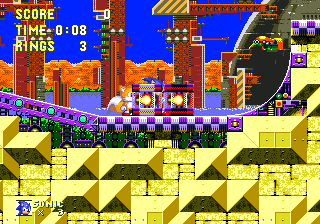
| + | | desc=[[Flybot767]]s have a different palette. | ||
| + | }} | ||
| + | {{Comparison | ||
| + | | image1=Sonic31993-11-03 MD LBZ1 DrumJump.png | ||
| + | | image2=Sonic3 MD LBZ1 DrumJump.png | ||
| + | | game1=Prototype | ||
| + | | game2=Final game | ||
| + | | desc=The prototype won't let the player jump off the bottom of the spinning drums. Instead of moving downwards, Sonic and Tails will jump upwards and land on the drum further up. | ||
| + | }} | ||
| + | {{Comparison | ||
| + | | image1=Sonic31993-11-03 MD LBZ1 LiftStuck.png | ||
| + | | image2=Sonic3 MD LBZ1 LiftStuck.png | ||
| + | | game1=Prototype | ||
| + | | game2=Final game | ||
| + | | desc=Sonic and Tails can jump "past" the spinning lifts and get stuck (or crushed, depending on which lift it is). | ||
| + | }} | ||
| + | {{Comparison | ||
| + | | image1=Sonic31993-11-03 MD LBZ1 TailsLift.png | ||
| + | | image2=Sonic3 MD LBZ1 TailsLift.png | ||
| + | | game1=Prototype | ||
| + | | game2=Final game | ||
| + | | desc=The first spinning lift encountered won't send Tails to his exclusive route yet. | ||
| + | }} | ||
| + | {{Comparison | ||
| + | | image1=Sonic31993-11-03 MD LBZ1 OrbinautLook.png | ||
| + | | image2=Sonic3 MD LBZ1 OrbinautLook.png | ||
| + | | game1=Prototype | ||
| + | | game2=Final game | ||
| + | | desc=[[Orbinaut]]s do not change direction to look at Sonic, which means it's easier to drive them into walls. They also have an incorrect palette. The spinning teacup lift to the left is also at a lower position. | ||
| + | }} | ||
| + | {{Comparison | ||
| + | | image1=Sonic31993-11-03 MD LBZ1 FirstTeacup.png | ||
| + | | image2=Sonic3 MD LBZ1 FirstTeacup.png | ||
| + | | game1=Prototype | ||
| + | | game2=Final game | ||
| + | | desc=This spinning teacup stops a little lower than usual. The final adds a [[Ribot]] in front of the player, and changes the static sideways [[Spikes (obstacle)|spikes]] to moving ones pointing upwards. | ||
| + | }} | ||
| + | {{Comparison | ||
| + | | image1=Sonic31993-11-03 MD LBZ1 IndoorTeacup.png | ||
| + | | image2=Sonic3 MD LBZ1 IndoorTeacup.png | ||
| + | | game1=Prototype | ||
| + | | game2=Final game | ||
| + | | desc=This spinning teacup is too low for Sonic to pass under it, though Tails can. The [[Invincibility]] [[monitor]] to the right was later changed to a [[Lightning Shield]] (and ''[[Sonic 3 & Knuckles]]'' would revert it back to an Invincibility). | ||
| + | }} | ||
| + | {{Comparison | ||
| + | | image1=Sonic31993-11-03 MD LBZ1 MonitorsAndSprings.png | ||
| + | | image2=Sonic3 MD LBZ1 MonitorsAndSprings.png | ||
| + | | game1=Prototype | ||
| + | | game2=Final game | ||
| + | | desc=This room, accessible via door switch, had its Invincibility changed to a [[Water Shield]] in the final. | ||
| + | }} | ||
| + | {{Comparison | ||
| + | | image1=Sonic31993-11-03 MD LBZ1 SlopePlatform1.png | ||
| + | | image2=Sonic3 MD LBZ1 SlopePlatform1.png | ||
| + | | game1=Prototype | ||
| + | | game2=Final game | ||
| + | | desc=The starting positions of moving floor platforms like this one are a little bit lower to the bottom of the slope... | ||
| + | }} | ||
| + | {{Comparison | ||
| + | | image1=Sonic31993-11-03 MD LBZ1 SlopePlatform2.png | ||
| + | | image2=Sonic3 MD LBZ1 SlopePlatform2.png | ||
| + | | game1=Prototype | ||
| + | | game2=Final game | ||
| + | | desc=...which results in them disappearing when walked off at the top of the slope due to being too far away from their starting positions. This leads to a bug where Sonic and Tails' vertical positions will be locked until they stand on another object. As a result, the starting positions of these platforms were changed to prevent this. | ||
| + | }} | ||
| + | {{Comparison | ||
| + | | image1=Sonic31993-11-03 MD LBZ1 SlopeCheckpoint.png | ||
| + | | image2=Sonic3 MD LBZ1 SlopeCheckpoint.png | ||
| + | | game1=Prototype | ||
| + | | game2=Final game | ||
| + | | desc=There is no [[Star Post]] here. The [[Ring]]s are also further to the left. | ||
| + | }} | ||
| + | {{Comparison | ||
| + | | image1=Sonic31993-11-03 MD LBZ1 TeacupSpring.png | ||
| + | | image2=Sonic3 MD LBZ1 TeacupSpring.png | ||
| + | | game1=Prototype | ||
| + | | game2=Final game | ||
| + | | desc=There is a [[spring]] here that bounces the player backwards into an Orbinaut, which can be seen as unfair object placement. The final removes the spring and embeds the spinning teacup lift into the floor. | ||
| + | }} | ||
| + | {{Comparison | ||
| + | | image1=Sonic31993-11-03 MD LBZ1 HiddenMonitors.png | ||
| + | | image2=Sonic3 MD LBZ1 HiddenMonitors.png | ||
| + | | game1=Prototype | ||
| + | | game2=Final game | ||
| + | | desc=The monitors hidden beneath the indoor spinning drum are a Super Ring and a 1-UP here. The final changes these to Water and Lightning Shields. | ||
}} | }} | ||
{{Comparison | {{Comparison | ||
| image1=Sonic31993-11-03 MD LBZ1 Knuckles.png | | image1=Sonic31993-11-03 MD LBZ1 Knuckles.png | ||
| − | | image2= | + | | image2=Sonic3 MD LBZ1 Knuckles.png |
| game1=Prototype | | game1=Prototype | ||
| game2=Final game | | game2=Final game | ||
| − | | desc=Graphics start corrupting when Eggman and Knuckles arrive on the scene. | + | | desc=Graphics and palettes start corrupting when [[Eggman]] and [[Knuckles the Echidna|Knuckles]] arrive on the scene. |
}} | }} | ||
{{Comparison | {{Comparison | ||
| image1=Sonic31993-11-03 MD LBZ1 Stuck.png | | image1=Sonic31993-11-03 MD LBZ1 Stuck.png | ||
| − | | image2=Notavailable.svg | + | | image2=Sonic3 MD LBZ1 Stuck.png |
| + | | game1=Prototype | ||
| + | | game2=Final game | ||
| + | | desc=The tower and the end of the Act does not collapse so the screen locks in place. However, the player can get past this by making Tails move to the right with the second control pad. | ||
| + | }} | ||
| + | {{Comparison | ||
| + | | image1=Sonic31993-11-03 MD LBZ1 TwinHammer.png | ||
| + | | image2=Sonic3 MD LBZ1 TwinHammer.png | ||
| + | | game1=Prototype | ||
| + | | game2=Final game | ||
| + | | desc=[[Twin Hammer]] loads without a boss theme. You fight it in the same place as the final game, but there are two obtrusive pipe systems in the floor, which when entered move Sonic and Tails above one of two boxes. | ||
| + | }} | ||
| + | {{Comparison | ||
| + | | image1=Sonic31993-11-03 MD LBZ1 TwinHammerDeath.png | ||
| + | | image2=Sonic3 MD LBZ1 TwinHammerDeath.png | ||
| + | | game1=Prototype | ||
| + | | game2=Final game | ||
| + | | desc=If the player gets hit during this battle and lands in the tube entrance, it counts as a pit death. | ||
| + | }} | ||
| + | {{Comparison | ||
| + | | image1=Sonic31993-11-03 MD LBZ1 BossRestart.png | ||
| + | | image2=Sonic3 MD LBZ1 BossRestart.png | ||
| + | | game1=Prototype | ||
| + | | game2=Final game | ||
| + | | desc=Dying just causes the the area to load as if the player has reached it through [[edit mode]] - devoid of bosses, and with an empty void on the right hand side. | ||
| + | }} | ||
| + | {{Comparison | ||
| + | | image1=Sonic31993-11-03 MD LBZ1 ActTransition.png | ||
| + | | image2=Sonic3 MD LBZ1 ActTransition.png | ||
| + | | game1=Prototype | ||
| + | | game2=Final game | ||
| + | | desc=Defeating Twin Hammer causes the second Act to load, but the player is sped right through a broken version of the Act to where Knuckles is standing. The music changes, and the player will fall to the floor and die (although Act 2 will load properly afterwards). | ||
| + | }} | ||
| + | {{Comparison | ||
| + | | sprite1=Notavailable.svg | ||
| + | | sprite1w= | ||
| + | | sprite1h= | ||
| + | | sprite1x= | ||
| + | | sprite1y= | ||
| + | | sprite2=S3 map LBZ1.png | ||
| + | | sprite2w=896 | ||
| + | | sprite2h=512 | ||
| + | | sprite2x=14976 | ||
| + | | sprite2y=1664 | ||
| + | | spritescale=0.75 | ||
| game1=Prototype | | game1=Prototype | ||
| game2=Final game | | game2=Final game | ||
| − | | desc= | + | | desc=Knuckles' boss area doesn't have a Star Post, Rings or a switch door here. |
}} | }} | ||
{{Comparison | {{Comparison | ||
| − | | | + | | sprite1=Notavailable.svg |
| − | | | + | | sprite1w= |
| + | | sprite1h= | ||
| + | | sprite1x= | ||
| + | | sprite1y= | ||
| + | | sprite2=S3 map LBZ1.png | ||
| + | | sprite2w=640 | ||
| + | | sprite2h=384 | ||
| + | | sprite2x=15744 | ||
| + | | sprite2y=2688 | ||
| + | | spritescale=0.75 | ||
| game1=Prototype | | game1=Prototype | ||
| game2=Final game | | game2=Final game | ||
| − | | desc= | + | | desc=Interestingly, the prototype has '''more''' of the beginning of Knuckles' Act 2 placed after where Act 1 ends even though the player is not supposed to see it normally. The final removes some of the level chunks, but leaves the spring. |
}} | }} | ||
| Line 42: | Line 194: | ||
==Act 2== | ==Act 2== | ||
{{Comparison | {{Comparison | ||
| − | | image1= | + | | image1=Sonic31993-11-03 MD LBZ2 SonicUnderwater.png |
| − | | image2=Notavailable.svg | + | | image2=Sonic3 MD LBZ2 SonicUnderwater.png |
| + | | game1=Prototype | ||
| + | | game2=Final game | ||
| + | | desc=Sonic and Tails do not have a dedicated underwater palette. | ||
| + | }} | ||
| + | {{Comparison | ||
| + | | image1=Sonic31993-11-03 MD LBZ2 RedBits.png | ||
| + | | image2=Sonic3 MD LBZ2 RedBits.png | ||
| + | | game1=Prototype | ||
| + | | game2=Final game | ||
| + | | desc=Weird red foreground tiles can be found dotted around the stage where animated tiles should be. | ||
| + | }} | ||
| + | {{Comparison | ||
| + | | sprite1=Notavailable.svg | ||
| + | | sprite1w= | ||
| + | | sprite1h= | ||
| + | | sprite1x= | ||
| + | | sprite1y= | ||
| + | | sprite2=S3 map LBZ2.png | ||
| + | | sprite2w=640 | ||
| + | | sprite2h=384 | ||
| + | | sprite2x=3968 | ||
| + | | sprite2y=1408 | ||
| + | | spritescale=0.75 | ||
| game1=Prototype | | game1=Prototype | ||
| game2=Final game | | game2=Final game | ||
| − | | desc= | + | | desc=A chunk of the ceiling here was removed in the final, sending the player towards the spring. |
}} | }} | ||
{{Comparison | {{Comparison | ||
| image1=Sonic31993-11-03 MD LBZ2 SkyCorruption.png | | image1=Sonic31993-11-03 MD LBZ2 SkyCorruption.png | ||
| − | | image2=Notavailable.svg | + | | image2=Sonic3 MD LBZ2 SkyCorruption.png |
| + | | game1=Prototype | ||
| + | | game2=Final game | ||
| + | | desc=The top part of the sky is always corrupted in this build. If the player restarts the level from a [[Star Post]] near the top boundary, the sky will appear normal as it should, but will corrupt once the player comes within proximity of the water. | ||
| + | }} | ||
| + | {{Comparison | ||
| + | | image1=Sonic31993-11-03 MD LBZ2 SpikeDrop.png | ||
| + | | image2=Sonic3 MD LBZ2 SpikeDrop.png | ||
| + | | game1=Prototype | ||
| + | | game2=Final game | ||
| + | | desc=The player has to get past moving spikes to proceed downward from here, and they can take damage from the spikes even when they are retracted into the wall. Obviously this is unfair design, so it was redesigned, adding a Ribot and a Flybot767 to compensate. The fire spitters following it are a little closer together here, too. | ||
| + | }} | ||
| + | {{Comparison | ||
| + | | image1=Sonic31993-11-03 MD LBZ2 SwitchRoom1.png | ||
| + | | image2=Sonic3 MD LBZ2 SwitchRoom1.png | ||
| + | | game1=Prototype | ||
| + | | game2=Final game | ||
| + | | desc=To get into the room containing the door switch, the player must avoid moving spikes. The final replaces the spikes with two [[Eggman Mark]]s. | ||
| + | }} | ||
| + | {{Comparison | ||
| + | | image1=Sonic31993-11-03 MD LBZ2 SwitchRoom2.png | ||
| + | | image2=Sonic3 MD LBZ2 SwitchRoom2.png | ||
| + | | game1=Prototype | ||
| + | | game2=Final game | ||
| + | | desc=Spikes would be added to this room to make it more dangerous. | ||
| + | }} | ||
| + | {{Comparison | ||
| + | | sprite1=Notavailable.svg | ||
| + | | sprite1w= | ||
| + | | sprite1h= | ||
| + | | sprite1x= | ||
| + | | sprite1y= | ||
| + | | sprite2=S3 map LBZ2.png | ||
| + | | sprite2w=1280 | ||
| + | | sprite2h=1024 | ||
| + | | sprite2x=6656 | ||
| + | | sprite2y=0 | ||
| + | | spritescale=0.5 | ||
| + | | game1=Prototype | ||
| + | | game2=Final game | ||
| + | | desc=This entire section is different in that a [[Speed Booster]] catapults the player through a speed section. The final cuts down on some of the speed and adds a teacup lift. | ||
| + | }} | ||
| + | {{Comparison | ||
| + | | image1=Sonic31993-11-03 MD LBZ2 OutOfControlTeacup.png | ||
| + | | image2=Sonic3 MD LBZ2 OutOfControlTeacup.png | ||
| + | | game1=Prototype | ||
| + | | game2=Final game | ||
| + | | desc=This spinning teacup is supposed to spin out of control and launch the player to the right, but it doesn't do it properly - it stops after reaching the bottom, and spins out of control when the player rides it back to its original position, immediately disappearing at the frame it's supposed to detach at. | ||
| + | }} | ||
| + | {{Comparison | ||
| + | | image1=Sonic31993-11-03 MD LBZ2 TileLoadGlitch.png | ||
| + | | image2=Sonic3 MD LBZ2 TileLoadGlitch.png | ||
| + | | game1=Prototype | ||
| + | | game2=Final game | ||
| + | | desc=The game swaps out the main level assets for those of the Death Egg when a certain X coordinate has been reached, which is typically after defeating the [[Ball Shooter]], but there is no check for the player's Y coordinate, which leads to the procedure happening in the top-most routes of the Act (which are set above the boss areas) when it shouldn't, and as a consequence the player will fall down and die. | ||
| + | }} | ||
| + | {{Comparison | ||
| + | | image1=Sonic31993-11-03 MD LBZ2 BallShooterStart.png | ||
| + | | image2=Sonic3 MD LBZ2 BallShooterStart.png | ||
| + | | game1=Prototype | ||
| + | | game2=Final game | ||
| + | | desc=The Ball Shooter's support and door sprites overlap one of the foreground tiles. | ||
| + | }} | ||
| + | {{Comparison | ||
| + | | image1=Sonic31993-11-03 MD LBZ2 BallShooterDoor.png | ||
| + | | image2=Sonic3 MD LBZ2 BallShooterDoor.png | ||
| + | | game1=Prototype | ||
| + | | game2=Final game | ||
| + | | desc=The Ball Shooter's door opens from the top rather than from the bottom. | ||
| + | }} | ||
| + | {{Comparison | ||
| + | | image1=Sonic31993-11-03 MD LBZ2 BallShooterDefeated.png | ||
| + | | image2=Sonic3 MD LBZ2 BallShooterDefeated.png | ||
| game1=Prototype | | game1=Prototype | ||
| game2=Final game | | game2=Final game | ||
| − | | desc= | + | | desc=It only takes one hit to destroy the Ball Shooter instead of the usual eight, likely for testing purposes. The camera's Y positions are also unlocked after destroying it. |
}} | }} | ||
{{Comparison | {{Comparison | ||
| image1=Sonic31993-11-03 MD LBZ2 Eggpod.png | | image1=Sonic31993-11-03 MD LBZ2 Eggpod.png | ||
| − | | image2=Notavailable.svg | + | | image2=Sonic3 MD LBZ2 Eggpod.png |
| + | | game1=Prototype | ||
| + | | game2=Final game | ||
| + | | desc=The [[Egg Mobile]] is raised off the ground, and the game doesn't do anything to stop the player from jumping over it and killing themselves. | ||
| + | }} | ||
| + | {{Comparison | ||
| + | | image1=Sonic31993-11-03 MD LBZ2 Knuckles.png | ||
| + | | image2=Sonic3 MD LBZ2 Knuckles.png | ||
| + | | game1=Prototype | ||
| + | | game2=Final game | ||
| + | | desc=Knuckles is standing on circular boss door parts rather than red girders. When he loads in, the background breaks. He also doesn't chuckle between hitting the Egg Mobile and falling off. | ||
| + | }} | ||
| + | {{Comparison | ||
| + | | image1=Sonic31993-11-03 MD LBZ2 Stuck.png | ||
| + | | image2=Sonic3 MD LBZ2 Stuck.png | ||
| + | | game1=Prototype | ||
| + | | game2=Final game | ||
| + | | desc=The Egg Mobile stops moving and the game soft-locks before reaching the area where Sonic and Tails would fight [[Beam Rocket]] and [[Big Arm]]. The Death Egg doesn't even move or set off tremors, either. | ||
| + | }} | ||
| + | {{Comparison | ||
| + | | sprite1=Notavailable.svg | ||
| + | | sprite1w= | ||
| + | | sprite1h= | ||
| + | | sprite1x= | ||
| + | | sprite1y= | ||
| + | | sprite2=S3 map LBZ2.png | ||
| + | | sprite2w=896 | ||
| + | | sprite2h=512 | ||
| + | | sprite2x=2688 | ||
| + | | sprite2y=2048 | ||
| + | | spritescale=0.75 | ||
| + | | vertical=yes | ||
| + | | game1=Prototype | ||
| + | | game2=Final game | ||
| + | | desc=Knuckles' route in Act 2 has had some work to it by this point as plenty of its object placement is there, but a few things are missing like all of the girders and their accompanying Ribots, with this section as an example. | ||
| + | }} | ||
| + | {{Comparison | ||
| + | | image1=Sonic31993-11-03 MD LBZ2 KnuxRouteBackground.png | ||
| + | | image2=Sonic3 MD LBZ2 KnuxRouteBackground.png | ||
| + | | game1=Prototype | ||
| + | | game2=Final game | ||
| + | | desc=The background for Knuckles' route has a glitched chunk that appears every so often near the bottom level boundary. | ||
| + | }} | ||
| + | {{Comparison | ||
| + | | image1=Sonic31993-11-03 MD LBZ2 KnuxRouteDrum.png | ||
| + | | image2=Sonic3 MD LBZ2 KnuxRouteDrum.png | ||
| + | | game1=Prototype | ||
| + | | game2=Final game | ||
| + | | desc=The spinning drum in Knuckles' route is non-functional. | ||
| + | }} | ||
| + | {{Comparison | ||
| + | | image1=Sonic31993-11-03 MD LBZ2 KnuxRoutePipe.png | ||
| + | | image2=Sonic3 MD LBZ2 KnuxRoutePipe.png | ||
| game1=Prototype | | game1=Prototype | ||
| game2=Final game | | game2=Final game | ||
| − | | desc= | + | | desc=And neither are the water pipes that Knuckles would enter in. |
}} | }} | ||
{{Comparison | {{Comparison | ||
| − | | | + | | sprite1=Notavailable.svg |
| − | | | + | | sprite1w= |
| + | | sprite1h= | ||
| + | | sprite1x= | ||
| + | | sprite1y= | ||
| + | | sprite2=S3 map LBZ2.png | ||
| + | | sprite2w=512 | ||
| + | | sprite2h=768 | ||
| + | | sprite2x=9216 | ||
| + | | sprite2y=2176 | ||
| + | | spritescale=0.75 | ||
| game1=Prototype | | game1=Prototype | ||
| game2=Final game | | game2=Final game | ||
| − | | desc= | + | | desc=A switch door, a spinning teacup and a fire spitter are missing from here. |
}} | }} | ||
{{Comparison | {{Comparison | ||
| − | | image1= | + | | image1=Sonic31993-11-03 MD LBZ2 KnuxRouteWall.png |
| − | | image2= | + | | image2=Sonic3 MD LBZ2 KnuxRouteWall.png |
| game1=Prototype | | game1=Prototype | ||
| game2=Final game | | game2=Final game | ||
| − | | desc=The | + | | desc=The final ''Sonic 3'' would swap out these three Rings with a Knuckles-only wall in the rising water section (''Sonic 3 & Knuckles'' would get rid of the wall later on). |
}} | }} | ||
| + | |||
===Map=== | ===Map=== | ||
{{Comparison | {{Comparison | ||
Latest revision as of 12:50, 22 November 2020
Contents
Act 1
| Prototype |
|---|
| Final game |
|---|
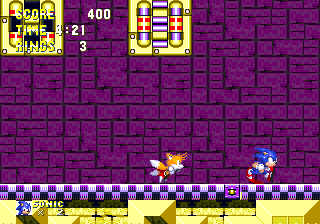
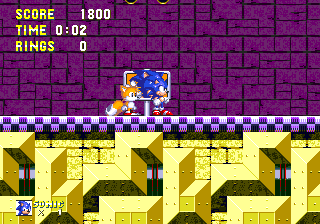
Sonic and Tails do not launch out of the snow at the beginning of the Act. They start standing on top of it.
| Prototype |
|---|
| Final game |
|---|
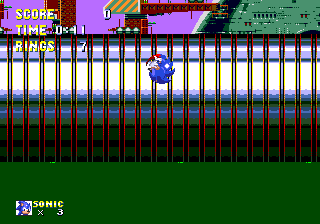
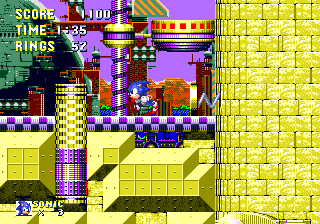
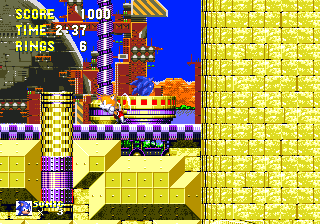
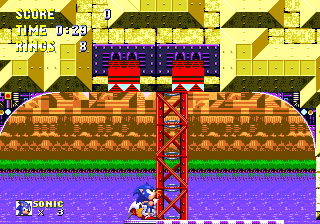
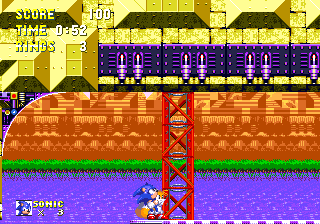
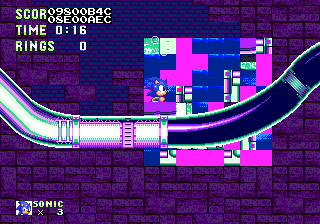
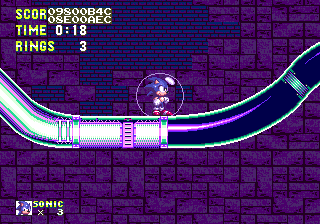
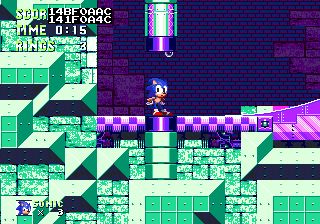
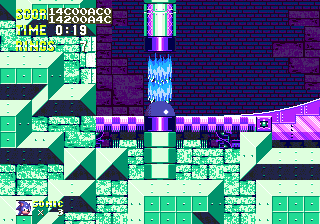
The background uses a different palette, featuring a pink sky, darker supports and a green Death Egg. Though it was changed in the final, the different palette would still persist in the Data Select icon:
| Prototype |
|---|
| Final game |
|---|
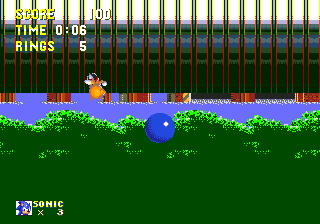
Flybot767s have a different palette.
| Prototype |
|---|
| Final game |
|---|
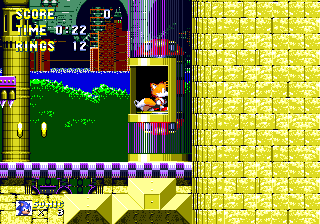
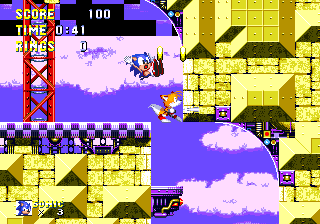
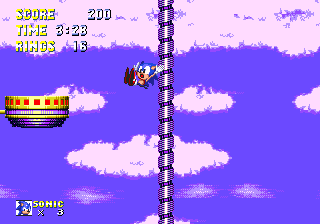
The prototype won't let the player jump off the bottom of the spinning drums. Instead of moving downwards, Sonic and Tails will jump upwards and land on the drum further up.
| Prototype |
|---|
| Final game |
|---|
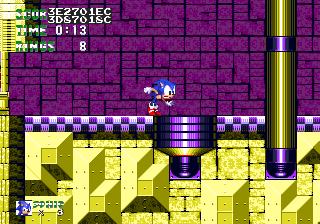
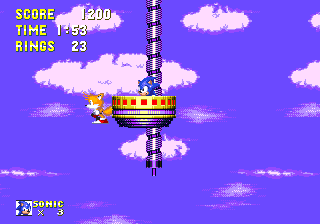
Sonic and Tails can jump "past" the spinning lifts and get stuck (or crushed, depending on which lift it is).
| Prototype |
|---|
| Final game |
|---|
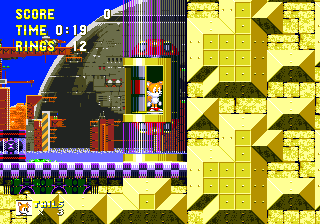
The first spinning lift encountered won't send Tails to his exclusive route yet.
| Prototype |
|---|
| Final game |
|---|
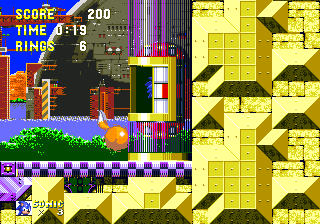
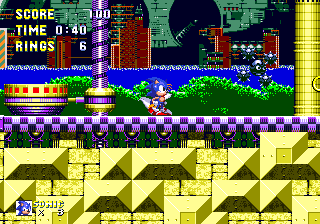
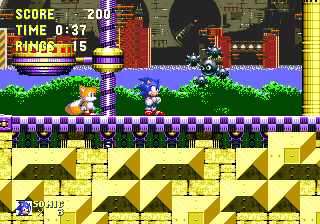
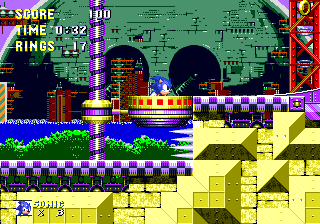
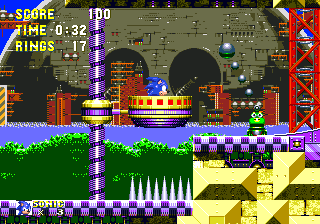
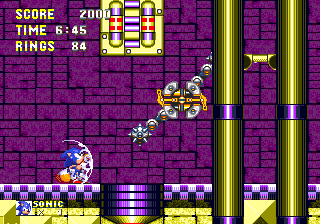
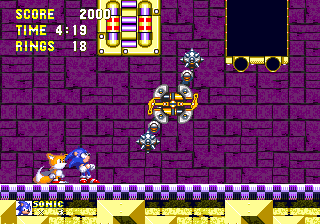
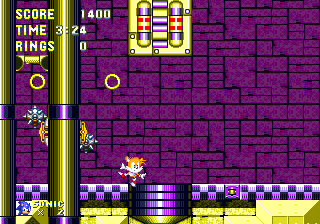
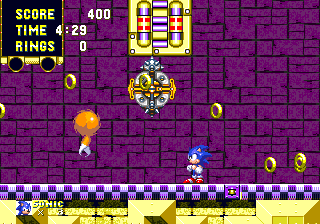
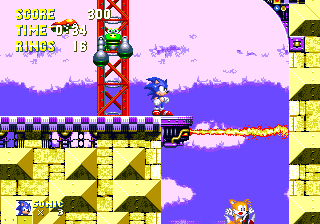
Orbinauts do not change direction to look at Sonic, which means it's easier to drive them into walls. They also have an incorrect palette. The spinning teacup lift to the left is also at a lower position.
| Prototype |
|---|
| Final game |
|---|
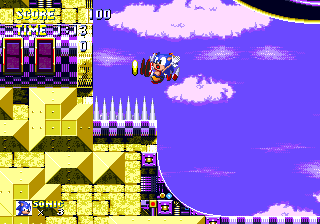
This spinning teacup stops a little lower than usual. The final adds a Ribot in front of the player, and changes the static sideways spikes to moving ones pointing upwards.
| Prototype |
|---|
| Final game |
|---|
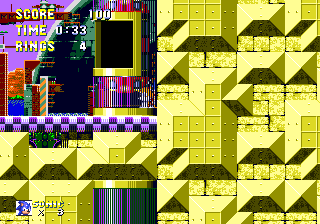
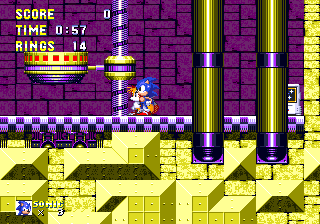
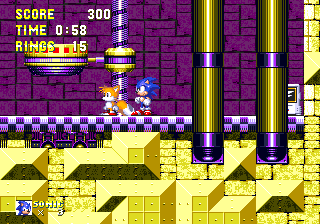
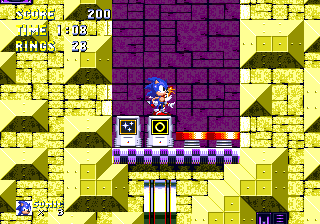
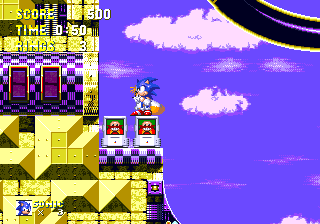
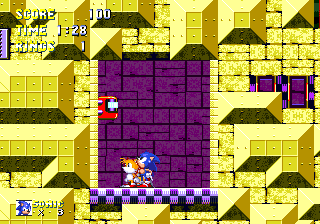
This spinning teacup is too low for Sonic to pass under it, though Tails can. The Invincibility monitor to the right was later changed to a Lightning Shield (and Sonic 3 & Knuckles would revert it back to an Invincibility).
| Prototype |
|---|
| Final game |
|---|
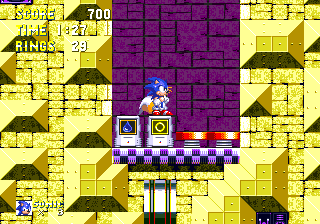
This room, accessible via door switch, had its Invincibility changed to a Water Shield in the final.
| Prototype |
|---|
| Final game |
|---|
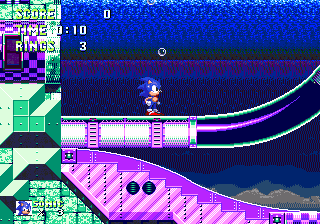
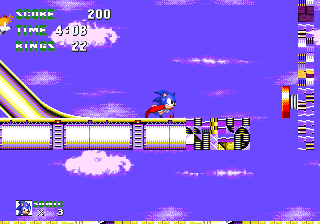
The starting positions of moving floor platforms like this one are a little bit lower to the bottom of the slope...
| Prototype |
|---|
| Final game |
|---|
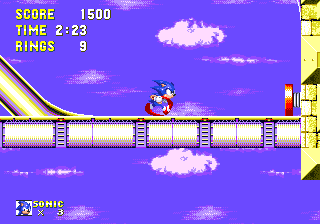
...which results in them disappearing when walked off at the top of the slope due to being too far away from their starting positions. This leads to a bug where Sonic and Tails' vertical positions will be locked until they stand on another object. As a result, the starting positions of these platforms were changed to prevent this.
| Prototype |
|---|
| Final game |
|---|
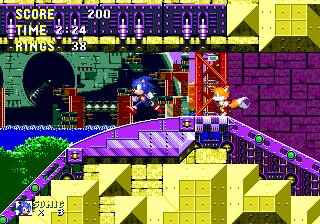
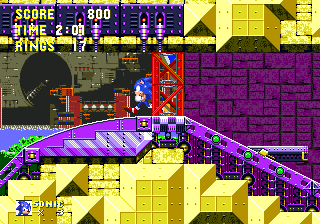
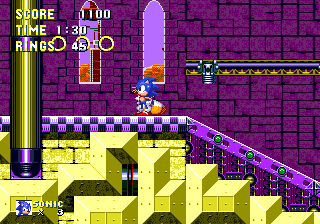
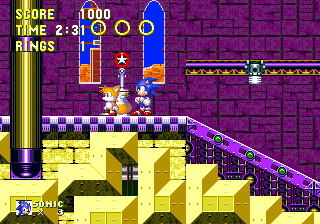
There is no Star Post here. The Rings are also further to the left.
| Prototype |
|---|
| Final game |
|---|
There is a spring here that bounces the player backwards into an Orbinaut, which can be seen as unfair object placement. The final removes the spring and embeds the spinning teacup lift into the floor.
| Prototype |
|---|
| Final game |
|---|
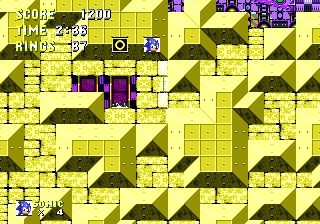
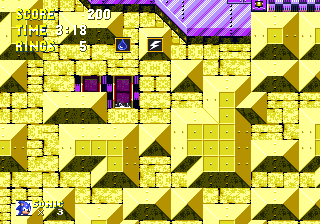
The monitors hidden beneath the indoor spinning drum are a Super Ring and a 1-UP here. The final changes these to Water and Lightning Shields.
| Prototype |
|---|
| Final game |
|---|
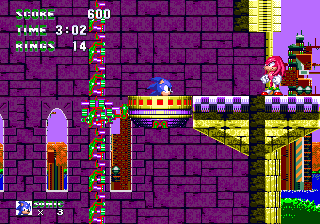
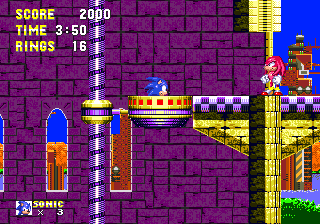
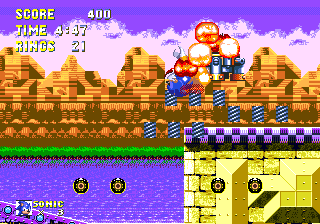
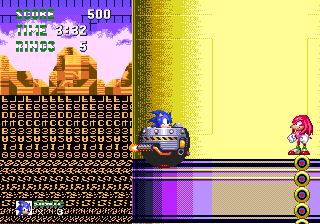
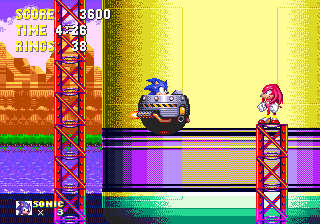
Graphics and palettes start corrupting when Eggman and Knuckles arrive on the scene.
| Prototype |
|---|
| Final game |
|---|
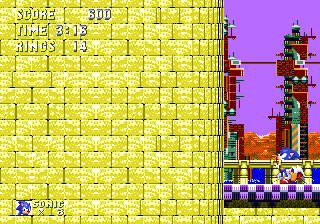
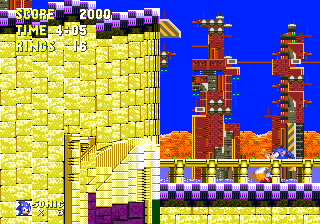
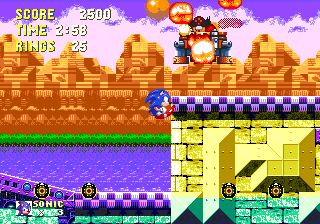
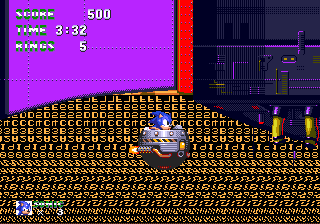
The tower and the end of the Act does not collapse so the screen locks in place. However, the player can get past this by making Tails move to the right with the second control pad.
| Prototype |
|---|
| Final game |
|---|
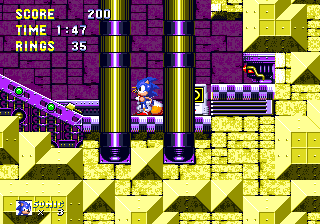
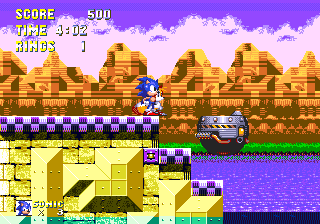
Twin Hammer loads without a boss theme. You fight it in the same place as the final game, but there are two obtrusive pipe systems in the floor, which when entered move Sonic and Tails above one of two boxes.
| Prototype |
|---|
| Final game |
|---|
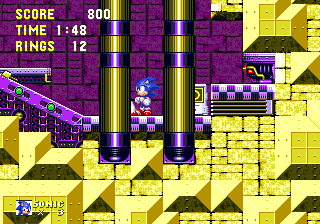
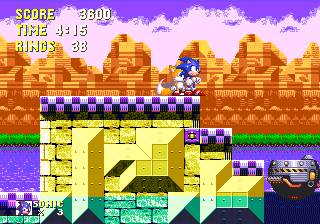
If the player gets hit during this battle and lands in the tube entrance, it counts as a pit death.
| Prototype |
|---|
| Final game |
|---|
Dying just causes the the area to load as if the player has reached it through edit mode - devoid of bosses, and with an empty void on the right hand side.
| Prototype |
|---|
| Final game |
|---|
Defeating Twin Hammer causes the second Act to load, but the player is sped right through a broken version of the Act to where Knuckles is standing. The music changes, and the player will fall to the floor and die (although Act 2 will load properly afterwards).
| Prototype |
|---|
| Final game |
|---|
Knuckles' boss area doesn't have a Star Post, Rings or a switch door here.
| Prototype |
|---|
| Final game |
|---|
Interestingly, the prototype has more of the beginning of Knuckles' Act 2 placed after where Act 1 ends even though the player is not supposed to see it normally. The final removes some of the level chunks, but leaves the spring.
Map

|
| Prototype |
|---|

|
| Final game |
Act 2
| Prototype |
|---|
| Final game |
|---|
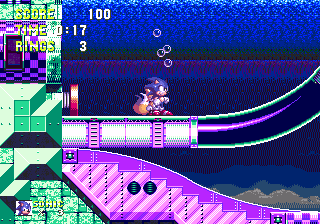
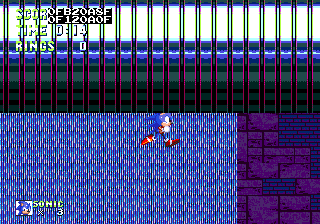
Sonic and Tails do not have a dedicated underwater palette.
| Prototype |
|---|
| Final game |
|---|
Weird red foreground tiles can be found dotted around the stage where animated tiles should be.
| Prototype |
|---|
| Final game |
|---|
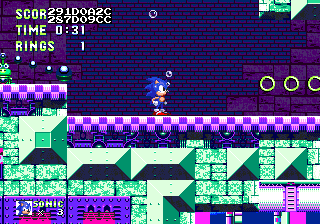
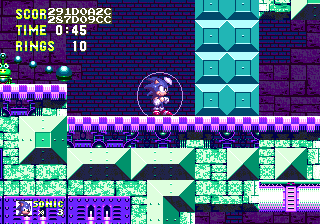
A chunk of the ceiling here was removed in the final, sending the player towards the spring.
| Prototype |
|---|
| Final game |
|---|
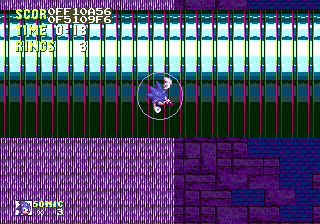
The top part of the sky is always corrupted in this build. If the player restarts the level from a Star Post near the top boundary, the sky will appear normal as it should, but will corrupt once the player comes within proximity of the water.
| Prototype |
|---|
| Final game |
|---|
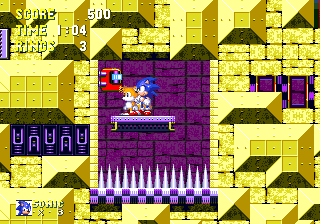
The player has to get past moving spikes to proceed downward from here, and they can take damage from the spikes even when they are retracted into the wall. Obviously this is unfair design, so it was redesigned, adding a Ribot and a Flybot767 to compensate. The fire spitters following it are a little closer together here, too.
| Prototype |
|---|
| Final game |
|---|
To get into the room containing the door switch, the player must avoid moving spikes. The final replaces the spikes with two Eggman Marks.
| Prototype |
|---|
| Final game |
|---|
Spikes would be added to this room to make it more dangerous.
| Prototype |
|---|
| Final game |
|---|
This entire section is different in that a Speed Booster catapults the player through a speed section. The final cuts down on some of the speed and adds a teacup lift.
| Prototype |
|---|
| Final game |
|---|
This spinning teacup is supposed to spin out of control and launch the player to the right, but it doesn't do it properly - it stops after reaching the bottom, and spins out of control when the player rides it back to its original position, immediately disappearing at the frame it's supposed to detach at.
| Prototype |
|---|
| Final game |
|---|
The game swaps out the main level assets for those of the Death Egg when a certain X coordinate has been reached, which is typically after defeating the Ball Shooter, but there is no check for the player's Y coordinate, which leads to the procedure happening in the top-most routes of the Act (which are set above the boss areas) when it shouldn't, and as a consequence the player will fall down and die.
| Prototype |
|---|
| Final game |
|---|
The Ball Shooter's support and door sprites overlap one of the foreground tiles.
| Prototype |
|---|
| Final game |
|---|
The Ball Shooter's door opens from the top rather than from the bottom.
| Prototype |
|---|
| Final game |
|---|
It only takes one hit to destroy the Ball Shooter instead of the usual eight, likely for testing purposes. The camera's Y positions are also unlocked after destroying it.
| Prototype |
|---|
| Final game |
|---|
The Egg Mobile is raised off the ground, and the game doesn't do anything to stop the player from jumping over it and killing themselves.
| Prototype |
|---|
| Final game |
|---|
Knuckles is standing on circular boss door parts rather than red girders. When he loads in, the background breaks. He also doesn't chuckle between hitting the Egg Mobile and falling off.
| Prototype |
|---|
| Final game |
|---|
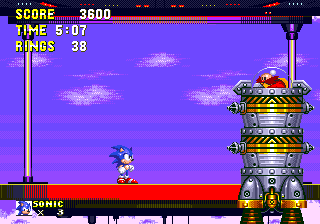
The Egg Mobile stops moving and the game soft-locks before reaching the area where Sonic and Tails would fight Beam Rocket and Big Arm. The Death Egg doesn't even move or set off tremors, either.
| Prototype |
|---|
| Final game |
Knuckles' route in Act 2 has had some work to it by this point as plenty of its object placement is there, but a few things are missing like all of the girders and their accompanying Ribots, with this section as an example.
| Prototype |
|---|
| Final game |
|---|
The background for Knuckles' route has a glitched chunk that appears every so often near the bottom level boundary.
| Prototype |
|---|
| Final game |
|---|
The spinning drum in Knuckles' route is non-functional.
| Prototype |
|---|
| Final game |
|---|
And neither are the water pipes that Knuckles would enter in.
| Prototype |
|---|
| Final game |
|---|
A switch door, a spinning teacup and a fire spitter are missing from here.
| Prototype |
|---|
| Final game |
|---|
The final Sonic 3 would swap out these three Rings with a Knuckles-only wall in the rising water section (Sonic 3 & Knuckles would get rid of the wall later on).
Map

|
| Prototype |
|---|

|
| Final game |
References
| Sonic the Hedgehog 3 (prototype; 1993-11-03), prototype version of Sonic the Hedgehog 3 | |
|---|---|
|
Main page | Comparisons | Maps | Hidden content | |
