
Difference between revisions of "SForcesOmni"
From Sonic Retro
(Adding title screen to the template.) |
|||
| Line 17: | Line 17: | ||
{{#vardefine:thumbsize|120px}}{{#vardefine:thumbwidth| }} | {{#vardefine:thumbsize|120px}}{{#vardefine:thumbwidth| }} | ||
{{OmniThumb|LostValley SF Switch.png|Lost Valley}} | {{OmniThumb|LostValley SF Switch.png|Lost Valley}} | ||
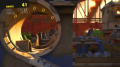
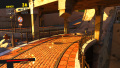
| − | {{OmniThumb| | + | {{OmniThumb|02.jpg|Space Port}} |
{{OmniThumb|GhostTown SonicForces Switch.png|Ghost Town}} | {{OmniThumb|GhostTown SonicForces Switch.png|Ghost Town}} | ||
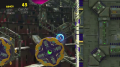
| − | {{OmniThumb| | + | {{OmniThumb|03.jpg|Prison Hall}} |
| − | {{OmniThumb| | + | {{OmniThumb|04.jpg|Egg Gate}} |
{{clear}} | {{clear}} | ||
| − | {{OmniThumb| | + | {{OmniThumb|05.jpg|Arsenal Pyramid}} |
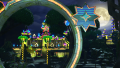
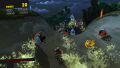
| − | {{OmniThumb| | + | {{OmniThumb|06.jpg|Luminous Forest}} |
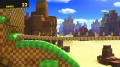
{{OmniThumb|GH SonicForces Switch.png|Green Hill (Sonic Forces)|Green Hill}} | {{OmniThumb|GH SonicForces Switch.png|Green Hill (Sonic Forces)|Green Hill}} | ||
| − | {{OmniThumb| | + | {{OmniThumb|07.jpg|Park Avenue}} |
{{OmniThumb|CasinoForest SonicForces Switch.png|Casino Forest}} | {{OmniThumb|CasinoForest SonicForces Switch.png|Casino Forest}} | ||
{{clear}} | {{clear}} | ||
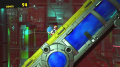
| − | {{OmniThumb| | + | {{OmniThumb|08.jpg|Aqua Road}} |
| − | {{OmniThumb| | + | {{OmniThumb|09.jpg|Sunset Heights}} |
| − | {{OmniThumb| | + | {{OmniThumb|10.jpg|Capital City}} |
{{OmniThumb|ChemicalPlant SonicForces Switch.png|Chemical Plant (Sonic Forces)|Chemical Plant}} | {{OmniThumb|ChemicalPlant SonicForces Switch.png|Chemical Plant (Sonic Forces)|Chemical Plant}} | ||
{{OmniThumb|Notavailable.svg|Guardian Rock}} | {{OmniThumb|Notavailable.svg|Guardian Rock}} | ||
{{clear}} | {{clear}} | ||
| − | {{OmniThumb| | + | {{OmniThumb|11.jpg|Network Terminal}} |
{{OmniThumb|DeathEgg SF Switch.png|Death Egg (Sonic Forces)|Death Egg}} | {{OmniThumb|DeathEgg SF Switch.png|Death Egg (Sonic Forces)|Death Egg}} | ||
| − | {{OmniThumb| | + | {{OmniThumb|12.jpg|Metropolitan Highway}} |
| − | {{OmniThumb| | + | {{OmniThumb|13.jpg|Null Space}} |
{{OmniThumb|Notavailable.svg|Imperial Tower}} | {{OmniThumb|Notavailable.svg|Imperial Tower}} | ||
{{clear}} | {{clear}} | ||
| − | {{OmniThumb| | + | {{OmniThumb|14.jpg|Mortar Canyon}} |
{{OmniThumb|IronFortress SF Switch.png|Iron Fortress}} | {{OmniThumb|IronFortress SF Switch.png|Iron Fortress}} | ||
| − | {{OmniThumb| | + | {{OmniThumb|15.jpg|Final Judgement}} |
{{clear}} | {{clear}} | ||
'''Episode Shadow levels:''' | '''Episode Shadow levels:''' | ||
Revision as of 14:42, 19 November 2017
| Sonic Forces | |
|---|---|
|
<div class="bobscreen" style="width:120px; height:Expression error: Unexpected < operator.px; display:inline-block; text-align:center; overflow:hidden;"></div>
|
show;hide
<div class="bobscreen" style="width:120px; height:Expression error: Unexpected < operator.px; display:inline-block; text-align:center; overflow:hidden;"> <div class="bobscreen" style="width:120px; height:Expression error: Unexpected < operator.px; display:inline-block; text-align:center; overflow:hidden;"> <div class="bobscreen" style="width:120px; height:Expression error: Unexpected < operator.px; display:inline-block; text-align:center; overflow:hidden;"> <div class="bobscreen" style="width:120px; height:Expression error: Unexpected < operator.px; display:inline-block; text-align:center; overflow:hidden;"> </div> <div class="bobscreen" style="width:120px; height:Expression error: Unexpected < operator.px; display:inline-block; text-align:center; overflow:hidden;"> </div> <div class="bobscreen" style="width:120px; height:Expression error: Unexpected < operator.px; display:inline-block; text-align:center; overflow:hidden;"> </div> <div class="bobscreen" style="width:120px; height:Expression error: Unexpected < operator.px; display:inline-block; text-align:center; overflow:hidden;"> </div> <div class="bobscreen" style="width:120px; height:Expression error: Unexpected < operator.px; display:inline-block; text-align:center; overflow:hidden;"> </div> <div class="bobscreen" style="width:120px; height:Expression error: Unexpected < operator.px; display:inline-block; text-align:center; overflow:hidden;"> </div> <div class="bobscreen" style="width:120px; height:Expression error: Unexpected < operator.px; display:inline-block; text-align:center; overflow:hidden;"> </div> <div class="bobscreen" style="width:120px; height:Expression error: Unexpected < operator.px; display:inline-block; text-align:center; overflow:hidden;"> </div> <div class="bobscreen" style="width:120px; height:Expression error: Unexpected < operator.px; display:inline-block; text-align:center; overflow:hidden;"> </div> <div class="bobscreen" style="width:120px; height:Expression error: Unexpected < operator.px; display:inline-block; text-align:center; overflow:hidden;"> </div> <div class="bobscreen" style="width:120px; height:Expression error: Unexpected < operator.px; display:inline-block; text-align:center; overflow:hidden;"> </div> Episode Shadow levels: </div></div> </div> |


Usage
{{SForcesOmni|#}}
Substitute # with one of the following numbers depending on which type of article you want to use the template:
- Levels (this is used by default and can be left blank)
- Enemies
- Bosses
- Gear