Difference between revisions of "Sonic the Hedgehog Extended Edition"
From Sonic Retro
| Line 104: | Line 104: | ||
The number of Chaos Emeralds [More Info] collected for the game progress in the save slot. The maximum is 7. | The number of Chaos Emeralds [More Info] collected for the game progress in the save slot. The maximum is 7. | ||
| − | ======<span style="font-size: 11pt;">[[Image: | + | ======<span style="font-size: 11pt;">[[Image:Md_circle3.png|3]] Sol Emeralds</span>====== |
The number of Sol Emeralds [More Info] collected for the game progress in the save slot. The maximum is 7. | The number of Sol Emeralds [More Info] collected for the game progress in the save slot. The maximum is 7. | ||
Revision as of 22:16, 18 March 2008
| |
This article is currently undergoing a cleanup. Its contents may change completely and frequently until this notice is removed. |
| Sonic the Hedgehog Extended Edition |
|---|
| System: Sega Mega Drive/Genesis |
| Original game: [[]] |
| Credits: Cinossu |
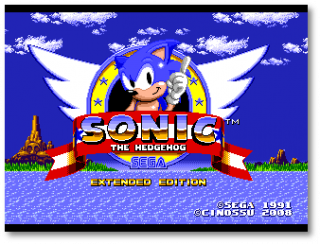
Sonic the Hedgehog Extended Edition is hack in progress by Cinossu of Sonic the Hedgehog on the Sega Mega Drive/Genesis. In this version of the game, instead of new or fully edited zones, all the original zones are kept intact with minor editing to the acts. Instead this hack extends the game beyond its original capabilities, including a zone map with warp rings to each act (much like in Sonic Advance 3), saving via sram slots (like in Sonic the Hedgehog 3), obtainable upgrades such as the spindash and super peel-out (like in the Megaman X series) as well as a new type of ring, emerald and special stage to add to the mix.
Contents
Starting Up
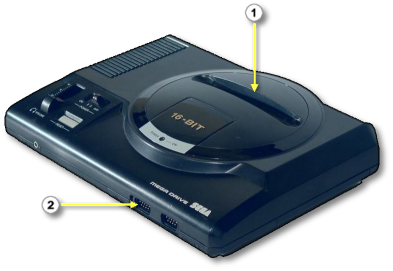
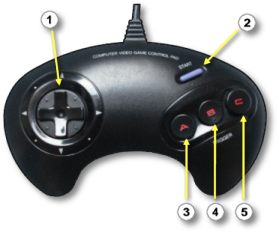
- Set up your Sega Mega Drive/Genesis System as described in its instruction manual. Plug in Control Pad 1.
- Make sure the power switch is OFF. Then insert the Sega cartridge into the console.
- Turn the power switch ON. In a few moments, the Sega splash screen appears.
- If there is a problem with the sram save data, a different screen will appear. Press the START button on Control Pad 1 to clear the erroneous data, and the game will take you to the Sega splash screen.
- If neither of these screens appear, turn the power switch OFF. Make sure your system is set up correctly and the cartridge is properly inserted. Then turn the power switch ON again.
Important: Always make sure that the Console is turned OFF when inserting or removing your Mega Drive/Genesis Cartridge.
Note: This game is for one player only.
Story
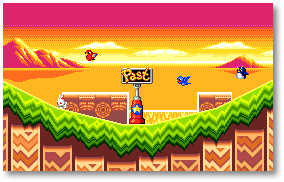
Time travel; a phenomenon not properly encountered by the residents of the many zones of the planet since the day Dr. Ivo Robotnik, the mad scientist, chained the mysterious "Little Planet" to the local terrain, bringing forth a devious plot to conquer using the Little Planet's Time Stones to his advantage. It was rather a surprise, therefore, when several inhabitants of the Sunset Hill Zone noticed one of the many long-forgotten time travel posts just sitting along a stretch of grass, as if it were naturally meant to be there. Many thought it was a replica, homage to an adventure long past, whilst others thought it just a mirage, a trick on the eyes, and that it would soon disappear exactly like the Little Planet it originated from...
... but there were the small minority who believed it to be real, and an omen of things to come...
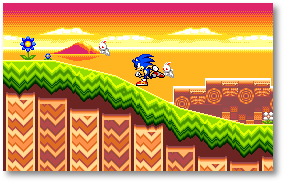
Running through the Sunset Hill Zone, Sonic the Hedgehog was supposedly out searching for a rumour, a relic of a former encounter with the evil Dr. Robotnik some 13 years previous... in actuality, he was getting quite bored. The local population hadn't heard from the doctor in a while and they were all enjoying the peace and quiet whilst it lasted, knowing it wouldn't for very long, and searching for something that only few truly believed existed was not Sonic's ideal form of relaxation. He'd much prefer to be lounging out on a reclined chair at the beach, a cool drink in one hand, and shades over his closed eyes, listening to music blaring out through his portable stereo...
... so lost in thought was the fastest creature on the planet that he did not realise he was slowly beginning to run faster, past his ‘jogging' speed and to those only he could get to by foot. Reaching a speed of above 88 MPH, Sonic was knocked out of his daydreaming as his body came into accidental contact with an object that he hadn't seen in over a decade; a time travel post, specifically one linked to the past. Remembering the critical velocity required for such an object to work, the hedgehog realised too late what was to occur. With a flash of light and a loud boom, Sonic the Hedgehog was gone from the Sunset Hill Zone, leaving only a still-spinning post and a faint echo in his wake...
Controls
 D-Button
- Change the current selection on the title screen.
- On the sound test screen, changes the current bgm/sfx selection. [More info]
- Moves Sonic left and right. Hold the button LEFT or RIGHT to speed up.
- Makes Sonic look up or crouch down. Hold the button DOWN while standing still to crouch, or hold UP to look upwards. (This won't work if Sonic is already at the highest or lowest point.)
 Start Button
- Skips all splash screens and starts the game introduction, and skips the game introduction and goes to the title screen.
- Brings up the selection on the title screen.
- Selects the highlighted option on the title screen or menu screen.
- With SOUND TEST highlighted, takes you to the sound test screen. [More info]
- On the sound test screen, takes you back to the title screen.
- Pauses a game, and resumes a paused game.
- Resumes a game when there is text on screen.


 Button A, B or C
- Skips a single splash screen to the next, and on the final splash screen starts the game introduction. Also skips the game introduction and goes to the title screen.
- On the sound test screen, pressing button C plays the currently selected bgm/sfx. Holding button A allows you to change the currently playing bgm's pitch, and holding button B allows you to change the currently playing bgm's tempo. [More info]
- Makes Sonic perform a Spin Attack.
Special and Obtainable Moves
Getting Started
When you turn the power on, a few splash screens appear before the game introduction starts. After the game introduction is finished, the title screen is displayed, where you get the options of starting a game or going to the Sound Test. [More info] If you are idle at the title screen until the music is finished, the demonstration mode begins. In demonstration mode, a small section of an act is played until you press any button or the demonstration time runs out, returning to the title screen.
As Sonic, you must evade traps and avoid enemies as you dash through seven hazardous zones using your available moves. Your goal is to rescue your friends from their egg prisons at the hand of Dr. Robotnik.
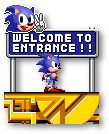
World Entrance
When you start the game from the title screen you will be taken to the World Entrance, a small mini-level where you get the choice of 3 save slots and one non-saving slot.
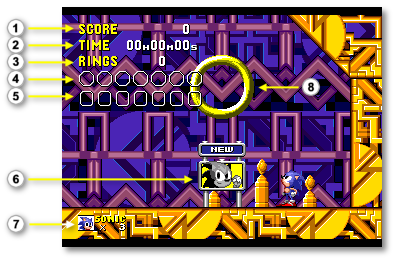
To the right, you will encounter a split path in three ways; straight ahead, above, and below. Each path leads to a Warp Ring for three different save slots, allowing you to save up to three different game progresses at once. When you walk up to one of these save files you will notice new on-screen counters appear. These, along with the signpost show the save slot's data.
 Score
Score
The current score for the game progress in the save slot.
 Chaos Emeralds
The number of Chaos Emeralds [More Info] collected for the game progress in the save slot. The maximum is 7.
 Sol Emeralds
The number of Sol Emeralds [More Info] collected for the game progress in the save slot. The maximum is 7.
 Continues
The number of continues [More Info] for the game progress in the save slot.
 Progress Signpost
A signpost showing the game progress of the save slot. The text New and a greyscale image of Sonic mean that the slot is currently empty. If the text is a zone abbreviation (Example: GHZ, MZ, etc.) with a coloured image of Sonic, it means that a game progress exists in the slot ready for continuation. If the text says Clear, it means the slot is complete in that the final boss has been beaten. A Dr. Robotnik image on the signpost means that the save slot data is corrupt.
 Lives
Lives
The current lives count for the game progress in the save slot.
 Warp Ring
Jump into this spinning Warp Ring to start or continue the game progress in the save slot.
On the middle path, before the save slot, you will notice a button with a signpost above it showing a Dr. Robotnik image on it. This button, as it is labelled by the signpost, is the delete button for the save slots. Upon pressing it, the palette of the World Entrance will turn grey and the music will change, meaning you are in delete mode. To delete a save slot, enable delete mode and go to the save slot you wish to delete. Upon entering the Warp Ring, the slot will be deleted, and the Warp Ring will reappear for the new and empty save slot. When you have deleted a save slot, delete mode will automatically be cancelled so you can start the empty save slot immediately. To cancel delete mode, just jump on the delete button again.
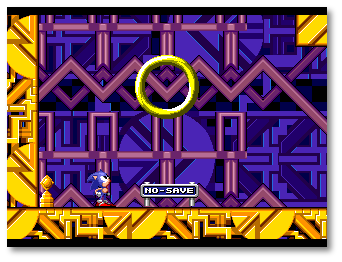
If you walk to the left, you will see a single Warp Ring with the entrance to a non-saving game. Jumping into the Warp Ring will start a new game as if you were starting an empty save slot. However, Save Posts [More Info] will be disabled, any unlockable secrets will not stay unlocked, and all progress made will be lost the next time you play the game. It is advised to play using the non-save slot only when playing a quick game or when all three save slots are in use and one cannot be deleted.
Grab the Rings
Staying alive will be tough, but you can grab Rings along the way. As long as you have at least a single ring you will not die when you get attacked or touched by an enemy, and instead you will lose all your currently held Rings. If you get attacked or touched by an enemy when your Ring count is at 0, you will die and lose a life. (Even if you are using the Spin Attack, you will lose a life if something smashes or squashes you.)
New to the game are the Negative Rings, or NegaRings, that decrease your ring count and can even make it go into negative numbers. While the number is negative, getting attacked or touched by an enemy results in the same responce as a normal positive ring count; you lose all your currently held NegaRings, setting your Ring count back to 0. The NegaRings are differentiated from the normal positive golden yellow Rings with a blood red colour instead.
On-Screen Counters
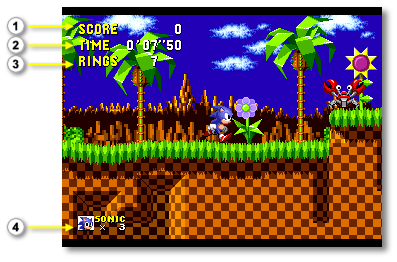
In game, using the on-screen counters, you can keep track of your Ring count along with your score, current number of lives, and the time it has taken you in the level so far.
 Score
Score
The in-game score count. There are many ways to add to your score, including destroying enemies and in-level destroyable blocks, as well as score bonuses at the end of the level. When you destroy an enemy, you will be awards 100 points. However, if you manage to chain-kill a group of enemies, the points you recieve will increase the more you destroy.
At the end of each level there is a tally of how many Rings you have collected and of the time it has taken you to complete the level. For each Ring you have collected, there is a bonus of 100 points. (Example: if you collect 100 Rings in the level, you will recieve a Ring bonus of 10,000 points.) Depending on how quick you complete the level, you will also recieve a Time bonus. Below is a list of Time bonuses and their respective time ranges:
- 50,000 points - 30 seconds or under.
- 10,000 points - 30 to 45 seconds.
- 5,000 points - 45 seconds to 1 minute.
- 4,000 points - 1 minute to 1 minute 30 seconds.
- 3,000 points - 1 minute 30 seconds to 2 minutes.
- 2,000 points - 2 to 3 minutes.
- 1,000 points - 3 to 4 minutes.
- 500 points - 4 to 5 minutes.
- 0 points - 5 minutes or above.
At the end of the tally, these bonuses are added on to your current score before proceeding to the next level.
 Time
Time
The time elapsed in the level so far. Shows minutes, seconds and centiseconds, giving you an accurate account of how long it has taken you so far, or even how long it has taken you to complete the level. The timer has a range up to 10 minutes, at which time you will get a Time Over and lose a life. In the final minute, the Time text will flash red warning you that you are close to a Time Over.
In some cases, this timer will already start with a time and count downwards to 0. In this case, the Time text will again flash when you get to the final minute, but you will not necessarily get a Time Over when the timer eventually does reach 0. What happens at this point depends on where in the game you are.
 Rings
Rings
The current number of Rings you have. If this is at 0, the Rings text will flash red, indicating that one more hit will make you lose a life. If your Ring count reaches 100 you will recieve an extra life. You will recieve another if you manage to reach 200 Rings as well. Losing Rings and reaching 100 Rings again in the same level will not give you another extra life, however.
 Lives
Lives
The number of lives you have left. At the start of a new game, you will have 3 lives. By collecting 100 (or 200) Rings in a level, getting extra life monitors [More Info], or getting an increment of 500,000 points will get you more. You lose a life by hitting or touching enemies with 0 Rings, getting squashed, or falling off of the level. When you reach 0 lives, you will get a Game Over. [More Info]
More Soon
Blah blah blah..
Releases
|
DOWNLOAD
|
![]() Currently no other released versions
Currently no other released versions
