Difference between revisions of "Sonic the Hedgehog 2 (Nick Arcade prototype)/Comparisons/Green Hill Zone"
From Sonic Retro
BSonirachi (talk | contribs) m (Reverted edits by CZ2746 (talk) to last revision by Black Squirrel) |
|||
| (5 intermediate revisions by 3 users not shown) | |||
| Line 7: | Line 7: | ||
{{Comparison | {{Comparison | ||
| image1=z dgh01.png | | image1=z dgh01.png | ||
| − | | image2= | + | | image2=Sonic1_GHZ_NickArcadeComparison_1.png |
| game1=''Sonic 2'' Nick Arcade prototype | | game1=''Sonic 2'' Nick Arcade prototype | ||
| game2=''Sonic the Hedgehog'' | | game2=''Sonic the Hedgehog'' | ||
| Line 14: | Line 14: | ||
{{Comparison | {{Comparison | ||
| image1=z dgh02.png | | image1=z dgh02.png | ||
| − | | image2= | + | | image2=Sonic1_GHZ_NickArcadeComparison_2.png |
| game1=''Sonic 2'' Nick Arcade prototype | | game1=''Sonic 2'' Nick Arcade prototype | ||
| game2=''Sonic the Hedgehog'' | | game2=''Sonic the Hedgehog'' | ||
| Line 25: | Line 25: | ||
| game2=''Sonic the Hedgehog'' | | game2=''Sonic the Hedgehog'' | ||
| desc=The Super Ring monitor has become a shield. In fact, all of the monitors are different, owing to changes to how the objects are stored betweem the two games. | | desc=The Super Ring monitor has become a shield. In fact, all of the monitors are different, owing to changes to how the objects are stored betweem the two games. | ||
| + | }} | ||
| + | {{Comparison | ||
| + | | image1=Notavailable.svg | ||
| + | | image2=Sonic1 MD Map Ghz1.png | ||
| + | | game1=''Sonic 2'' Nick Arcade prototype | ||
| + | | game2=''Sonic the Hedgehog'' | ||
| + | | desc= | ||
| + | | vertical=true | ||
}} | }} | ||
| Line 30: | Line 38: | ||
{{Comparison | {{Comparison | ||
| image1=z dgh04.png | | image1=z dgh04.png | ||
| − | | image2= | + | | image2=Sonic1_GHZ_NickArcadeComparison_3.png |
| game1=''Sonic 2'' Nick Arcade prototype | | game1=''Sonic 2'' Nick Arcade prototype | ||
| game2=''Sonic the Hedgehog'' | | game2=''Sonic the Hedgehog'' | ||
| Line 37: | Line 45: | ||
{{Comparison | {{Comparison | ||
| image1=z dgh05.png | | image1=z dgh05.png | ||
| − | | image2= | + | | image2=Sonic1_GHZ_NickArcadeComparison_4.png |
| game1=''Sonic 2'' Nick Arcade prototype | | game1=''Sonic 2'' Nick Arcade prototype | ||
| game2=''Sonic the Hedgehog'' | | game2=''Sonic the Hedgehog'' | ||
| Line 44: | Line 52: | ||
{{Comparison | {{Comparison | ||
| image1=z dgh06.png | | image1=z dgh06.png | ||
| − | | image2= | + | | image2=Sonic1_GHZ_NickArcadeComparison_5.png |
| game1=''Sonic 2'' Nick Arcade prototype | | game1=''Sonic 2'' Nick Arcade prototype | ||
| game2=''Sonic the Hedgehog'' | | game2=''Sonic the Hedgehog'' | ||
| Line 51: | Line 59: | ||
{{Comparison | {{Comparison | ||
| image1=z dgh07.png | | image1=z dgh07.png | ||
| − | | image2= | + | | image2=Sonic1_GHZ_NickArcadeComparison_6.png |
| game1=''Sonic 2'' Nick Arcade prototype | | game1=''Sonic 2'' Nick Arcade prototype | ||
| game2=''Sonic the Hedgehog'' | | game2=''Sonic the Hedgehog'' | ||
| Line 58: | Line 66: | ||
{{Comparison | {{Comparison | ||
| image1=z dgh08.png | | image1=z dgh08.png | ||
| − | | image2= | + | | image2=Sonic1_GHZ_NickArcadeComparison_7.png |
| game1=''Sonic 2'' Nick Arcade prototype | | game1=''Sonic 2'' Nick Arcade prototype | ||
| game2=''Sonic the Hedgehog'' | | game2=''Sonic the Hedgehog'' | ||
| Line 65: | Line 73: | ||
{{Comparison | {{Comparison | ||
| image1=z dgh09.png | | image1=z dgh09.png | ||
| − | | image2= | + | | image2=Sonic1_GHZ_NickArcadeComparison_8.png |
| game1=''Sonic 2'' Nick Arcade prototype | | game1=''Sonic 2'' Nick Arcade prototype | ||
| game2=''Sonic the Hedgehog'' | | game2=''Sonic the Hedgehog'' | ||
| Line 72: | Line 80: | ||
{{Comparison | {{Comparison | ||
| image1=z dgh11.png | | image1=z dgh11.png | ||
| − | | image2= | + | | image2=Sonic1_GHZ_NickArcadeComparison_9.png |
| game1=''Sonic 2'' Nick Arcade prototype | | game1=''Sonic 2'' Nick Arcade prototype | ||
| game2=''Sonic the Hedgehog'' | | game2=''Sonic the Hedgehog'' | ||
| desc=And we complete the zone. | | desc=And we complete the zone. | ||
| + | }} | ||
| + | {{Comparison | ||
| + | | image1=Notavailable.svg | ||
| + | | image2=Sonic1 MD Map Ghz2.png | ||
| + | | game1=''Sonic 2'' Nick Arcade prototype | ||
| + | | game2=''Sonic the Hedgehog'' | ||
| + | | desc= | ||
| + | | vertical=true | ||
}} | }} | ||
| Line 81: | Line 97: | ||
{{Comparison | {{Comparison | ||
| image1=z dgh10.png | | image1=z dgh10.png | ||
| − | | image2= | + | | image2=Sonic1_GHZ_NickArcadeComparison_10.png |
| game1=''Sonic 2'' Nick Arcade prototype | | game1=''Sonic 2'' Nick Arcade prototype | ||
| game2=''Sonic the Hedgehog'' | | game2=''Sonic the Hedgehog'' | ||
| Line 88: | Line 104: | ||
{{Comparison | {{Comparison | ||
| image1=z dgh12.png | | image1=z dgh12.png | ||
| − | | image2= | + | | image2=Sonic1_GHZ_NickArcadeComparison_11.png |
| game1=''Sonic 2'' Nick Arcade prototype | | game1=''Sonic 2'' Nick Arcade prototype | ||
| game2=''Sonic the Hedgehog'' | | game2=''Sonic the Hedgehog'' | ||
| Line 95: | Line 111: | ||
{{Comparison | {{Comparison | ||
| image1=z dgh13.png | | image1=z dgh13.png | ||
| − | | image2= | + | | image2=Ghzboss.png |
| game1=''Sonic 2'' Nick Arcade prototype | | game1=''Sonic 2'' Nick Arcade prototype | ||
| game2=''Sonic the Hedgehog'' | | game2=''Sonic the Hedgehog'' | ||
| Line 102: | Line 118: | ||
{{Comparison | {{Comparison | ||
| image1=z dgh14.png | | image1=z dgh14.png | ||
| − | | image2= | + | | image2=Sonic1_GHZ_NickArcadeComparison_13.png |
| game1=''Sonic 2'' Nick Arcade prototype | | game1=''Sonic 2'' Nick Arcade prototype | ||
| game2=''Sonic the Hedgehog'' | | game2=''Sonic the Hedgehog'' | ||
| Line 109: | Line 125: | ||
{{Comparison | {{Comparison | ||
| image1=z dgh15.png | | image1=z dgh15.png | ||
| − | | image2= | + | | image2=Sonic1_GHZ_NickArcadeComparison_14.png |
| game1=''Sonic 2'' Nick Arcade prototype | | game1=''Sonic 2'' Nick Arcade prototype | ||
| game2=''Sonic the Hedgehog'' | | game2=''Sonic the Hedgehog'' | ||
| Line 116: | Line 132: | ||
{{Comparison | {{Comparison | ||
| image1=z dgh16.png | | image1=z dgh16.png | ||
| − | | image2= | + | | image2=Sonic1_GHZ_NickArcadeComparison_15.png |
| game1=''Sonic 2'' Nick Arcade prototype | | game1=''Sonic 2'' Nick Arcade prototype | ||
| game2=''Sonic the Hedgehog'' | | game2=''Sonic the Hedgehog'' | ||
| desc=Free the flickies! I'm sure they're glad to escape this broken zone... | | desc=Free the flickies! I'm sure they're glad to escape this broken zone... | ||
| + | }} | ||
| + | {{Comparison | ||
| + | | image1=Notavailable.svg | ||
| + | | image2=Sonic1 MD Map Ghz3.png | ||
| + | | game1=''Sonic 2'' Nick Arcade prototype | ||
| + | | game2=''Sonic the Hedgehog'' | ||
| + | | desc= | ||
| + | | vertical=true | ||
}} | }} | ||
| Line 125: | Line 149: | ||
<references /> | <references /> | ||
| − | {{ | + | {{S2NAOmni}} |
Latest revision as of 19:39, 26 July 2020
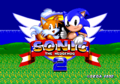
The Nick Arcade prototype of Sonic 2 provides clear evidence that it was built off of Sonic 1... because it includes the original game's first stage!
It is believed this might have been a very early test stage, as while the team went to the trouble of converting the 256x256 level titles to 128x128 (which the rest of Sonic 2 uses), the stage isn't in good health in this prototype.
Contents
Act 1
| Sonic 2 Nick Arcade prototype |
|---|

| Sonic the Hedgehog |
|---|

Welcome to Green Hill Zone! However this isn't as cool as it looks, as you can probably tell from the garbled lives icon and HUD. Just try walking!
| Sonic 2 Nick Arcade prototype |
|---|

| Sonic the Hedgehog |
|---|

The collision data in this level is significantly damaged, enough to make walking very difficult indeed. However, you can jump and run to get around it to an extent.
| Sonic 2 Nick Arcade prototype |
|---|

| Sonic the Hedgehog |
|---|

The Super Ring monitor has become a shield. In fact, all of the monitors are different, owing to changes to how the objects are stored betweem the two games.

|
| Sonic 2 Nick Arcade prototype |
|---|

|
| Sonic the Hedgehog |
Act 2
| Sonic 2 Nick Arcade prototype |
|---|

| Sonic the Hedgehog |
|---|

Act 2 seems a lot more solid than Act 1.
| Sonic 2 Nick Arcade prototype |
|---|

| Sonic the Hedgehog |
|---|

The Chopper badnik appears to be the most intact Sonic 1 enemy.
| Sonic 2 Nick Arcade prototype |
|---|

| Sonic the Hedgehog |
|---|

The Sonic 1 push-against-rock and jump bug still exists!
| Sonic 2 Nick Arcade prototype |
|---|

| Sonic the Hedgehog |
|---|

Eggman monitor! The aforementioned object changes cause this to appear, however, it does nothing.
| Sonic 2 Nick Arcade prototype |
|---|

| Sonic the Hedgehog |
|---|

Unused tiles in Sonic 1 seem to have manifested themselves onto the mapping of the Crabmeat badnik.
| Sonic 2 Nick Arcade prototype |
|---|

| Sonic the Hedgehog |
|---|

The Sonic 1up has become a Tails 1up monitor. Something to note for later.
| Sonic 2 Nick Arcade prototype |
|---|

| Sonic the Hedgehog |
|---|

And we complete the zone.
|
|
| Sonic 2 Nick Arcade prototype |
|---|

|
| Sonic the Hedgehog |
Act 3
| Sonic 2 Nick Arcade prototype |
|---|

| Sonic the Hedgehog |
|---|

Thanks to mapping changes, instead of an invincibility box in the tree, we get Power Sneakers.
| Sonic 2 Nick Arcade prototype |
|---|

| Sonic the Hedgehog |
|---|

Now onto the fun part, the boss!
| Sonic 2 Nick Arcade prototype |
|---|

| Sonic the Hedgehog |
|---|

Fighting against "garbleotnik" with Tails is a very weird experience.
| Sonic 2 Nick Arcade prototype |
|---|

| Sonic the Hedgehog |
|---|

Eggman explodes, which is more than can be said for the later Simon Wai prototype.
| Sonic 2 Nick Arcade prototype |
|---|

| Sonic the Hedgehog |
|---|

Even a garbled egg capsule is included!
| Sonic 2 Nick Arcade prototype |
|---|

| Sonic the Hedgehog |
|---|

Free the flickies! I'm sure they're glad to escape this broken zone...
|
|
| Sonic 2 Nick Arcade prototype |
|---|

|
| Sonic the Hedgehog |
References
| Sonic the Hedgehog 2 (Nick Arcade prototype), prototype version of Sonic the Hedgehog 2 (16-bit) | |
|---|---|
|
Main page | Comparisons | Maps | Hidden content | Technical information | |