Difference between revisions of "S1 Split Guides/Basic Level Editing"
From Sonic Retro
(Cleanup) |
(More spacing between steps) |
||
| Line 12: | Line 12: | ||
:3. Choose '''mz1.sep''' and open it in SonED2. Scroll down and you should see this: | :3. Choose '''mz1.sep''' and open it in SonED2. Scroll down and you should see this: | ||
[[Image:soned-mz01.png]] | [[Image:soned-mz01.png]] | ||
| + | |||
:4. Select Editor -> Level Editor (Plane A). | :4. Select Editor -> Level Editor (Plane A). | ||
[[Image:soned-mz02.png]] | [[Image:soned-mz02.png]] | ||
| + | |||
:5. Now click on the temple. Poof! It's gone! | :5. Now click on the temple. Poof! It's gone! | ||
[[Image:soned-mz03.png]] | [[Image:soned-mz03.png]] | ||
| + | |||
:6. However it's easy enough to get back, just hit Z. What we're doing here is selecting what '''chunk''' we are editing. Chunks are premade level pieces, and rearranging them can lead to some interesting new level layouts fairly easily. You can select them simply by pressing A or Z to scroll back and forth through them, and click to place them. | :6. However it's easy enough to get back, just hit Z. What we're doing here is selecting what '''chunk''' we are editing. Chunks are premade level pieces, and rearranging them can lead to some interesting new level layouts fairly easily. You can select them simply by pressing A or Z to scroll back and forth through them, and click to place them. | ||
[[Image:soned-mz04.gif]] | [[Image:soned-mz04.gif]] | ||
| + | |||
:7. Try experimenting with chunks! Here I've created a weird hill. I have no idea what it will be like to play through though! | :7. Try experimenting with chunks! Here I've created a weird hill. I have no idea what it will be like to play through though! | ||
[[Image:soned-mz05.png]] | [[Image:soned-mz05.png]] | ||
| + | |||
:8. Now we move onto Object placement. Scroll to the right till you reach this section: | :8. Now we move onto Object placement. Scroll to the right till you reach this section: | ||
[[Image:soned-mz06.png]] | [[Image:soned-mz06.png]] | ||
| + | |||
:9. Select Object Editor from the Editor menu. | :9. Select Object Editor from the Editor menu. | ||
[[Image:soned-mz07.png]] | [[Image:soned-mz07.png]] | ||
| + | |||
:10. Now double left click in the space to the right of the ring boxes. a [?] object should appear. | :10. Now double left click in the space to the right of the ring boxes. a [?] object should appear. | ||
[[Image:soned-mz08.png]] | [[Image:soned-mz08.png]] | ||
| + | |||
:11. Now double left click on the [?] object. That should bring up this list: | :11. Now double left click on the [?] object. That should bring up this list: | ||
[[Image:soned-mz09.png]] | [[Image:soned-mz09.png]] | ||
| + | |||
:12. We're going to place a another monitor, so select "Monitor", and drag your monitor to line it up with the others. Now compare our Monitor with the other Ring boxes: | :12. We're going to place a another monitor, so select "Monitor", and drag your monitor to line it up with the others. Now compare our Monitor with the other Ring boxes: | ||
[[Image:soned-mz10.png]] | [[Image:soned-mz10.png]] | ||
| + | |||
As you can see, we are going to have to change the Object type ID to "26 06 00". To do this, you hover over the box and use the S and X keys, this adjusts the Object "Property". You can also use the A and Z keys to select the object type. Select whichever type of box you want, I'm going to choose an invincibility powerup. | As you can see, we are going to have to change the Object type ID to "26 06 00". To do this, you hover over the box and use the S and X keys, this adjusts the Object "Property". You can also use the A and Z keys to select the object type. Select whichever type of box you want, I'm going to choose an invincibility powerup. | ||
[[Image:soned-mz11.png]] | [[Image:soned-mz11.png]] | ||
| + | |||
:13. Now seems like a good time to stop and see whether what we've done actually works! Go to File -> Save Project. | :13. Now seems like a good time to stop and see whether what we've done actually works! Go to File -> Save Project. | ||
[[Image:soned-mz12.png]] | [[Image:soned-mz12.png]] | ||
| + | |||
:14. Double click build.bat. | :14. Double click build.bat. | ||
[[Image:soned-mz13.png]] | [[Image:soned-mz13.png]] | ||
| + | |||
:15. Then everything should compile ok. If you get an error about Include, make sure "s1comb.asm" exists in the folder. Now open up the S1Built ROM in your emulator of choice! | :15. Then everything should compile ok. If you get an error about Include, make sure "s1comb.asm" exists in the folder. Now open up the S1Built ROM in your emulator of choice! | ||
Revision as of 12:08, 2 January 2008
(Guide originally written by Qjimbo)
Now that you've set up the disassembly, you can get working on level design.
Creating a simple level layout edit
- 1. Run SonED2.exe
- 2. Click File, Open and browse to the Projects folder you created (C:\SonED2-1\s1h\project)
Now, due to the way Sonic 1 is made, you can't edit Green Hill Zone without first combining two files, so for now, to keep things simple, we are going to edit Marble Zone
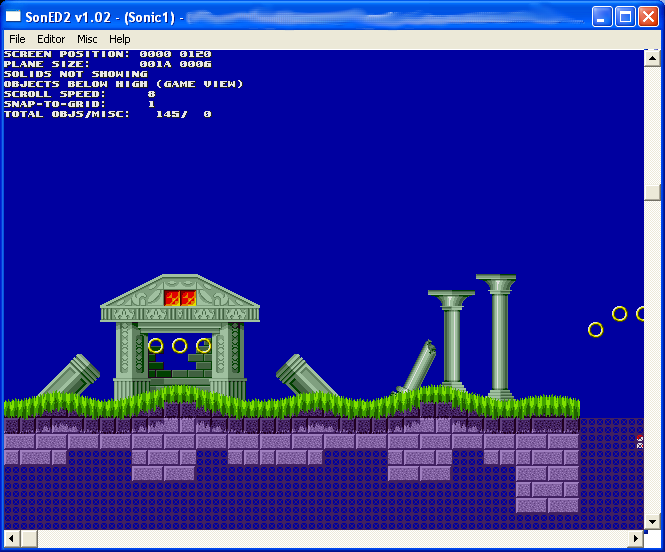
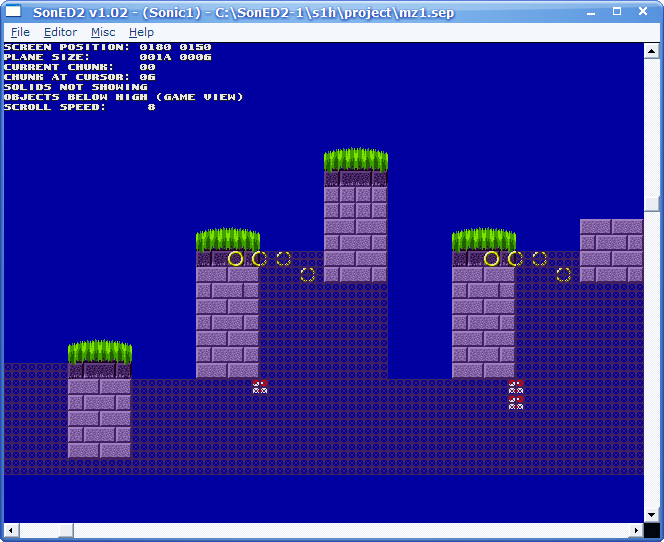
- 3. Choose mz1.sep and open it in SonED2. Scroll down and you should see this:
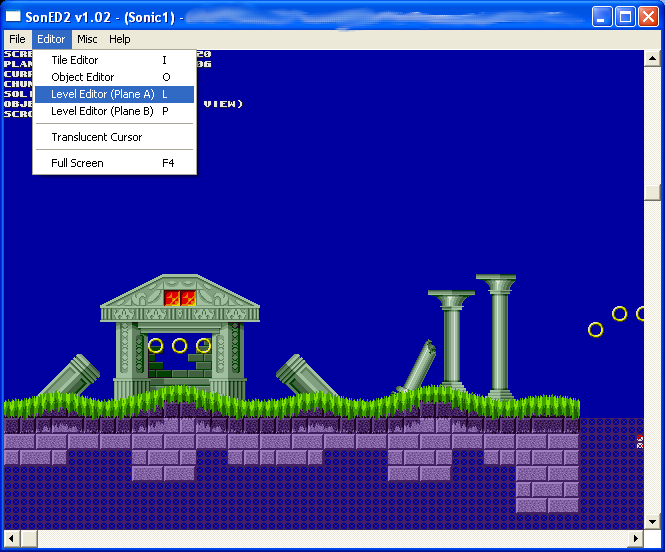
- 4. Select Editor -> Level Editor (Plane A).
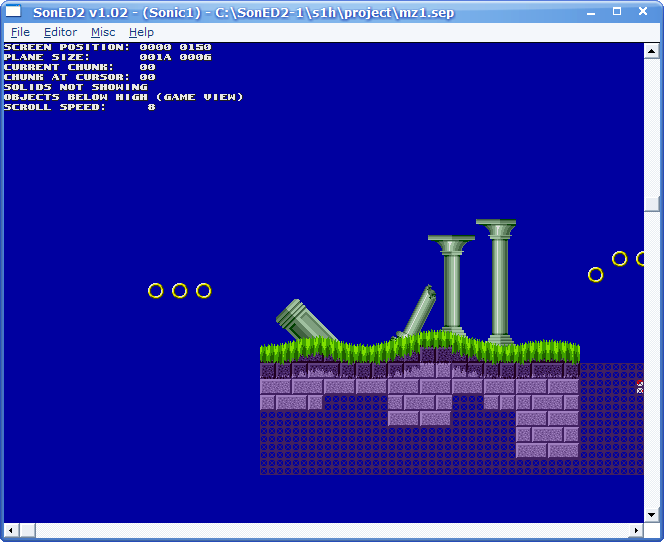
- 5. Now click on the temple. Poof! It's gone!
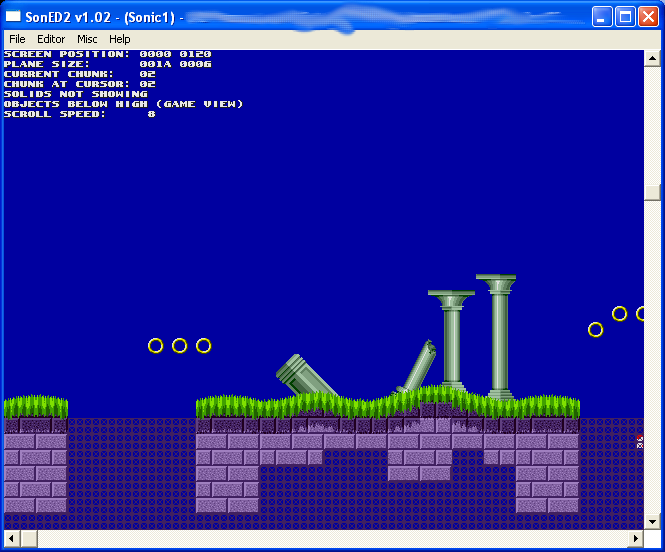
- 6. However it's easy enough to get back, just hit Z. What we're doing here is selecting what chunk we are editing. Chunks are premade level pieces, and rearranging them can lead to some interesting new level layouts fairly easily. You can select them simply by pressing A or Z to scroll back and forth through them, and click to place them.
- 7. Try experimenting with chunks! Here I've created a weird hill. I have no idea what it will be like to play through though!
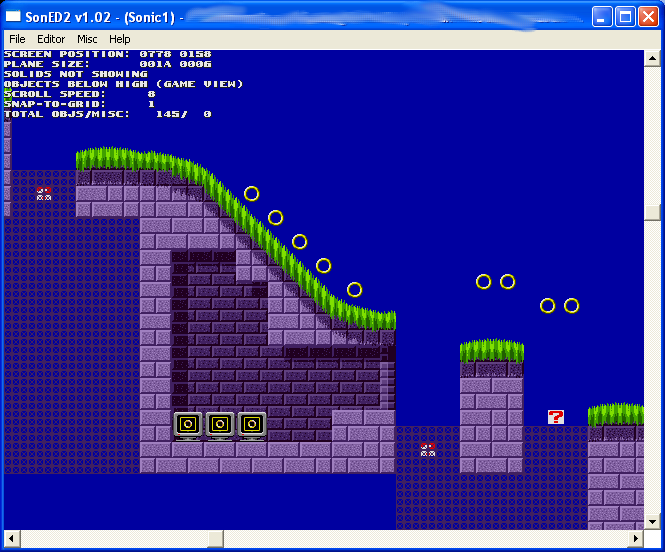
- 8. Now we move onto Object placement. Scroll to the right till you reach this section:
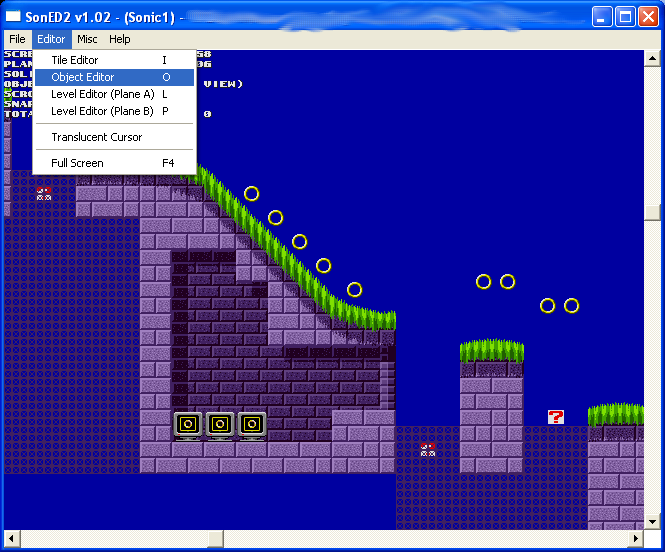
- 9. Select Object Editor from the Editor menu.
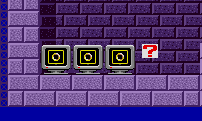
- 10. Now double left click in the space to the right of the ring boxes. a [?] object should appear.
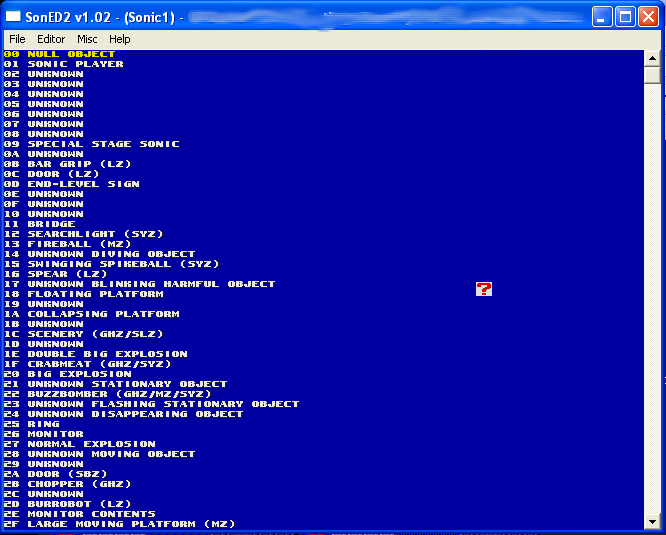
- 11. Now double left click on the [?] object. That should bring up this list:
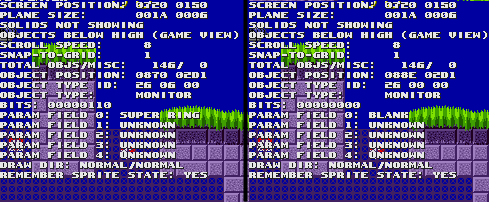
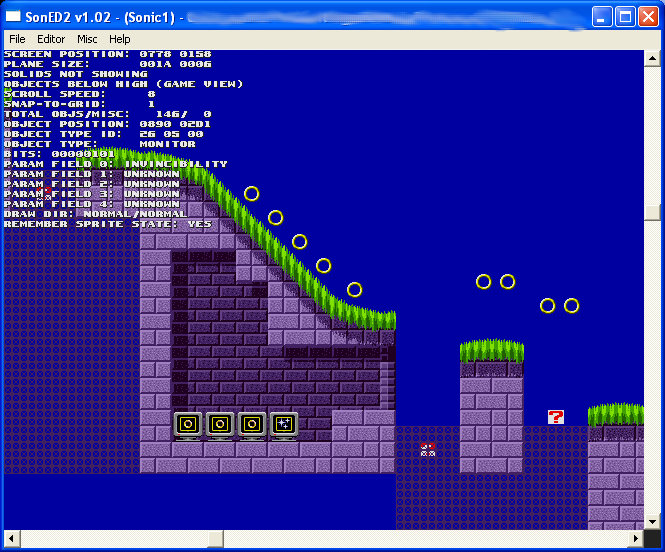
- 12. We're going to place a another monitor, so select "Monitor", and drag your monitor to line it up with the others. Now compare our Monitor with the other Ring boxes:
As you can see, we are going to have to change the Object type ID to "26 06 00". To do this, you hover over the box and use the S and X keys, this adjusts the Object "Property". You can also use the A and Z keys to select the object type. Select whichever type of box you want, I'm going to choose an invincibility powerup.
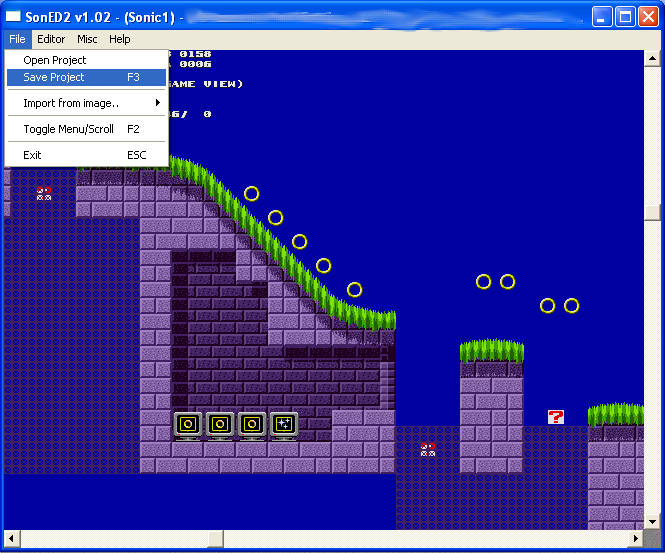
- 13. Now seems like a good time to stop and see whether what we've done actually works! Go to File -> Save Project.
- 14. Double click build.bat.
- 15. Then everything should compile ok. If you get an error about Include, make sure "s1comb.asm" exists in the folder. Now open up the S1Built ROM in your emulator of choice!
What you should see
File:S1BUILT 001.gif File:S1BUILT 002.gif File:S1BUILT 003.gif File:S1BUILT 004.gif
My weird level layouts are there, and so is the invincibility box!
