
Difference between revisions of "SLWOmni"
From Sonic Retro
BSonirachi (talk | contribs) (making preparations for splitting off the Zeti boss fights to their own pages) |
Doomdorm64 (talk | contribs) |
||
| Line 38: | Line 38: | ||
| content2= | | content2= | ||
{{#vardefine:thumbsize|65px}}{{#vardefine:thumbwidth|65px}} | {{#vardefine:thumbsize|65px}}{{#vardefine:thumbwidth|65px}} | ||
| − | {{OmniThumb| | + | {{OmniThumb|SLW Antlion.png|Antlion}} |
| − | {{OmniThumb| | + | {{OmniThumb|SLW Antlion Mother.png|Antlion Mother}} |
| − | {{OmniThumb|Anton. | + | {{OmniThumb|SLW Anton.png|Anton}} |
{{OmniThumb|Aquis.png|Aquis}} | {{OmniThumb|Aquis.png|Aquis}} | ||
| − | {{OmniThumb| | + | {{OmniThumb|SLW Baku Baku.jpg|Baku Baku}} |
{{OmniThumb|Balkiry.png|Balkiry}} | {{OmniThumb|Balkiry.png|Balkiry}} | ||
{{OmniThumb|Ballhog.png|Ball Hog}} | {{OmniThumb|Ballhog.png|Ball Hog}} | ||
{{OmniThumb|Basaran.png|Batbrain}} | {{OmniThumb|Basaran.png|Batbrain}} | ||
| − | {{OmniThumb| | + | {{OmniThumb|SLW BFB.jpg|BFB}} |
{{OmniThumb|Blaster art sk manual.png|Blaster}} | {{OmniThumb|Blaster art sk manual.png|Blaster}} | ||
{{clear}} | {{clear}} | ||
| − | {{OmniThumb| | + | {{OmniThumb|SLW Blowfish Transporter.jpg|Blowfish Transporter}} |
{{OmniThumb|Bomb-spr.png|Bomb}} | {{OmniThumb|Bomb-spr.png|Bomb}} | ||
| − | {{OmniThumb| | + | {{OmniThumb|SLW Boo.png|Boo}} |
| − | {{OmniThumb| | + | {{OmniThumb|SLW Boom Boo.jpg|Boom Boo}} |
{{OmniThumb|Burrobot.png|Burrobot}} | {{OmniThumb|Burrobot.png|Burrobot}} | ||
{{OmniThumb|Buzzbomber.png|Buzz Bomber}} | {{OmniThumb|Buzzbomber.png|Buzz Bomber}} | ||
| Line 65: | Line 65: | ||
{{OmniThumb|Crawlton.png|Crawlton}} | {{OmniThumb|Crawlton.png|Crawlton}} | ||
{{OmniThumb|Sonic3&K Badnik DragonFly.PNG|Dragonfly}} | {{OmniThumb|Sonic3&K Badnik DragonFly.PNG|Dragonfly}} | ||
| − | {{OmniThumb| | + | {{OmniThumb|SLW Dung Beetle.png|Dung Beetle}} |
{{OmniThumb|En pwn.png|Egg Pawn}} | {{OmniThumb|En pwn.png|Egg Pawn}} | ||
| − | {{OmniThumb| | + | {{OmniThumb|SLW Electro Spinner.png|Electro Spinner}} |
| − | {{OmniThumb| | + | {{OmniThumb|SLW Galaga Bee.png|Galaga Bee}} |
{{OmniThumb|Grabber.png|Grabber}} | {{OmniThumb|Grabber.png|Grabber}} | ||
{{clear}} | {{clear}} | ||
| − | {{OmniThumb| | + | {{OmniThumb|SLW Gustav Turtle.png|Gustav Turtle}} |
{{OmniThumb|Jaws.png|Jaws}} | {{OmniThumb|Jaws.png|Jaws}} | ||
| − | {{OmniThumb| | + | {{OmniThumb|SLW Laser Grabber.png|Laser Grabber}} |
{{OmniThumb|Sonic3&K Badnik Madmole.PNG|Madmole}} | {{OmniThumb|Sonic3&K Badnik Madmole.PNG|Madmole}} | ||
| − | {{OmniThumb| | + | {{OmniThumb|SLW Manbou.png|Manbou}} |
| − | {{OmniThumb| | + | {{OmniThumb|SLW Manta.png|Manta}} |
{{OmniThumb|Motobug.png|Moto Bug}} | {{OmniThumb|Motobug.png|Moto Bug}} | ||
{{OmniThumb|Mushmeanie.png|Mushmeanie}} | {{OmniThumb|Mushmeanie.png|Mushmeanie}} | ||
| Line 93: | Line 93: | ||
{{OmniThumb|Yadorin.png|Spikes}} | {{OmniThumb|Yadorin.png|Spikes}} | ||
{{clear}} | {{clear}} | ||
| − | {{OmniThumb| | + | {{OmniThumb|SLW Spinner.png|Spinner}} |
| − | {{OmniThumb| | + | {{OmniThumb|SLW Sprinkler.png|Sprinkler}} |
| − | {{OmniThumb| | + | {{OmniThumb|SLW Tarantula.png|Tarantula}} |
| − | {{OmniThumb| | + | {{OmniThumb|SLW Tonber.png|Tonber}} |
{{OmniThumb|Turtloid.png|Turtloid}} | {{OmniThumb|Turtloid.png|Turtloid}} | ||
| − | {{OmniThumb| | + | {{OmniThumb|SLW Utsubo.png|Utsubo}} |
| icon3=Bosses | | icon3=Bosses | ||
| content3= | | content3= | ||
Revision as of 15:19, 18 August 2019
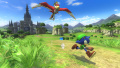
| Sonic Lost World | |
|---|---|
|
Main page |
show;hide
<div class="bobscreen" style="width:65px; height:Expression error: Unexpected < operator.px; display:inline-block; text-align:center; overflow:hidden;"> <div class="bobscreen" style="width:65px; height:Expression error: Unexpected < operator.px; display:inline-block; text-align:center; overflow:hidden;"> <div class="bobscreen" style="width:65px; height:Expression error: Unexpected < operator.px; display:inline-block; text-align:center; overflow:hidden;"> <div class="bobscreen" style="width:65px; height:Expression error: Unexpected < operator.px; display:inline-block; text-align:center; overflow:hidden;"> </div> <div class="bobscreen" style="width:65px; height:Expression error: Unexpected < operator.px; display:inline-block; text-align:center; overflow:hidden;"> </div> <div class="bobscreen" style="width:65px; height:Expression error: Unexpected < operator.px; display:inline-block; text-align:center; overflow:hidden;"> </div> <div class="bobscreen" style="width:65px; height:Expression error: Unexpected < operator.px; display:inline-block; text-align:center; overflow:hidden;"> </div> <div class="bobscreen" style="width:65px; height:Expression error: Unexpected < operator.px; display:inline-block; text-align:center; overflow:hidden;"> </div> <div class="bobscreen" style="width:65px; height:Expression error: Unexpected < operator.px; display:inline-block; text-align:center; overflow:hidden;"> </div> <div class="bobscreen" style="width:65px; height:Expression error: Unexpected < operator.px; display:inline-block; text-align:center; overflow:hidden;"> </div> <div class="bobscreen" style="width:65px; height:Expression error: Unexpected < operator.px; display:inline-block; text-align:center; overflow:hidden;"> </div> <div class="bobscreen" style="width:65px; height:Expression error: Unexpected < operator.px; display:inline-block; text-align:center; overflow:hidden;"> </div> <div class="bobscreen" style="width:65px; height:Expression error: Unexpected < operator.px; display:inline-block; text-align:center; overflow:hidden;"> </div> </div> Music:
</div> </div> |


Usage
{{SLWOmni|#}}
Substitute # with one of the following numbers depending on which type of article you want to use the template:
- Levels (this is used by default and can be left blank)
- Enemies
- Bosses
- Media