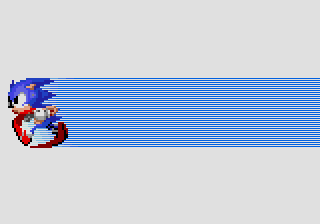
Fix Sonic 2 Sega Screen
From Sonic Retro
This guide is backported from AMPS in Sonic 2, and is expected to work in all versions of the standard disassembly. This guide was written by RobiWanKenobi.
Let's say you've decided to change Sonic's sprites to something else, no harm, except this actually affects the Sega screen. The screen calls for the same art/mappings as the player object, which any changes would affect both aspects. Fortunately, the Sonic object in the Sega screen can use standalone art and mappings, so let's do that. It's effective for when you're porting sprites from Sonic 3 and Knuckles or doing custom sprites.
Go into the art folder, then the uncompressed folder, and make a copy of the Sonic sprites. Do the same for his mappings and DPLC's in the mappings folder (sprite and spriteDPLC subfolders respectively). All three duplicate files should be named "SegaSonic.bin".
Let's apply our changes! In s2.asm, find this line of code for Sonic's art.
;---------------------------------------------------------------------------------------
; Uncompressed art
; Patterns for Sonic  ; ArtUnc_50000:
;---------------------------------------------------------------------------------------
	align $20
ArtUnc_Sonic:	BINCLUDE	"art/uncompressed/Sonic's art.bin"
;---------------------------------------------------------------------
We're going to add in the extra art file, so copy and paste the block of code with the only difference is that the duplicate will call for the Sega screen-specific art like so:
;---------------------------------------------------------------------
	align $20
ArtUnc_SegaSonic:	BINCLUDE	"art/uncompressed/SegaSonic.bin"
;---------------------------------------------------------------------------------------
Now we're going to add the extra mapping file, so let's scroll down to find this line of code:
;--------------------------------------------------------------------------------------
; Sprite Mappings
; Sonic			; MapUnc_6FBE0: SprTbl_Sonic:
;--------------------------------------------------------------------------------------
Add a new line underneath calling for the separate mapping file, like so:
;--------------------------------------------------------------------------------------
Mapunc_SegaSonic:	BINCLUDE	"mappings/sprite/SegaSonic.bin"
;--------------------------------------------------------------------------------------
Now we're going to expand upon the DPLC code, with this change allowing us to have distinct files in use. Don't worry, we'll resolve some other issues later. This is where the DPLC file is called:
;--------------------------------------------------------------------------------------
; Sprite Dynamic Pattern Reloading
; Sonic DPLCs   		; MapRUnc_714E0:
;--------------------------------------------------------------------------------------
; WARNING: the build script needs editing if you rename this label
;          or if you move Sonic's running frame to somewhere else than frame $2D
;Sega Screen Sonic
MapRUnc_Sonic:	BINCLUDE	"mappings/spriteDPLC/Sonic.bin"
;--------------------------------------------------------------------------------------
This header should instead call for the Sega screen file, so in the standard MapRUnc header, change "Sonic.bin" to "SegaSonic.bin" and add another code block to use the standard Sonic art for in-game stuff. For example (and what we will use later in this guide as said example), the gameplay sprite DPLC's will be referred to as Sonic3 in the header. The gameplay sprite DPLC file will not be renamed, obviously. You should have this after adding the new header:
;--------------------------------------------------------------------------------------
; Sprite Dynamic Pattern Reloading
; Sonic DPLCs   		; MapRUnc_714E0:
;--------------------------------------------------------------------------------------
; WARNING: the build script needs editing if you rename this label
;          or if you move Sonic's running frame to somewhere else than frame $2D
;Sega Screen Sonic
MapRUnc_Sonic:	BINCLUDE	"mappings/spriteDPLC/SegaSonic.bin"
;--------------------------------------------------------------------------------------
;Sonic's in-game sprites
MapRUnc_Sonic3:	BINCLUDE	"mappings/spriteDPLC/Sonic.bin"
;--------------------------------------------------------------------------------------
Now we are going to apply these changes to the actual Sega screen and gameplay. And if you've changed Sonic's art, it's going to be noticeable. Further in the main s2.asm file, head over to LoadSonicDymPLC_Part2 and you will see this:
LoadSonicDynPLC_Part2:
	cmp.b	(Sonic_LastLoadedDPLC).w,d0
	beq.s	return_1B89A
	move.b	d0,(Sonic_LastLoadedDPLC).w
	lea	(MapRUnc_Sonic).l,a2
	add.w	d0,d0
	adda.w	(a2,d0.w),a2
	move.w	(a2)+,d5
	subq.w	#1,d5
	bmi.s	return_1B89A
	move.w	#tiles_to_bytes(ArtTile_ArtUnc_Sonic),d4
All we need to do is change the header being called for the DPLC used in gameplay sprites. The line you need to change is right underneath the move.b command for Sonic_LastLoadedDPLC. Change it to MapRUnc_Sonic3. Now scroll down to ObjB0_Init, and you should see this:
ObjB0_Init:
	bsr.w	LoadSubObject
	move.w	#$1E8,x_pixel(a0)
	move.w	#$F0,y_pixel(a0)
	move.w	#$B,objoff_2A(a0)
	move.w	#2,(SegaScr_VInt_Subrout).w
	bset	#0,render_flags(a0)
	bset	#0,status(a0)

	; Initialize streak horizontal offsets for Sonic going left.
	; 9 full lines (8 pixels) + 6 pixels, 2-byte interleaved entries for PNT A and PNT B
	lea	(Horiz_Scroll_Buf + 2 * 2 * (9 * 8 + 6)).w,a1
	lea	Streak_Horizontal_offsets(pc),a2
	moveq	#0,d0
	moveq	#$22,d6	; Number of streaks-1
-	move.b	(a2)+,d0
	add.w	d0,(a1)
	addq.w	#2 * 2 * 2,a1	; Advance to next streak 2 pixels down
	dbf	d6,-

	lea	off_3A294(pc),a1 ; pointers to mapping DPLC data
	lea	(ArtUnc_Sonic).l,a3
	lea	(Chunk_Table).l,a5
	moveq	#4-1,d5 ; there are 4 mapping frames to loop over
Much like before, all we need to do is change the header. This time, it's the uncompressed art file for the Sega screen in the third to last line. You should change said header to ArtUnc_SegaSonic. If this has been done correctly, the Sega screen will call for the correct file and gameplay sprites will be intact.
