|
|
| Line 1: |
Line 1: |
| − | <span class="morphMaster" id="SA2Master">{{{1|1}}}</span>
| + | {{omni|{{{1|1}}}|{{{2}}} |
| − | {| class="bottomtemplate" align="center"
| + | | name=Sonic Adventure 2 |
| − | |- | + | | title=''Sonic Adventure 2'' |
| − | ! class="bottomtemphead" align="center" colspan="2"| ''Sonic Adventure 2''
| + | | titlescreen=Sa2_title.png |
| − | |- | + | | cheatspage=yes |
| − | |class="bottomtempalt" valign="top"| | + | | manualpage=yes |
| − | <center>'''''Sonic Adventure 2'''''</center><br />
| + | | magazinepage=yes |
| − | [[Image:Sa2_title.png|120px|center]]
| + | | developmentpage=yes |
| − | [[Sonic Adventure 2|Main]] ([[Sonic Adventure 2: Battle|SA2B]]) ([[Sonic Adventure 2 (2012)|2012]])<br />
| + | | secretspage=yes |
| − | Stages:<br/> | + | | schgpage=yes |
| − | <span id="SA2Link1"> Hero </span>|<span id="SA2Link2"> Dark </span>|<span id="SA2Link3"> Extra</span><br/>
| + | | bugpage=yes |
| − | <span id="SA2Link4">Enemies</span><br/>
| + | | creditspage=yes |
| − | <span id="SA2Link5">Bosses</span><br/>
| + | | achievementspage=yes |
| − | <span id="SA2Link6">DLC</span> (DC only)<br/>
| + | | rerelease1=Sonic Adventure 2: Battle |
| − | Music: [[Cuts Unleashed SA2 Vocal Collection|Vocals]] / [[Multi-dimensional Sonic Adventure 2 Original Sound Track|OST]]<br />
| + | | rerelease1short=SA2B |
| − | <span id="SA2Link7">Story Screen Scripts</span><br/>
| + | | rerelease2=Sonic Adventure 2 (2012) |
| − | [[Cheat Codes:Sonic Adventure 2|Cheat Codes]] ([[Cheat Codes:Sonic Adventure 2: Battle|SA2B]])<br />
| + | | rerelease2short=2012 |
| − | Commercials ([[Commercials:Sonic Adventure 2: Battle|SA2B]])<br />
| + | | icon1=Hero Stages |
| − | [[Sonic Adventure 2 magazine articles|Magazines]] ([[Sonic Adventure 2: Battle magazine articles|SA2B]])<br />
| + | | content1= |
| − | [[Game Development:Sonic Adventure 2|Game Development]]<br />
| + | {{#vardefine:thumbsize|120px}}{{#vardefine:thumbwidth| }} |
| − | [[Game Secrets:Sonic Adventure 2|Game Secrets]]<br />
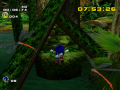
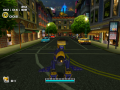
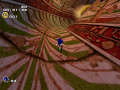
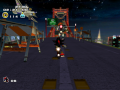
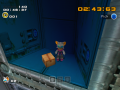
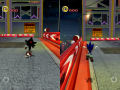
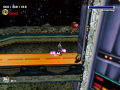
| + | {{OmniThumb|Cityescape.png|City Escape}} |
| − | [[Sonic Adventure 2 bug list|Bug List]]<br />
| + | {{OmniThumb|Wildcanyon.png|Wild Canyon}} |
| − | [[SCHG:Sonic Adventure 2|SCHG]] ([[SCHG:Sonic Adventure 2: Battle|SA2B]] | [[SCHG:Sonic Adventure 2 (PC)|PC]])
| + | {{OmniThumb|Prisonlane.png|Prison Lane}} |
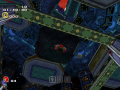
| | + | {{OmniThumb|Metalharbor.png|Metal Harbor}} |
| | + | {{OmniThumb|Greenforest.png|Green Forest}} |
| | + | {{OmniThumb|Pumpkinhill.png|Pumpkin Hill}} |
| | + | {{clear}} |
| | + | {{OmniThumb|Missionstreet.png|Mission Street}} |
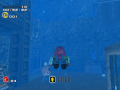
| | + | {{OmniThumb|Aquaticmine.png|Aquatic Mine}} |
| | + | {{OmniThumb|Route101.png|Route 101}} |
| | + | {{OmniThumb|Hiddenbase.png|Hidden Base}} |
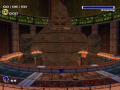
| | + | {{OmniThumb|Pyramidcave.png|Pyramid Cave}} |
| | + | {{OmniThumb|Deathchamber.png|Death Chamber}} |
| | + | {{clear}} |
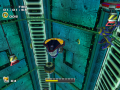
| | + | {{OmniThumb|Eternalengine.png|Eternal Engine}} |
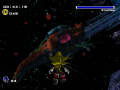
| | + | {{OmniThumb|Meteorherd.png|Meteor Herd}} |
| | + | {{OmniThumb|Crazygadget.png|Crazy Gadget}} |
| | + | {{OmniThumb|Finalrush.png|Final Rush}} |
| | | | |
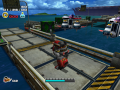
| − | |class="bottomtemptext" align="center" width="400" | | + | | icon2=Dark Stages |
| − | <div id="SA2Content1" {{#ifeq: {{{1|1}}} | 1 | | style="display: none;"}}>'''Hero Stages:'''
| + | | content2= |
| − | {| style="text-align:center"
| + | {{#vardefine:thumbsize|120px}}{{#vardefine:thumbwidth| }} |
| − | |-
| + | {{OmniThumb|Irongate.png|Iron Gate}} |
| − | |[[Image:Cityescape.png|80px|link=City Escape]]
| + | {{OmniThumb|Drylagoon.png|Dry Lagoon}} |
| − | [[City Escape]]
| + | {{OmniThumb|Sandocean.png|Security Hall}} |
| − | |[[Image:Wildcanyon.png|80px|link=Wild Canyon]]
| + | {{OmniThumb|Radicalhighway.png|White Jungle}} |
| − | [[Wild Canyon]]
| + | {{OmniThumb|Egg_quarters.png|Route 280}} |
| − | |[[Image:Prisonlane.png|80px|link=Prison Lane]]
| + | {{clear}} |
| − | [[Prison Lane]]
| + | {{OmniThumb|Lostcolony.png|Lost Colony}} |
| − | |[[Image:Metalharbor.png|80px|link=Metal Harbor]]
| + | {{OmniThumb|Weaponsbed.png|Weapons Bed}} |
| − | [[Metal Harbor]]
| + | {{OmniThumb|Securityhall.png|Security Hall}} |
| − | |[[Image:Greenforest.png|80px|link=Green Forest]]
| + | {{OmniThumb|Whitejungle.png|White Jungle}} |
| − | [[Green Forest]]
| + | {{OmniThumb|Route280.png|Route 280}} |
| − | |[[Image:Pumpkinhill.png|80px|link=Pumpkin Hill]]
| + | {{clear}} |
| − | [[Pumpkin Hill]]
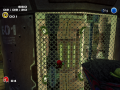
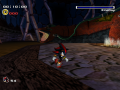
| + | {{OmniThumb|SA2 Sky Rail.jpg|Sky Rail}} |
| − | |-valign="top"
| + | {{OmniThumb|Madspace.png|Mad Space}} |
| − | |[[Image:Missionstreet.png|80px|link=Mission Street]]
| + | {{OmniThumb|Cosmicwall.png|Cosmic Wall}} |
| − | [[Mission Street]]
| + | {{OmniThumb|Finalchase.png|Final Chase}} |
| − | |[[Image:Aquaticmine.png|80px|link=Aquatic Mine]]
| |
| − | [[Aquatic Mine]]
| |
| − | |[[Image:Route101.png|80px|link=Route 101]]
| |
| − | [[Route 101]]
| |
| − | |[[Image:Hiddenbase.png|80px|link=Hidden Base]]
| |
| − | [[Hidden Base]]
| |
| − | |[[Image:Pyramidcave.png|80px|link=Pyramid Cave]]
| |
| − | [[Pyramid Cave]]
| |
| − | |[[Image:Deathchamber.png|80px|link=Death Chamber]]
| |
| − | [[Death Chamber]]
| |
| − | |-
| |
| − | |
| |
| − | |[[Image:Eternalengine.png|80px|link=Eternal Engine]]
| |
| − | [[Eternal Engine]]
| |
| − | |[[Image:Meteorherd.png|80px|link=Meteor Herd]]
| |
| − | [[Meteor Herd]]
| |
| − | |[[Image:Crazygadget.png|80px|link=Crazy Gadget]]
| |
| − | [[Crazy Gadget]]
| |
| − | |[[Image:Finalrush.png|80px|link=Final Rush]]
| |
| − | [[Final Rush]]
| |
| − | |-
| |
| − | |}
| |
| − | </div>
| |
| − | <div id="SA2Content2" {{#ifeq: {{{1|1}}} | 2 | | style="display: none;"}}>'''Dark Stages:'''
| |
| − | {| style="text-align:center" | |
| − | |-valign="top"
| |
| − | |[[Image:Irongate.png|80px|link=Iron Gate]]
| |
| − | [[Iron Gate]]
| |
| − | |[[Image:Drylagoon.png|80px|link=Dry Lagoon]] | |
| − | [[Dry Lagoon]]
| |
| − | |[[Image:Sandocean.png|80px|link=Sand Ocean]] | |
| − | [[Sand Ocean]]
| |
| − | |[[Image:Radicalhighway.png|80px|link=Radical Highway]] | |
| − | [[Radical Highway]]
| |
| − | |[[Image:Egg_quarters.png|80px|link=Egg Quarters]] | |
| − | [[Egg Quarters]]
| |
| − | |- valign="bottom"
| |
| − | |[[Image:Lostcolony.png|80px|link=Lost Colony]] | |
| − | [[Lost Colony]]
| |
| − | |[[Image:Weaponsbed.png|80px|link=Weapons Bed]] | |
| − | [[Weapons Bed]]
| |
| − | |[[Image:Securityhall.png|80px|link=Security Hall]] | |
| − | [[Security Hall]]
| |
| − | |[[Image:Whitejungle.png|80px|link=White Jungle]] | |
| − | [[White Jungle]]
| |
| − | |[[Image:Route280.png|80px|link=Route 280]] | |
| − | [[Route 280]]
| |
| − | |}
| |
| − | {| style="text-align:center" | |
| − | |[[Image:SA2 Sky Rail.jpg|80px|link=Sky Rail]]
| |
| − | [[Sky Rail]]
| |
| − | |[[Image:Madspace.png|80px|link=Mad Space]] | |
| − | [[Mad Space]]
| |
| − | |[[Image:Cosmicwall.png|80px|link=Cosmic Wall]] | |
| − | [[Cosmic Wall]]
| |
| − | |[[Image:Finalchase.png|80px|link=Final Chase]]
| |
| − | [[Final Chase]]
| |
| − | |
| |
| − | |}
| |
| − | </div>
| |
| − | <div id="SA2Content3" {{#ifeq: {{{1|1}}} | 3 | | style="display: none;"}}>'''Extra Stages:'''
| |
| − | {| style="text-align:center" | |
| − | |-
| |
| − | |
| |
| − | |
| |
| − | |[[File:ChaoWorld_SA2.png|80px|link=Chao World]]
| |
| − | [[Chao World]]
| |
| − | |[[Image:SA2 Cannons Core Knuckles.jpg|80px|link=Cannon's Core]]
| |
| − | [[Cannon's Core]]
| |
| − | |[[Image:Sa2ghz.png|80px|link=Green Hill]]
| |
| − | [[Green Hill (Sonic Adventure 2)|Green Hill]]
| |
| − | |}
| |
| − | {| style="text-align:center" | |
| − | '''2 Player Mode:'''
| |
| − | |[[File:SonicVSshadow_2P_(radicalhighway).png|80px|link=Sonic Vs Shadow (2P)]]
| |
| − | [[Sonic Vs Shadow (2P)|Sonic/Shadow]]
| |
| − | |[[File:Tailsvseggman_2P_(desert).png|80px|link=Tails VS Dr. Eggman (2P)]]
| |
| − | [[Tails VS Dr. Eggman (2P)|Tails/Dr. Eggman]]
| |
| − | |}
| |
| − | </div>
| |
| − | <div id="SA2Content4" {{#ifeq: {{{1|1}}} | 4 | | style="display: none;"}}>'''Enemies and Obstacles''':
| |
| − | {| style="text-align:center"
| |
| | | | |
| − | <br/>'''[[Badniks]]''':
| + | | icon3=Extra Stages |
| − | |style="vertical-align:top; width:75px"|[[Image:Sa2_Buzzbomber.png|65px|link=Buzzbomber#Sonic Adventure 2]] | + | | content3= |
| − | [[Buzzbomber#Sonic Adventure 2|Buzzbomber]]
| + | {{#vardefine:thumbsize|120px}}{{#vardefine:thumbwidth| }} |
| − | |style="vertical-align:top; width:75px"|[[Image:Sa2_Chopper.png|65px|link=Chopper#Sonic Adventure 2]]
| + | {{OmniThumb|ChaoWorld_SA2.png|Chao World}} |
| − | [[Chopper#Sonic Adventure 2|Chopper]]
| + | {{OmniThumb|SA2 Cannons Core Knuckles.jpg|Cannon's Core}} |
| − | |style="vertical-align:top; width:75px"|[[Image:Sa2_E-1000.png|65px|link=E-1000]]
| + | {{OmniThumb|Sa2ghz.png|Green Hill (Sonic Adventure 2)|Green Hill}} |
| − | [[E-1000]]
| |
| − | |style="vertical-align:top; width:75px"|[[Image:Sa2_gola.png|65px|link=Sol#Sonic Adventure 2]] | |
| − | [[Sol#Sonic Adventure 2|Gola]]
| |
| − | |style="vertical-align:top; width:75px"|[[Image:Sa2_kiki.png|65px|link=E-20 Kiki]] | |
| − | [[E-20 Kiki|Kiki]]
| |
| − | |style="vertical-align:top; width:75px"|[[Image:Sa2_unidus.png|65px|link=E-32 Unidus]] | |
| − | [[E-32 Unidus|Unidus]]
| |
| − | |} | |
| | | | |
| − | '''GUN Robots''': | + | '''2 Player Mode:'''<br/> |
| − | {| style="text-align:center" | + | {{OmniThumb|SonicVSshadow_2P_(radicalhighway).png|Sonic Vs Shadow (2P)}} |
| − | |-
| + | {{OmniThumb|Tailsvseggman_2P_(desert).png|Tails VS Dr. Eggman (2P)}} |
| − | |style="vertical-align:top; width:75px"|[[Image:Sa2_chaos.png|65px|link=Artificial Chaos P-1]]
| |
| − | [[Artificial Chaos P-1]]
| |
| − | |style="vertical-align:top; width:75px"|[[Image:Sa2_chaos_p100.png|65px|link=Artificial Chaos P-100]]
| |
| − | [[Artificial Chaos P-100]]
| |
| − | |style="vertical-align:top; width:75px"|[[Image:Sa2_blue_eagle.png|65px|link=Blue Eagle]]
| |
| − | [[Blue Eagle]]
| |
| − | |style="vertical-align:top; width:75px"|[[Image:Sa2_bombbeetle.png|65px|link=Bomb Beetle]]
| |
| − | [[Bomb Beetle]]
| |
| − | |style="vertical-align:top; width:75px"|[[Image:Sa2_bombwing.png|65px|link=Bomb Wing]]
| |
| − | [[Bomb Wing]]
| |
| − | |style="vertical-align:top; width:75px"|[[Image:Sa2_goldbeetle.png|65px|link=Gold Beetle]]
| |
| − | [[Gold Beetle]]
| |
| − | |style="vertical-align:top; width:75px"|[[Image:Sa2_gumhawk.png|65px|link=Gum Hawk]]
| |
| − | [[Gum Hawk]]
| |
| − | |-
| |
| − | |style="vertical-align:bottom; width:75px"|[[Image:Sa2_gunbeetle.png|65px|link=Gun Beetle]]
| |
| − | [[Gun Beetle]]
| |
| − | |style="vertical-align:bottom; width:75px"|[[Image:Sa2_gunhawk.png|65px|link=Gun Hawk]]
| |
| − | [[Gun Hawk]]
| |
| − | |style="vertical-align:bottom; width:75px"|[[Image:Sa2_gunhunter.png|65px|link=Gun Hunter]]
| |
| − | [[Gun Hunter]]
| |
| − | |style="vertical-align:bottom; width:75px"|[[Image:Sa2_gunwing.png|65px|link=Gun Wing]]
| |
| − | [[Gun Wing]]
| |
| − | |style="vertical-align:bottom; width:75px"|[[Image:Sa2_hornet3.png|65px|link=Hornet-3]]
| |
| − | [[Hornet-3]]
| |
| − | |style="vertical-align:top; width:75px"|[[Image:Sa2_hornet6.png|65px|link=Hornet-6]]
| |
| − | [[Hornet-6]]
| |
| − | |style="vertical-align:top; width:75px"|[[Image:Sa2_hornet9.png|65px|link=Hornet-9]]
| |
| − | [[Hornet-9]]
| |
| − | |-
| |
| − | |style="vertical-align:top; width:75px"|[[Image:Sa2_laserhawk.png|65px|link=Laser Hawk]]
| |
| − | [[Laser Hawk]]
| |
| − | |style="vertical-align:top; width:75px"|[[Image:Sa2_laserhornet.png|65px|link=Laser Hornet]]
| |
| − | [[Laser Hornet]]
| |
| − | |style="vertical-align:top; width:75px"|[[Image:Sa2_laserhunter.png|65px|link=Laser Hunter]]
| |
| − | [[Laser Hunter]]
| |
| − | |style="vertical-align:top; width:75px"|[[Image:Sa2_monobeetles.png|65px|link=Mono Beetle]]
| |
| − | [[Mono Beetle]]
| |
| − | |style="vertical-align:top; width:75px"|[[Image:Sa2_phoenix_(robot).png|65px|link=Phoenix_(robot)]]
| |
| − | [[Phoenix (robot)|Phoenix]]
| |
| − | |style="vertical-align:top; width:75px"|[[Image:Sa2_rhinocannon.png|65px|link=Rhino Cannon]]
| |
| − | [[Rhino Cannon]]
| |
| − | |style="vertical-align:top; width:75px"|[[Image:Sa2_rhinojet.png|65px|link=Rhino Jet]]
| |
| − | [[Rhino Jet]]
| |
| − | |}
| |
| − | {| style="text-align:center" | |
| − | |style="vertical-align:top; width:75px"|[[Image:Sa2_rhinometal.png|65px|link=Rhino Metal]]
| |
| − | [[Rhino Metal]]
| |
| − | |style="vertical-align:top; width:75px"|[[Image:Sa2_rhinospike.png|65px|link=Rhino Spike]]
| |
| − | [[Rhino Spike]]
| |
| − | |style="vertical-align:top; width:75px"|[[Image:Sa2_shieldhunter.png|65px|link=Shield Hunter]]
| |
| − | [[Shield Hunter]]
| |
| − | |style="vertical-align:top; width:75px"|[[Image:Sa2_skyhawk.png|65px|link=Sky Hawk]]
| |
| − | [[Sky Hawk]]
| |
| − | |style="vertical-align:top; width:75px"|[[Image:Sa2_sparkbeetle.png|65px|link=Spark Beetle]]
| |
| − | [[Spark Beetle]]
| |
| − | |style="vertical-align:top; width:75px"|[[Image:Sa2_springbeetle.png|65px|link=Spring Beetle]]
| |
| − | [[Spring Beetle]]
| |
| − | |}
| |
| − | '''Ghosts''':
| |
| − | {| style="text-align:center" | |
| − | |-
| |
| − | |style="vertical-align:bottom; width:75px"|[[Image:Sa2_boo.png|65px|link=Boo]]
| |
| − | [[Boo]]
| |
| − | |style="vertical-align:bottom; width:75px"|[[Image:Sa2_boom_boo.png|65px|link=Boom Boo]]
| |
| − | [[Boom Boo]]
| |
| − | |}</div>
| |
| − | <div id="SA2Content5" {{#ifeq: {{{1|1}}} | 5 | | style="display: none;"}}>'''Bosses''':
| |
| | | | |
| − | {| style="text-align:center"
| + | | icon4=Enemies |
| − | |- valign="bottom" | + | | content4= |
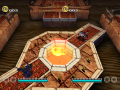
| − | |class="bottomtemptext" align="center" colspan="2"| '''Hero''': | + | {{#vardefine:thumbsize|75px}}{{#vardefine:thumbwidth| }} |
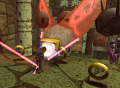
| − | | | + | '''[[Badniks]]:'''<br/> |
| − | |class="bottomtemptext" align="center" colspan="2"| '''Dark''': | + | {{OmniThumb|Sa2_Buzzbomber.png|Buzz Bomber}} |
| − | |- valign="top" | + | {{OmniThumb|Sa2_Chopper.png|Chopper}} |
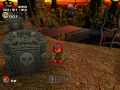
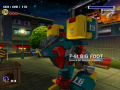
| − | |[[Image:Bigfoot.png|100px|link=F-6t BIG FOOT]]
| + | {{OmniThumb|Sa2_E-1000.png|E-1000}} |
| − | [[F-6t BIG FOOT]]
| + | {{OmniThumb|Sa2_gola.png|Sol#Sonic_Adventure_2|Gola}} |
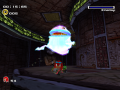
| − | |[[Image:KingBoomBoo.png|100px|link=King Boom Boo]] | + | {{OmniThumb|Sa2_kiki.png|Kiki}} |
| − | [[King Boom Boo]]
| + | {{OmniThumb|Sa2_unidus.png|Unidus}} |
| − | | | |
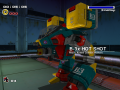
| − | |[[Image:Hotshot.png|100px|link=B-3x HOT SHOT]]
| |
| − | [[B-3x HOT SHOT]]
| |
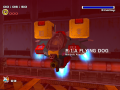
| − | |[[Image:Flyingdog.png|100px|link=R-1/A FLYING DOG]] | |
| − | [[R-1/A FLYING DOG]]
| |
| − | |}
| |
| | | | |
| − | '''Both''': | + | '''GUN Robots:'''<br/> |
| − | {| style="text-align:center" | + | {{OmniThumb|Sa2_chaos.png|Artificial Chaos P-1}} |
| − | |-valign="top" | + | {{OmniThumb|Sa2_chaos_p100.png|Artificial Chaos P-100}} |
| − | |[[Image:Tailsvseggman.png|100px|link=Tails_VS_Dr._Eggman]] | + | {{OmniThumb|Sa2_blue_eagle.png|Blue Eagle}} |
| − | [[Tails_VS_Dr._Eggman|Tails/Eggman]]
| + | {{OmniThumb|Sa2_bombbeetle.png|Bomb Beetle}} |
| − | |[[Image:Sonicvsshadow.png|100px|link=Sonic VS Shadow]] | + | {{OmniThumb|Sa2_bombwing.png|Bomb Wing}} |
| − | [[Sonic VS Shadow|Sonic/Shadow]]
| + | {{OmniThumb|Sa2_goldbeetle.png|Gold Beetle}} |
| − | |[[Image:Knucklesvsrouge.png|100px|link=Knuckles VS Rouge]] | + | {{OmniThumb|Sa2_gumhawk.png|Gum Hawk}} |
| − | [[Knuckles VS Rouge|Knuckles/Rouge]]
| + | {{clear}} |
| − | |[[Image:Sa2 egg golem sonic.jpg|100px|link=Egg Golem (Sonic Adventure 2)]] | + | {{OmniThumb|Sa2_gunbeetle.png|Gun Beetle}} |
| − | [[Egg Golem (Sonic Adventure 2)|Egg Golem]]
| + | {{OmniThumb|Sa2_gunhawk.png|Gun Hawk}} |
| − | |}
| + | {{OmniThumb|Sa2_gunhunter.png|Gun Hunter}} |
| − | '''Final''': | + | {{OmniThumb|Sa2_gunwing.png|Gun Wing}} |
| − | {| style="text-align:center" | + | {{OmniThumb|Sa2_hornet3.png|Hornet-3}} |
| − | |- valign="bottom"
| + | {{OmniThumb|Sa2_hornet6.png|Hornet-6}} |
| − | |
| + | {{OmniThumb|Sa2_hornet9.png|Hornet-9}} |
| − | |[[Image:Biolizard.png|100px|link=Biolizard]]
| + | {{clear}} |
| − | [[Biolizard]]
| + | {{OmniThumb|Sa2_laserhawk.png|Laser Hawk}} |
| − | |[[Image:Finalhazard.png|100px|link=Finalhazard]] | + | {{OmniThumb|Sa2_laserhornet.png|Laser Hornet}} |
| − | [[Finalhazard]]
| + | {{OmniThumb|Sa2_laserhunter.png|Laser Hunter}} |
| − | | | + | {{OmniThumb|Sa2_monobeetles.png|Mono Beetle}} |
| − | |}</div> | + | {{OmniThumb|Sa2_phoenix_(robot).png|Phoenix (robot)|Phoenix}} |
| − | <div id="SA2Content6" {{#ifeq: {{{1|1}}} | 6 | | style="display: none;"}}>'''Downloadable Content''':
| + | {{OmniThumb|Sa2_rhinocannon.png|Rhino Cannon}} |
| − | {| style="text-align:center" | + | {{OmniThumb|Sa2_rhinojet.png|Rhino Jet}} |
| − | |-
| + | {{clear}} |
| − | |[[Image:Highspeedkart.png|100px|link=High-Speed Trial Kart Racing]]
| + | {{OmniThumb|Sa2_rhinometal.png|Rhino Metal}} |
| − | [[High-Speed Trial Kart Racing|High-Speed Trial]]
| + | {{OmniThumb|Sa2_rhinospike.png|Rhino Spike}} |
| − | |[[Image:Eggrobokart.png|100px|link=Eggrobo Kart Racing]] | + | {{OmniThumb|Sa2_shieldhunter.png|Shield Hunter}} |
| − | [[Eggrobo Kart Racing|Eggrobo Kart]]
| + | {{OmniThumb|Sa2_skyhawk.png|Sky Hawk}} |
| − | |[[Image:Opaopakart.png|100px|link=Opa-Opa Kart Racing]] | + | {{OmniThumb|Sa2_sparkbeetle.png|Spark Beetle}} |
| − | [[Opa-Opa Kart Racing|Opa-Opa Kart]]
| + | {{OmniThumb|Sa2_springbeetle.png|Spring Beetle}} |
| − | |-
| + | |
| − | |[[Image:Hallowtheme.png|100px|link=Sonic Adventure 2 Halloween Theme]] | + | '''Ghosts:'''<br/> |
| − | [[Sonic Adventure 2 Halloween Theme|Halloween Theme]]
| + | {{OmniThumb|Sa2_boo.png|Boo}} |
| − | |[[Image:Xmastheme.png|100px|link=Sonic Adventure 2 Christmas Theme]] | + | {{OmniThumb|Sa2_boom_boo.png|Boom Boo}} |
| − | [[Sonic Adventure 2 Christmas Theme|Christmas Theme]]
| + | |
| − | |[[Image:Menuthemes.png|100px|link=Sonic Adventure 2 Menu Themes]] | + | | icon5=Bosses |
| − | [[Sonic Adventure 2 Menu Themes|Menu Themes]]
| + | | content5= |
| − | |}</div> | + | {{#vardefine:thumbsize|120px}}{{#vardefine:thumbwidth| }} |
| − | <div id="SA2Content7" {{#ifeq: {{{1|1}}} | 7 | | style="display: none;"}}>'''Story Screen Scripts''':
| + | '''Hero''':<br/> |
| − | {| style="text-align:center" | + | {{OmniThumb|Bigfoot.png|F-6t BIG FOOT}} |
| − | |- | + | {{OmniThumb|KingBoomBoo.png|King Boom Boo}} |
| − | [[Sonic_Adventure_2_-_Hero_Journal|Hero Journal]] |
| + | |
| − | [[Sonic_Adventure_2_-_Dark_Journal|Dark Journal]] |
| + | '''Dark''':<br/> |
| − | [[Sonic_Adventure_2_-_Last_Journal|Last Journal]] | + | {{OmniThumb|Hotshot.png|B-3x HOT SHOT}} |
| − | |}</div>
| + | {{OmniThumb|Flyingdog.png|R-1/A FLYING DOG}} |
| − | |}
| + | |
| − | <noinclude> | + | '''Both''':<br/> |
| | + | {{OmniThumb|Tailsvseggman.png|Tails VS Dr. Eggman|Tails/Eggman}} |
| | + | {{OmniThumb|Sonicvsshadow.png|Sonic VS Shadow|Sonic/Shadow}} |
| | + | {{OmniThumb|Knucklesvsrouge.png|Knuckles VS Rouge|Knuckles/Rouge}} |
| | + | {{OmniThumb|Sa2 egg golem sonic.jpg|Egg Golem (Sonic Adventure 2)|Egg Golem}} |
| | + | |
| | + | '''Final''':<br/> |
| | + | {{OmniThumb|Biolizard.png|Biolizard}} |
| | + | {{OmniThumb|Finalhazard.png|Finalhazard}} |
| | + | |
| | + | | icon6=DLC |
| | + | | content6= |
| | + | {{#vardefine:thumbsize|120px}}{{#vardefine:thumbwidth| }} |
| | + | {{OmniThumb|Highspeedkart.png|High-Speed Trial Kart Racing|High-Speed Trial}} |
| | + | {{OmniThumb|Eggrobokart.png|Eggrobo Kart Racing|Eggrobo Kart}} |
| | + | {{OmniThumb|Opaopakart.png|Opa-Opa Kart Racing|Opa-Opa Kart}} |
| | + | {{clear}} |
| | + | {{OmniThumb|Hallowtheme.png|Sonic Adventure 2 Halloween Theme|Halloween Theme}} |
| | + | {{OmniThumb|Xmastheme.png|Sonic Adventure 2 Christmas Theme|Christmas Theme}} |
| | + | {{OmniThumb|Menuthemes.png|Sonic Adventure 2 Menu Themes|Menu Themes}} |
| | + | |
| | + | | icon7=Story Scripts |
| | + | | content7= |
| | + | {{#vardefine:thumbsize|120px}}{{#vardefine:thumbwidth| }} |
| | + | {{OmniThumb|Notavailable.svg|Sonic Adventure 2 - Hero Journal|Hero Journal}} |
| | + | {{OmniThumb|Notavailable.svg|Sonic Adventure 2 - Dark Journal|Dark Journal}} |
| | + | {{OmniThumb|Notavailable.svg|Sonic Adventure 2 - Last Journal|Last Journal}} |
| | + | }}<includeonly>[[Category:Sonic Adventure 2]]</includeonly><noinclude> |
| | ==Usage== | | ==Usage== |
| | <nowiki>{{</nowiki>{{PAGENAME}}|{{red|#}}<nowiki>}}</nowiki> | | <nowiki>{{</nowiki>{{PAGENAME}}|{{red|#}}<nowiki>}}</nowiki> |
| Line 283: |
Line 161: |
| | Substitute {{red|#}} with one of the following numbers depending on which type of article you want to use the template: | | Substitute {{red|#}} with one of the following numbers depending on which type of article you want to use the template: |
| | | | |
| − | # Levels (this is used by default and can be left blank) | + | # Hero Stages (this is used by default and can be left blank) |
| | + | # Dark Stages |
| | + | # Extra Stages |
| | # Enemies | | # Enemies |
| | # Bosses | | # Bosses |
| Line 289: |
Line 169: |
| | # Story Screen Scripts | | # Story Screen Scripts |
| | | | |
| − | [[Category:Navigational templates|{{PAGENAME}}]]</noinclude> | + | [[Category:Navigational templates (single game)|{{PAGENAME}}]]</noinclude> |