
Difference between revisions of "SA2Omni"
From Sonic Retro
RGamer2009 (talk | contribs) |
RGamer2009 (talk | contribs) (rearranged enemies and levels) |
||
| Line 76: | Line 76: | ||
|[[Image:Egg_quarters.png|80px|link=Egg Quarters]] | |[[Image:Egg_quarters.png|80px|link=Egg Quarters]] | ||
[[Egg Quarters]] | [[Egg Quarters]] | ||
| + | |- valign="bottom" | ||
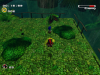
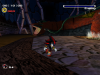
|[[Image:Lostcolony.png|80px|link=Lost Colony]] | |[[Image:Lostcolony.png|80px|link=Lost Colony]] | ||
[[Lost Colony]] | [[Lost Colony]] | ||
| − | |||
|[[Image:Weaponsbed.png|80px|link=Weapons Bed]] | |[[Image:Weaponsbed.png|80px|link=Weapons Bed]] | ||
[[Weapons Bed]] | [[Weapons Bed]] | ||
| Line 87: | Line 87: | ||
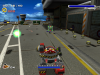
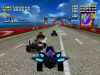
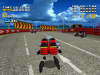
|[[Image:Route280.png|80px|link=Route 280]] | |[[Image:Route280.png|80px|link=Route 280]] | ||
[[Route 280]] | [[Route 280]] | ||
| + | |- | ||
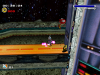
|[[Image:SA2 Sky Rail.jpg|80px|link=Sky Rail]] | |[[Image:SA2 Sky Rail.jpg|80px|link=Sky Rail]] | ||
[[Sky Rail]] | [[Sky Rail]] | ||
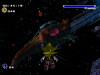
|[[Image:Madspace.png|80px|link=Mad Space]] | |[[Image:Madspace.png|80px|link=Mad Space]] | ||
[[Mad Space]] | [[Mad Space]] | ||
| − | |||
| − | |||
| − | |||
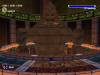
|[[Image:Cosmicwall.png|80px|link=Cosmic Wall]] | |[[Image:Cosmicwall.png|80px|link=Cosmic Wall]] | ||
[[Cosmic Wall]] | [[Cosmic Wall]] | ||
| Line 125: | Line 123: | ||
<br/>'''[[Badniks]]''': | <br/>'''[[Badniks]]''': | ||
| − | |style="vertical-align: | + | |style="vertical-align:top; width:75px"|[[Image:Sa2_E-1000.png|65px|link=E-1000]] |
[[E-1000]] | [[E-1000]] | ||
| − | |style="vertical-align: | + | |style="vertical-align:top; width:75px"|[[Image:Sa2_gola.png|65px|link=Sol#Sonic Adventure 2]] |
[[Sol#Sonic Adventure 2|Gola]] | [[Sol#Sonic Adventure 2|Gola]] | ||
| − | |style="vertical-align: | + | |style="vertical-align:top; width:75px"|[[Image:Sa2_kiki.png|65px|link=E-20 Kiki]] |
[[E-20 Kiki|Kiki]] | [[E-20 Kiki|Kiki]] | ||
| − | |style="vertical-align: | + | |style="vertical-align:top; width:75px"|[[Image:Sa2_unidus.png|65px|link=E-32 Unidus]] |
[[E-32 Unidus|Unidus]] | [[E-32 Unidus|Unidus]] | ||
|} | |} | ||
| Line 138: | Line 136: | ||
{| style="text-align:center" | {| style="text-align:center" | ||
|- | |- | ||
| − | |style="vertical-align: | + | |style="vertical-align:top; width:75px"|[[Image:Sa2_chaos.png|65px|link=Artificial Chaos P-1]] |
[[Artificial Chaos P-1]] | [[Artificial Chaos P-1]] | ||
| − | |style="vertical-align: | + | |style="vertical-align:top; width:75px"|[[Image:Sa2_chaos_p100.png|65px|link=Artificial Chaos P-100]] |
[[Artificial Chaos P-100]] | [[Artificial Chaos P-100]] | ||
| − | |style="vertical-align: | + | |style="vertical-align:top; width:75px"|[[Image:Sa2_blue_eagle.png|65px|link=Blue Eagle]] |
[[Blue Eagle]] | [[Blue Eagle]] | ||
| − | |style="vertical-align: | + | |style="vertical-align:top; width:75px"|[[Image:Sa2_bombbeetle.png|65px|link=Bomb Beetle]] |
[[Bomb Beetle]] | [[Bomb Beetle]] | ||
| − | |style="vertical-align: | + | |style="vertical-align:top; width:75px"|[[Image:Sa2_bombwing.png|65px|link=Bomb Wing]] |
[[Bomb Wing]] | [[Bomb Wing]] | ||
| − | |style="vertical-align: | + | |style="vertical-align:top; width:75px"|[[Image:Sa2_goldbeetle.png|65px|link=Gold Beetle]] |
[[Gold Beetle]] | [[Gold Beetle]] | ||
| + | |style="vertical-align:top; width:75px"|[[Image:Sa2_gumhawk.png|65px|link=Gum Hawk]] | ||
| + | [[Gum Hawk]] | ||
|- | |- | ||
| − | |||
| − | |||
|style="vertical-align:bottom; width:75px"|[[Image:Sa2_gunbeetle.png|65px|link=Gun Beetle]] | |style="vertical-align:bottom; width:75px"|[[Image:Sa2_gunbeetle.png|65px|link=Gun Beetle]] | ||
[[Gun Beetle]] | [[Gun Beetle]] | ||
| Line 163: | Line 161: | ||
|style="vertical-align:bottom; width:75px"|[[Image:Sa2_hornet3.png|65px|link=Hornet-3]] | |style="vertical-align:bottom; width:75px"|[[Image:Sa2_hornet3.png|65px|link=Hornet-3]] | ||
[[Hornet-3]] | [[Hornet-3]] | ||
| − | + | |style="vertical-align:top; width:75px"|[[Image:Sa2_hornet6.png|65px|link=Hornet-6]] | |
| − | |style="vertical-align: | ||
[[Hornet-6]] | [[Hornet-6]] | ||
| − | |style="vertical-align: | + | |style="vertical-align:top; width:75px"|[[Image:Sa2_hornet9.png|65px|link=Hornet-9]] |
[[Hornet-9]] | [[Hornet-9]] | ||
| − | |style="vertical-align: | + | |- |
| + | |style="vertical-align:top; width:75px"|[[Image:Sa2_laserhawk.png|65px|link=Laser Hawk]] | ||
[[Laser Hawk]] | [[Laser Hawk]] | ||
| − | |style="vertical-align: | + | |style="vertical-align:top; width:75px"|[[Image:Sa2_laserhornet.png|65px|link=Laser Hornet]] |
[[Laser Hornet]] | [[Laser Hornet]] | ||
| − | |style="vertical-align: | + | |style="vertical-align:top; width:75px"|[[Image:Sa2_laserhunter.png|65px|link=Laser Hunter]] |
[[Laser Hunter]] | [[Laser Hunter]] | ||
| − | |style="vertical-align: | + | |style="vertical-align:top; width:75px"|[[Image:Sa2_monobeetles.png|65px|link=Mono Beetle]] |
[[Mono Beetle]] | [[Mono Beetle]] | ||
| − | + | |style="vertical-align:top; width:75px"|[[Image:Sa2_phoenix_(robot).png|65px|link=Phoenix_(robot)]] | |
| − | |style="vertical-align: | ||
[[Phoenix (robot)|Phoenix]] | [[Phoenix (robot)|Phoenix]] | ||
| − | |style="vertical-align: | + | |style="vertical-align:top; width:75px"|[[Image:Sa2_rhinocannon.png|65px|link=Rhino Cannon]] |
[[Rhino Cannon]] | [[Rhino Cannon]] | ||
| − | |style="vertical-align: | + | |style="vertical-align:top; width:75px"|[[Image:Sa2_rhinojet.png|65px|link=Rhino Jet]] |
[[Rhino Jet]] | [[Rhino Jet]] | ||
| − | |style="vertical-align: | + | |- |
| + | |style="vertical-align:top; width:75px"|[[Image:Sa2_rhinometal.png|65px|link=Rhino Metal]] | ||
[[Rhino Metal]] | [[Rhino Metal]] | ||
| − | |style="vertical-align: | + | |style="vertical-align:top; width:75px"|[[Image:Sa2_rhinospike.png|65px|link=Rhino Spike]] |
[[Rhino Spike]] | [[Rhino Spike]] | ||
| − | |style="vertical-align: | + | |style="vertical-align:top; width:75px"|[[Image:Sa2_shieldhunter.png|65px|link=Shield Hunter]] |
[[Shield Hunter]] | [[Shield Hunter]] | ||
| − | + | |style="vertical-align:top; width:75px"|[[Image:Sa2_skyhawk.png|65px|link=Sky Hawk]] | |
| − | |style="vertical-align: | ||
[[Sky Hawk]] | [[Sky Hawk]] | ||
| − | |style="vertical-align: | + | |style="vertical-align:top; width:75px"|[[Image:Sa2_sparkbeetle.png|65px|link=Spark Beetle]] |
[[Spark Beetle]] | [[Spark Beetle]] | ||
| − | |style="vertical-align: | + | |style="vertical-align:top; width:75px"|[[Image:Sa2_springbeetle.png|65px|link=Spring Beetle]] |
[[Spring Beetle]] | [[Spring Beetle]] | ||
|} | |} | ||
| − | |||
'''Ghosts''': | '''Ghosts''': | ||
{| style="text-align:center" | {| style="text-align:center" | ||
| Line 214: | Line 210: | ||
[[King Boom Boo]] | [[King Boom Boo]] | ||
|} | |} | ||
| − | |||
{| style="text-align:center" | {| style="text-align:center" | ||
|-valign="top" | |-valign="top" | ||
| + | '''Dark''': | ||
|[[Image:Hotshot.png|100px|link=B-3x HOT SHOT]] | |[[Image:Hotshot.png|100px|link=B-3x HOT SHOT]] | ||
[[B-3x HOT SHOT]] | [[B-3x HOT SHOT]] | ||
Revision as of 01:29, 5 December 2010
1
| Sonic Adventure 2 | |
|---|---|
 Main Article (SA2B) |
|


Usage
{{SA2Omni|#}}
Substitute # with one of the following numbers depending on which type of article you want to use the template:
- Levels (this is used by default and can be left blank)
- Enemies
- Bosses
- Downloadable Content
- Story Screen Scripts