
Difference between revisions of "S4Omni"
From Sonic Retro
| (3 intermediate revisions by 2 users not shown) | |||
| Line 1: | Line 1: | ||
| − | {{omni|{{{1|1}}} | + | {{omni|{{{1|1}}}|{{{2}}} |
| name=Sonic the Hedgehog 4 | | name=Sonic the Hedgehog 4 | ||
| title=''Sonic the Hedgehog 4'' | | title=''Sonic the Hedgehog 4'' | ||
| − | | titlescreen= | + | | titlescreen=Sonic4EpI PC title.png |
| mapspage=yes | | mapspage=yes | ||
| magazinepage=yes | | magazinepage=yes | ||
| Line 41: | Line 41: | ||
| content2= | | content2= | ||
{{#vardefine:thumbsize|64px}}{{#vardefine:thumbwidth|75px}} | {{#vardefine:thumbsize|64px}}{{#vardefine:thumbwidth|75px}} | ||
| − | {{OmniThumb|Asteron | + | {{OmniThumb|Asteron in Sonic the Hedgehog 4.png|Asteron}} |
{{OmniThumb|S4 Batbot Sprite.png|Batbot}} | {{OmniThumb|S4 Batbot Sprite.png|Batbot}} | ||
{{OmniThumb|S4 Bubbles Sprite.png|Bubbles}} | {{OmniThumb|S4 Bubbles Sprite.png|Bubbles}} | ||
| Line 48: | Line 48: | ||
{{clear}} | {{clear}} | ||
{{OmniThumb|S4 Chopper Sprite.png|Chopper}} | {{OmniThumb|S4 Chopper Sprite.png|Chopper}} | ||
| − | {{OmniThumb| | + | {{OmniThumb|S4 Crawl.png|Crawl}} |
{{OmniThumb|S4 Jaws Sprite.png|Jaws}} | {{OmniThumb|S4 Jaws Sprite.png|Jaws}} | ||
{{OmniThumb|S4 Motobug Sprite.png|Moto Bug}} | {{OmniThumb|S4 Motobug Sprite.png|Moto Bug}} | ||
| Line 68: | Line 68: | ||
'''Episode II''':<br/> | '''Episode II''':<br/> | ||
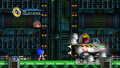
| − | {{OmniThumb| | + | {{OmniThumb|Sylvania Castle Boss.jpeg|Sylvania Castle Zone Boss}} |
| − | {{OmniThumb| | + | {{OmniThumb|Metal Sonic Battle White Park.jpg|Metal Sonic (White Park Boss)}} |
{{OmniThumb|notavailable.svg|Oil Desert Zone Boss}} | {{OmniThumb|notavailable.svg|Oil Desert Zone Boss}} | ||
| − | {{OmniThumb| | + | {{OmniThumb|Metal Sonic Sky Fortress.png|Metal Sonic (Sky Fortress Boss)}} |
{{OmniThumb|notavailable.svg|Death Egg mk.II Zone Boss}} | {{OmniThumb|notavailable.svg|Death Egg mk.II Zone Boss}} | ||
Revision as of 10:35, 17 November 2017
| Sonic the Hedgehog 4 | |
|---|---|
|
Main page (I|II|Metal) |
show;hide
Episode I:
<div class="bobscreen" style="width:120px; height:Expression error: Unexpected < operator.px; display:inline-block; text-align:center; overflow:hidden;"> Episode II: <div class="bobscreen" style="width:120px; height:Expression error: Unexpected < operator.px; display:inline-block; text-align:center; overflow:hidden;"> <div class="bobscreen" style="width:120px; height:Expression error: Unexpected < operator.px; display:inline-block; text-align:center; overflow:hidden;"> <div class="bobscreen" style="width:120px; height:Expression error: Unexpected < operator.px; display:inline-block; text-align:center; overflow:hidden;"> </div> <div class="bobscreen" style="width:120px; height:Expression error: Unexpected < operator.px; display:inline-block; text-align:center; overflow:hidden;"> </div> <div class="bobscreen" style="width:120px; height:Expression error: Unexpected < operator.px; display:inline-block; text-align:center; overflow:hidden;"> </div> <div class="bobscreen" style="width:120px; height:Expression error: Unexpected < operator.px; display:inline-block; text-align:center; overflow:hidden;"> </div></div> Episode I:
Episode II: <div class="bobscreen" style="width:120px; height:Expression error: Unexpected < operator.px; display:inline-block; text-align:center; overflow:hidden;"> <div class="bobscreen" style="width:120px; height:Expression error: Unexpected < operator.px; display:inline-block; text-align:center; overflow:hidden;"> </div> <div class="bobscreen" style="width:120px; height:Expression error: Unexpected < operator.px; display:inline-block; text-align:center; overflow:hidden;"> </div> </div> Episode I:
</div>
<div class="bobscreen" style="width:120px; height:Expression error: Unexpected < operator.px; display:inline-block; text-align:center; overflow:hidden;"> </div> </div> |


Usage
{{S4Omni|#}}
Substitute # with one of the following numbers depending on which type of article you want to use the template:
- Levels (this is used by default and can be left blank)
- Enemies
- Bosses