
Difference between revisions of "S4Omni"
From Sonic Retro
m |
m |
||
| (46 intermediate revisions by 11 users not shown) | |||
| Line 8: | Line 8: | ||
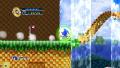
[[File:Sonic4ep1.png|120px|center]] | [[File:Sonic4ep1.png|120px|center]] | ||
| − | [[Sonic the Hedgehog 4|Main | + | [[Sonic the Hedgehog 4|Main]] ([[Sonic the Hedgehog 4 Episode I|I]], [[Sonic the Hedgehog 4 Episode II|II]], [[Sonic the Hedgehog 4: Episode Metal|Metal]])<br/> |
<span id="S4Link1">Levels</span><br/> | <span id="S4Link1">Levels</span><br/> | ||
| − | <span id="S4Link2"> | + | <span id="S4Link2">Enemies</span><br/> |
| − | <span id="S4Link3"> | + | <span id="S4Link3">Bosses</span><br/> |
| − | + | [[Sonic the Hedgehog 4 Episode I credits|Credits]]<br/> | |
[[Sonic the Hedgehog 4 bug list|Bug List]]<br/> | [[Sonic the Hedgehog 4 bug list|Bug List]]<br/> | ||
| − | < | + | [[Sonic the Hedgehog 4 achievements|Achievements]]<br/> |
| + | [[:Category:Sonic the Hedgehog 4 prereleases|Prereleases]]<br/> | ||
| + | [[Sonic the Hedgehog 4 magazine articles|Magazine Articles]]<br/> | ||
[[Game Development:Sonic the Hedgehog 4|Game Development]]<br/> | [[Game Development:Sonic the Hedgehog 4|Game Development]]<br/> | ||
| − | + | |class="bottomtemptext" align="center" width="400"| | |
| − | + | <div id="S4Content1" {{#ifeq: {{{1|1}}} | 1 | | style="display: none;"}}>'''Episode I''': | |
| − | |||
| − | |||
| − | |||
| − | |||
| − | |||
| − | |class="bottomtemptext" align="center" width="400 | ||
| − | <div id="S4Content1" {{#ifeq: {{{1|1}}} | 1 | | style="display: none;"}}>''' | ||
{| style="text-align:center" | {| style="text-align:center" | ||
|- | |- | ||
| Line 36: | Line 31: | ||
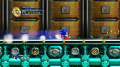
|[[Image:Sonic4mgz.png|120px|link=Mad Gear Zone]] | |[[Image:Sonic4mgz.png|120px|link=Mad Gear Zone]] | ||
[[Mad Gear Zone|Mad Gear]] | [[Mad Gear Zone|Mad Gear]] | ||
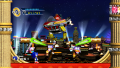
| − | |[[Image: | + | |[[Image:WSNE8P-1.png|120px|link=E.G.G. Station Zone]] |
| − | [[E.G.G Station Zone|E.G.G Station]] | + | [[E.G.G. Station Zone|E.G.G. Station]] |
| − | |[[Image:Sonic 4 | + | |[[Image:SpecialStagewidescreen.jpg|120px|link=Special Stage (Sonic the Hedgehog 4: Episode I)]] |
| − | [[Special Stage (Sonic the Hedgehog 4)|Special Stage]] | + | [[Special Stage (Sonic the Hedgehog 4: Episode I)|Special Stage]] |
| + | |} | ||
| + | '''Episode II''': | ||
| + | {| style="text-align:center" | ||
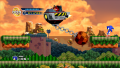
| + | |[[File:Sonic4scz.jpg|120px|link=Sylvania Castle Zone]] | ||
| + | [[Sylvania Castle Zone|Sylvania Castle]] | ||
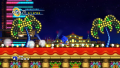
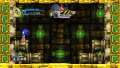
| + | |[[Image:Sonic4wpz.jpg|120px|link=White Park Zone]] | ||
| + | [[White Park Zone|White Park]] | ||
| + | |[[File:Sonic4odz.jpg|120px|link=Oil Desert Zone]] | ||
| + | [[Oil Desert Zone|Oil Desert]] | ||
| + | |- | ||
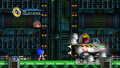
| + | |[[File:Sonic4sfz.jpg|120px|link=Sky Fortress Zone]] | ||
| + | [[Sky Fortress Zone|Sky Fortress]] | ||
| + | |[[Image:Sonic4dez.jpg|120px|link=Death Egg mk.II]] | ||
| + | [[Death Egg mk.II]] | ||
| + | |[[File:Sonic4-2SpecialStage.jpg|120px|link=Special Stage (Sonic the Hedgehog 4: Episode II)]] | ||
| + | [[Special Stage (Sonic the Hedgehog 4: Episode II)|Special Stage]] | ||
|} | |} | ||
</div> | </div> | ||
| − | <div id="S4Content2" {{#ifeq: {{{1|1}}} | | + | <div id="S4Content2" {{#ifeq: {{{1|1}}} | 3 | | style="display: none;"}}>'''Episode 1''': |
| − | |||
| − | |||
| − | |||
| − | |||
| − | |||
{| style="text-align:center" | {| style="text-align:center" | ||
|- | |- | ||
| Line 60: | Line 66: | ||
|style="vertical-align:bottom; width:75px"|[[File:S4 Buzzer Sprite.png|64px|link=Buzzer]] | |style="vertical-align:bottom; width:75px"|[[File:S4 Buzzer Sprite.png|64px|link=Buzzer]] | ||
[[Buzzer]] | [[Buzzer]] | ||
| + | |- | ||
|style="vertical-align:bottom; width:75px"|[[File:S4 Chopper Sprite.png|64px|link=Chopper]] | |style="vertical-align:bottom; width:75px"|[[File:S4 Chopper Sprite.png|64px|link=Chopper]] | ||
[[Chopper]] | [[Chopper]] | ||
| − | |||
|style="vertical-align:bottom; width:75px"|[[File:Crawl_sprite.png|link=Crawl]] | |style="vertical-align:bottom; width:75px"|[[File:Crawl_sprite.png|link=Crawl]] | ||
[[Crawl]] | [[Crawl]] | ||
| Line 71: | Line 77: | ||
|style="vertical-align:bottom; width:75px"|[[Image:S4 Newtron Sprite.png|64px|link=Newtron]] | |style="vertical-align:bottom; width:75px"|[[Image:S4 Newtron Sprite.png|64px|link=Newtron]] | ||
[[Newtron]] | [[Newtron]] | ||
| − | |style="vertical-align:bottom; width:75px"|[[ | + | |} |
| + | {| style="text-align:center" | ||
| + | |style="vertical-align:bottom; width:75px"|[[File:S4 Orbinaut Sprite.png|64px|link=Orbinaut]] | ||
[[Orbinaut]] | [[Orbinaut]] | ||
| − | |style="vertical-align:bottom; width:75px"|[[File: | + | |style="vertical-align:bottom; width:75px"|[[File:S4 Shellcracker Sprite.png|64px|link=Shellcracker]] |
[[Shellcracker]] | [[Shellcracker]] | ||
| − | + | |style="vertical-align:bottom; width:75px"|[[File:S4 Slicer Sprite.png|64px|link=Slicer]] | |
| − | |style="vertical-align:bottom; width:75px"|[[File: | ||
[[Slicer]] | [[Slicer]] | ||
|}</div> | |}</div> | ||
| − | <div id=" | + | <div id="S4Content3" {{#ifeq: {{{1|1}}} | 4 | | style="display: none;"}}>'''Episode 1''': |
{| style="text-align:center; margin-left: auto; margin-right: auto" | {| style="text-align:center; margin-left: auto; margin-right: auto" | ||
|- | |- | ||
| − | |[[File: | + | |[[File:SHZboss.png|120px|link=Splash Hill Zone Boss]] |
[[Splash Hill Zone Boss|Splash Hill]] | [[Splash Hill Zone Boss|Splash Hill]] | ||
| − | |[[File: | + | |[[File:CSZBoss.png|120px|link=Casino Street Zone Boss]] |
[[Casino Street Zone Boss|Casino Street]] | [[Casino Street Zone Boss|Casino Street]] | ||
|} | |} | ||
{| style="text-align:center" | {| style="text-align:center" | ||
|- | |- | ||
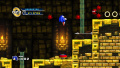
| − | |[[File: | + | |[[File:LLZBoss.png|120px|link=Lost Labyrinth Zone Boss]] |
[[Lost Labyrinth Zone Boss|Lost Labyrinth]] | [[Lost Labyrinth Zone Boss|Lost Labyrinth]] | ||
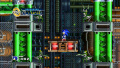
| − | |[[File: | + | |[[File:MGZBoss.png|120px|link=Mad Gear Zone Boss]] |
[[Mad Gear Zone Boss|Mad Gear]] | [[Mad Gear Zone Boss|Mad Gear]] | ||
| − | |[[File: | + | |[[File:EGGSTATIONBoss.png|120px|link=E.G.G. Station Zone Final Boss]] |
| − | [[E.G.G. Station Zone Boss|E.G.G. Station]] | + | [[E.G.G. Station Zone Final Boss|E.G.G. Station]] |
| + | |- | ||
| + | |} | ||
| + | '''Episode II''': | ||
| + | {| style="text-align:center; margin-left: auto; margin-right: auto" | ||
| + | |- | ||
| + | |[[File:notavailable.svg|120px|link=Sylvania Castle Zone Boss]] | ||
| + | [[Sylvania Castle Zone Boss|Sylvania Castle]] | ||
| + | |[[File:notavailable.svg|120px|link=Metal Sonic (White Park Boss)]] | ||
| + | [[Metal Sonic (White Park Boss)|White Park]] | ||
| + | |} | ||
| + | {| style="text-align:center" | ||
| + | |- | ||
| + | |[[File:notavailable.svg|120px|link=Oil Desert Zone Boss]] | ||
| + | [[Oil Desert Zone Boss|Oil Desert]] | ||
| + | |[[File:notavailable.svg|120px|link=Metal Sonic (Sky Fortress Boss)]] | ||
| + | [[Metal Sonic (Sky Fortress Boss)|Sky Fortress]] | ||
| + | |[[File:notavailable.svg|120px|link=Death Egg mk.II Zone Boss]] | ||
| + | [[Death Egg mk.II Zone Boss|Death Egg mk.II]] | ||
|- | |- | ||
|}</div> | |}</div> | ||
| − | |||
|} | |} | ||
<noinclude> | <noinclude> | ||
| Line 107: | Line 131: | ||
# Levels (this is used by default and can be left blank) | # Levels (this is used by default and can be left blank) | ||
| − | |||
# Enemies | # Enemies | ||
# Bosses | # Bosses | ||
| − | |||
[[Category:Navigational Templates|{{PAGENAME}}]]</noinclude> | [[Category:Navigational Templates|{{PAGENAME}}]]</noinclude> | ||
Revision as of 12:40, 18 June 2012
1
| Sonic the Hedgehog 4 | |
|---|---|
 Main (I, II, Metal) |
|

Usage
{{S4Omni|#}}
Substitute # with one of the following numbers depending on which type of article you want to use the template:
- Levels (this is used by default and can be left blank)
- Enemies
- Bosses