
Difference between revisions of "Template:S&KOmni"
From Sonic Retro
BSonirachi (talk | contribs) (Updating thumbnails to Act 1 screenshots and sorting out the bosses.) |
|||
| Line 22: | Line 22: | ||
| content1= | | content1= | ||
{{#vardefine:thumbsize|120px}}{{#vardefine:thumbwidth| }} | {{#vardefine:thumbsize|120px}}{{#vardefine:thumbwidth| }} | ||
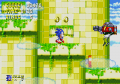
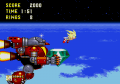
| − | {{OmniThumb| | + | {{OmniThumb|MushroomHillAct1.png|Mushroom Hill Zone|Mushroom Hill}} |
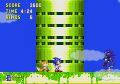
| − | {{OmniThumb| | + | {{OmniThumb|FlyingBatteryAct1.png|Flying Battery Zone|Flying Battery}} |
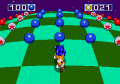
{{OmniThumb|Sandopolis.png|Sandopolis Zone|Sandopolis}} | {{OmniThumb|Sandopolis.png|Sandopolis Zone|Sandopolis}} | ||
{{OmniThumb|Lavareef.png|Lava Reef Zone|Lava Reef}} | {{OmniThumb|Lavareef.png|Lava Reef Zone|Lava Reef}} | ||
| Line 29: | Line 29: | ||
{{clear}} | {{clear}} | ||
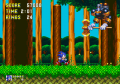
{{OmniThumb|Skysanctuary.png|Sky Sanctuary Zone|Sky Sanctuary}} | {{OmniThumb|Skysanctuary.png|Sky Sanctuary Zone|Sky Sanctuary}} | ||
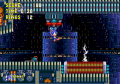
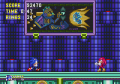
| − | {{OmniThumb| | + | {{OmniThumb|DeathEggAct1.png|Death Egg Zone (S&K)|Death Egg}} |
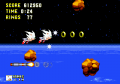
{{OmniThumb|DoomsdayLevel.PNG|The Doomsday Zone|The Doomsday}} | {{OmniThumb|DoomsdayLevel.PNG|The Doomsday Zone|The Doomsday}} | ||
{{OmniThumb|Slots.png|Bonus Stage (Sonic 3 & Knuckles)|Bonus Stages}} | {{OmniThumb|Slots.png|Bonus Stage (Sonic 3 & Knuckles)|Bonus Stages}} | ||
| Line 62: | Line 62: | ||
| content3= | | content3= | ||
{{#vardefine:thumbsize|120px}}{{#vardefine:thumbwidth| }} | {{#vardefine:thumbsize|120px}}{{#vardefine:thumbwidth| }} | ||
| + | '''Sub-Bosses:'''<br/> | ||
{{OmniThumb|Mhzsubboss.png|Hey Ho}} | {{OmniThumb|Mhzsubboss.png|Hey Ho}} | ||
| − | |||
{{OmniThumb|Fbzsubboss.png|Gapsule}} | {{OmniThumb|Fbzsubboss.png|Gapsule}} | ||
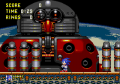
{{OmniThumb|FBZ BarrierEggman.PNG|Barrier Eggman (S&K)|Barrier Eggman}} | {{OmniThumb|FBZ BarrierEggman.PNG|Barrier Eggman (S&K)|Barrier Eggman}} | ||
| + | {{OmniThumb|Lrzsubboss.png|Heat Arms}} | ||
| + | {{clear}} | ||
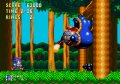
| + | {{OmniThumb|Snzsubboss.png|Guardian}} | ||
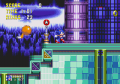
| + | {{OmniThumb|Dez1boss.png|Red Eye}} | ||
| + | {{OmniThumb|deb.png|Death Ball}} | ||
| + | {{OmniThumb|Doomsday1stboss.PNG|The Doomsday Zone Sub-boss|Doomsday sub-boss}} | ||
| + | {{clear}} | ||
| + | '''Level Bosses:'''<br/> | ||
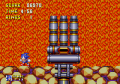
| + | {{OmniThumb|Mhzboss.png|Jet Mobile}} | ||
{{OmniThumb|Fbzboss.png|Hang Mobile}} | {{OmniThumb|Fbzboss.png|Hang Mobile}} | ||
| − | |||
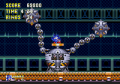
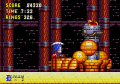
{{OmniThumb|Snzboss.png|Egg Golem (S&K)|Egg Golem}} | {{OmniThumb|Snzboss.png|Egg Golem (S&K)|Egg Golem}} | ||
| − | |||
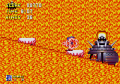
{{OmniThumb|Lrzmobile.png|Hot Mobile}} | {{OmniThumb|Lrzmobile.png|Hot Mobile}} | ||
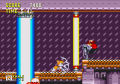
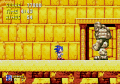
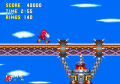
{{OmniThumb|Hiddenpalacesk.png|Knuckles (Hidden Palace Zone boss)|Knuckles}} | {{OmniThumb|Hiddenpalacesk.png|Knuckles (Hidden Palace Zone boss)|Knuckles}} | ||
| + | {{clear}} | ||
{{OmniThumb|Mechasonic.png|Mecha Sonic (Sky Sanctuary Zone Boss)|Mecha Sonic}} | {{OmniThumb|Mechasonic.png|Mecha Sonic (Sky Sanctuary Zone Boss)|Mecha Sonic}} | ||
| − | |||
| − | |||
{{OmniThumb|Dez2finalboss.png|Great Eggman Robo}} | {{OmniThumb|Dez2finalboss.png|Great Eggman Robo}} | ||
| − | |||
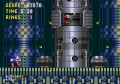
{{OmniThumb|Doomsday.png|The Doomsday Zone Boss|Doomsday boss}} | {{OmniThumb|Doomsday.png|The Doomsday Zone Boss|Doomsday boss}} | ||
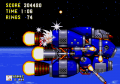
{{OmniThumb|Supermetalboss.png|Super Mecha Sonic}} | {{OmniThumb|Supermetalboss.png|Super Mecha Sonic}} | ||
Revision as of 17:13, 5 September 2017
| Sonic & Knuckles | |
|---|---|
|
Main page (Blue Sphere|KiS2|S3&K) |
show;hide
<div class="bobscreen" style="width:120px; height:Expression error: Unexpected < operator.px; display:inline-block; text-align:center; overflow:hidden;"> Sub-Bosses:
<div class="bobscreen" style="width:120px; height:Expression error: Unexpected < operator.px; display:inline-block; text-align:center; overflow:hidden;"> Level Bosses: </div> </div> |


Usage
{{S&KOmni|#}}
Substitute # with one of the following numbers depending on which type of article you want to use the template:
- Levels (this is used by default and can be left blank)
- Enemies
- Bosses