Difference between revisions of "Sonic the Hedgehog 3C (prototype 0408)/Comparisons/Mushroom Hill Zone"
From Sonic Retro
(→Act 2) |
|||
| (8 intermediate revisions by 2 users not shown) | |||
| Line 1: | Line 1: | ||
{{back|Sonic the Hedgehog 3C (prototype 0408)/Comparisons}} | {{back|Sonic the Hedgehog 3C (prototype 0408)/Comparisons}} | ||
{{cleanup}} | {{cleanup}} | ||
| − | + | [[Mushroom Hill Zone]] is quite a standout among ''[[Sonic & Knuckles]]'' zones in that the overall level layout has a lot of differences compared to later prototypes and the final. | |
| + | {{clear}} | ||
==Act 1== | ==Act 1== | ||
{{Comparison | {{Comparison | ||
| image1=S3C0408 mhz act1start.png | | image1=S3C0408 mhz act1start.png | ||
| − | | image2= | + | | image2=S3&K_MHZ_3C0408Comparsion_Act1Start.png |
| − | | game1=0408 | + | | game1=''Sonic 3C'' 0408 |
| − | | game2=''Sonic & Knuckles'' final | + | | game2=''Sonic 3 & Knuckles'' final |
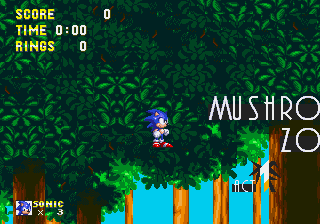
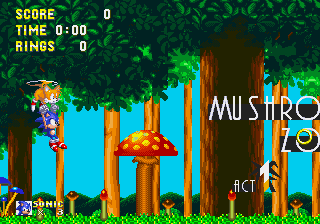
| − | | desc=At the beginning of Act 1, | + | | desc=At the beginning of Act 1, [[Sonic the Hedgehog|Sonic]] and [[Miles "Tails" Prower|Tails]] fall from high up in the sky instead of flying in. |
}} | }} | ||
{{Comparison | {{Comparison | ||
| image1=S3C0408 mhz diffpath1.png | | image1=S3C0408 mhz diffpath1.png | ||
| image2=S3C0408 mhz diffpath2.png | | image2=S3C0408 mhz diffpath2.png | ||
| − | | game1=0408 | + | | game1=''Sonic 3C'' 0408 |
| − | | game2=''Sonic & Knuckles'' final | + | | game2=''Sonic 3 & Knuckles'' final |
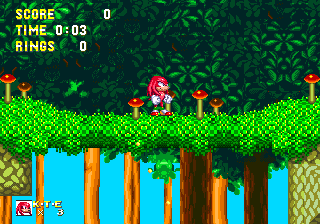
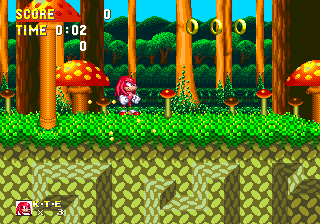
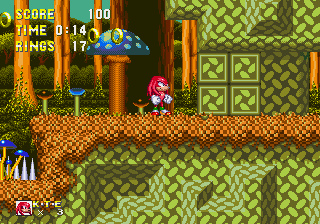
| − | | desc=On the other hand, Knuckles gets dumped in a completely different part of the zone than he does in the final. | + | | desc=On the other hand, [[Knuckles the Echidna|Knuckles]] gets dumped in a completely different part of the zone than he does in the final. His starting point here is (0x0440, 0x033C), while in ''S3&K'' final it's (0x0080, 0x096D)—a point which doesn't even exist in 0408's version of the zone. |
| − | + | If Knuckles climbs the wall on the left, he will find a [[Fire Shield]]. When he makes his way to the right, he will find himself at one of the higher routes of the act due to his much higher starting position. | |
| + | }} | ||
| + | {{Comparison | ||
| + | | image1=S3C0408 mhz act1 giantring.png | ||
| + | | image2=S3&K_MHZ_3C0408Comparsion_GiantRing.png | ||
| + | | game1=''Sonic 3C'' 0408 | ||
| + | | game2=''Sonic 3 & Knuckles'' final | ||
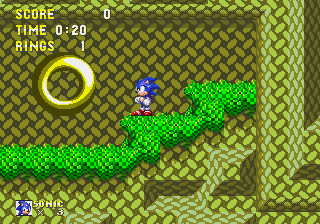
| + | | desc=The first [[Giant Ring]] is not a Super Giant Ring. Entering it will attempt to send the player to the [[Hidden Palace Zone (Sonic & Knuckles)|Hidden Palace]] emerald chamber with [[Death Egg Zone (Sonic & Knuckles)|Death Egg]] Act 2 music playing, then immediately load a [[Special Stage (Sonic 3 & Knuckles)|Special Stage]]. | ||
| − | + | Knuckles, on the other hand, does not encounter any Giant Rings at his starting point. | |
}} | }} | ||
{{Comparison | {{Comparison | ||
| image1=S3C0408 mhz act1difflayout1.png | | image1=S3C0408 mhz act1difflayout1.png | ||
| image2=S3C0408 mhz act1difflayout2.png | | image2=S3C0408 mhz act1difflayout2.png | ||
| − | | game1 | + | | game1=''Sonic 3C'' 0408 |
| − | + | | game2=''Sonic 3 & Knuckles'' final | |
| − | + | | desc=The section of the zone that follows the first Giant Ring is noticeably different. | |
| − | |||
| − | |||
| − | |||
| − | |||
| − | |||
| − | | game2=''Sonic & Knuckles'' final | ||
| − | | desc=The | ||
}} | }} | ||
{{Comparison | {{Comparison | ||
| image1=S3C0408 mhz ringpattern.png | | image1=S3C0408 mhz ringpattern.png | ||
| − | | image2= | + | | image2=S3&K_MHZ_3C0408Comparsion_GiantRing2.png |
| − | | game1=0408 | + | | game1=''Sonic 3C'' 0408 |
| − | | game2=''Sonic & Knuckles'' final | + | | game2=''Sonic 3 & Knuckles'' final |
| − | | desc=In lieu of a giant ring, there is a pattern of regular rings here instead. (Act 1; screen coordinates 25D1:068C) | + | | desc=In lieu of a giant ring, there is a diamond pattern of regular rings here instead. (Act 1; screen coordinates 25D1:068C) |
}} | }} | ||
{{Comparison | {{Comparison | ||
| image1=S3C0408 mhz warpring.png | | image1=S3C0408 mhz warpring.png | ||
| image2=Notavailable.svg | | image2=Notavailable.svg | ||
| − | | game1=0408 | + | | game1=''Sonic 3C'' 0408 |
| − | | game2=''Sonic & Knuckles'' final | + | | game2=''Sonic 3 & Knuckles'' final |
| desc=However, there is a giant ring seemingly randomly placed elsewhere in the level. | | desc=However, there is a giant ring seemingly randomly placed elsewhere in the level. | ||
}} | }} | ||
| Line 52: | Line 53: | ||
| image1=Notavailable.svg | | image1=Notavailable.svg | ||
| image2=Notavailable.svg | | image2=Notavailable.svg | ||
| − | | game1=0408 | + | | game1=''Sonic 3C'' 0408 |
| − | | game2=''Sonic & Knuckles'' final | + | | game2=''Sonic 3 & Knuckles'' final |
| desc=The spring you must hit to get to the ledge to use the pulley machine isn't very reactive. | | desc=The spring you must hit to get to the ledge to use the pulley machine isn't very reactive. | ||
}} | }} | ||
| Line 59: | Line 60: | ||
| image1=Notavailable.svg | | image1=Notavailable.svg | ||
| image2=Notavailable.svg | | image2=Notavailable.svg | ||
| − | | game1=0408 | + | | game1=''Sonic 3C'' 0408 |
| − | | game2=''Sonic & Knuckles'' final | + | | game2=''Sonic 3 & Knuckles'' final |
| desc=There is no sound effect on the Pulley machine. | | desc=There is no sound effect on the Pulley machine. | ||
}} | }} | ||
{{Comparison | {{Comparison | ||
| − | | image1=S3C0408 mhz | + | | image1=S3C0408 mhz knuxgrab.png |
| image2=Notavailable.svg | | image2=Notavailable.svg | ||
| − | | game1=0408 | + | | game1=''Sonic 3C'' 0408 |
| − | | game2=''Sonic & Knuckles'' final | + | | game2=''Sonic 3 & Knuckles'' final |
| − | | desc= | + | | desc=Knuckles can grab a lot more than he should be able to. It is possible to grab the other side as well, but he will be obscured by it. |
}} | }} | ||
| − | |||
| − | |||
{{Comparison | {{Comparison | ||
| − | | image1=S3C0408 mhz | + | | image1=S3C0408 mhz noaxe.png |
| − | | image2= | + | | image2=S3&K_MHZ_3C0408Comparsion_Axe.png |
| − | | game1=0408 | + | | game1=''Sonic 3C'' 0408 |
| − | | game2=''Sonic & Knuckles'' final | + | | game2=''Sonic 3 & Knuckles'' final |
| − | | desc= | + | | desc=Touching [[Hey Ho]]'s axe will hurt you in this prototype, but not in the final. It also doesn't make any sound effects when chopping. |
}} | }} | ||
| + | ===Map=== | ||
{{Comparison | {{Comparison | ||
| − | | image1= | + | | image1=Notavailable.svg |
| − | | image2= | + | | image2=SonicandKnuckles MD Map Mh1.png |
| − | | game1=0408 | + | | game1=''Sonic 3C'' 0408 |
| − | | game2=''Sonic & Knuckles'' final | + | | game2=''Sonic 3 & Knuckles'' final |
| − | | desc= | + | | desc= |
| + | | vertical=yes | ||
}} | }} | ||
| + | |||
| + | ==Act 2== | ||
{{Comparison | {{Comparison | ||
| − | | image1=S3C0408 mhz | + | | image1=S3C0408 mhz blueswitch.png |
| − | | image2= | + | | image2=S3&K_MHZ_3C0408Comparsion_RedSwitch.png |
| − | | game1=0408 | + | | game1=''Sonic 3C'' 0408 |
| − | | game2=''Sonic & Knuckles'' final | + | | game2=''Sonic 3 & Knuckles'' final |
| − | | desc= | + | | desc=Knuckles' switch at the beginning of Act 2 is blue, not red. When Knuckles pulls the lever, it does not move down with his hand and doesn't make a sound effect. |
}} | }} | ||
| − | {{ | + | {{comparison |
| − | | image1= | + | | image1=Notavailable.svg |
| image2=Notavailable.svg | | image2=Notavailable.svg | ||
| − | | game1=0408 | + | | game1=''Sonic 3C'' 0408 |
| − | | game2=''Sonic & Knuckles'' final | + | | game2=''Sonic 3 & Knuckles'' final |
| − | | desc= | + | | desc=The switch does not appear at all in Knuckles' game. |
}} | }} | ||
{{Comparison | {{Comparison | ||
| − | | image1= | + | | image1=S3C0408 mhz noinvmonitor.png |
| − | | image2= | + | | image2=S3&K_MHZ_3C0408Comparsion_InvMonitor.png |
| − | | game1=0408 | + | | game1=''Sonic 3C'' 0408 |
| − | | game2=''Sonic & Knuckles'' final | + | | game2=''Sonic 3 & Knuckles'' final |
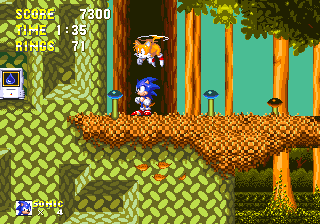
| − | | desc=There | + | | desc=There should be an [[Invincibility]] [[monitor]] here. Also, the layout is slightly different. |
}} | }} | ||
{{Comparison | {{Comparison | ||
| − | | image1= | + | | image1=S3C0408 mhz stuckmons1.png |
| − | | image2= | + | | image2=S3&K_MHZ_3C0408Comparsion_GiantRing4.png |
| − | | game1=0408 | + | | game1=''Sonic 3C'' 0408 |
| − | | game2=''Sonic & Knuckles'' final | + | | game2=''Sonic 3 & Knuckles'' final |
| − | | desc= | + | | desc=This Giant Ring is missing. Instead, there is...a pair of monitors stuck in the ceiling? Knocking them down reveals... |
}} | }} | ||
{{Comparison | {{Comparison | ||
| − | | image1= | + | | image1=S3C0408 mhz stuckmons2.png |
| − | | image2= | + | | image2=S3&K_MHZ_3C0408Comparsion_GiantRing4.png |
| − | | game1=0408 | + | | game1=''Sonic 3C'' 0408 |
| − | | game2=''Sonic & Knuckles'' final | + | | game2=''Sonic 3 & Knuckles'' final |
| − | | desc= | + | | desc=...a little Russian Roulette action? The layout in this area is different, too. Both MHZ1 and MHZ2 received a lot of changes before the final, it seems. |
}} | }} | ||
{{Comparison | {{Comparison | ||
| image1=S3C0408 mhz ringsproto.png | | image1=S3C0408 mhz ringsproto.png | ||
| image2=S3C0408 mhz ringsfin.png | | image2=S3C0408 mhz ringsfin.png | ||
| − | | game1=0408 | + | | game1=''Sonic 3C'' 0408 |
| − | | game2=''Sonic & Knuckles'' final | + | | game2=''Sonic 3 & Knuckles'' final |
| − | | | + | | desc=The ring placement in this descent is different. |
}} | }} | ||
{{Comparison | {{Comparison | ||
| image1=S3C0408_mhz_wallproto.png | | image1=S3C0408_mhz_wallproto.png | ||
| image2=S3C0408 mhz wallfinal.png | | image2=S3C0408 mhz wallfinal.png | ||
| − | | game1=0408 | + | | game1=''Sonic 3C'' 0408 |
| − | | game2=''Sonic & Knuckles'' final | + | | game2=''Sonic 3 & Knuckles'' final |
| desc=In the final, these breakable walls were shifted to the left. Interestingly, Knuckles cannot break them while gliding, but they break when he lands. | | desc=In the final, these breakable walls were shifted to the left. Interestingly, Knuckles cannot break them while gliding, but they break when he lands. | ||
| Line 138: | Line 141: | ||
}} | }} | ||
{{Comparison | {{Comparison | ||
| − | | image1=S3C0408 mhz | + | | image1=S3C0408 mhz monswitch.png |
| + | | image2=S3&K_MHZ_3C0408Comparsion_Shield.png | ||
| + | | game1=''Sonic 3C'' 0408 | ||
| + | | game2=''Sonic 3 & Knuckles'' final | ||
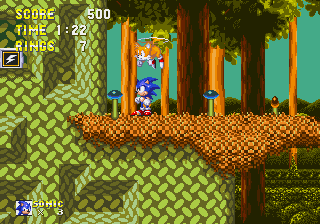
| + | | desc=In this prototype, there is a [[Water Shield]] monitor at this location. In the final, it's a [[Lightning Shield]] monitor. | ||
| + | }} | ||
| + | {{Comparison | ||
| + | | image1=S3C0408 mhz nogiantring.png | ||
| + | | image2=S3&K_MHZ_3C0408Comparsion_GiantRing3.png | ||
| + | | game1=''Sonic 3C'' 0408 | ||
| + | | game2=''Sonic 3 & Knuckles'' final | ||
| + | | desc=There's no entry to the giant ring here. | ||
| + | }} | ||
| + | {{Comparison | ||
| + | | image1=Notavailable.svg | ||
| image2=Notavailable.svg | | image2=Notavailable.svg | ||
| − | | game1=0408 | + | | game1=''Sonic 3C'' 0408 |
| − | | game2=''Sonic & Knuckles'' final | + | | game2=''Sonic 3 & Knuckles'' final |
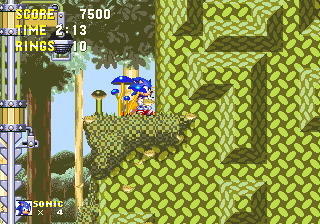
| − | | desc= | + | | desc=There is a lack of weighted mushroom devices - but there is one on the bottom of the level, not right after the change. |
}} | }} | ||
{{Comparison | {{Comparison | ||
| − | | image1= | + | | image1=Notavailable.svg |
| image2=Notavailable.svg | | image2=Notavailable.svg | ||
| − | | game1=0408 | + | | game1=''Sonic 3C'' 0408 |
| − | | game2=''Sonic & Knuckles'' final | + | | game2=''Sonic 3 & Knuckles'' final |
| − | | desc= | + | | desc=There is no gust of air that raises Sonic during the mushroom flight, instead, there seems to be a similar air to Sky Sanctuary Zone that mucks up Sonic. |
}} | }} | ||
| − | |||
| − | |||
{{Comparison | {{Comparison | ||
| − | | image1= | + | | image1=Notavailable.svg |
| image2=Notavailable.svg | | image2=Notavailable.svg | ||
| − | | game1=0408 | + | | game1=''Sonic 3C'' 0408 |
| − | | game2=''Sonic & Knuckles'' final | + | | game2=''Sonic 3 & Knuckles'' final |
| − | | desc= | + | | desc=After the palette change, the level layout is different again. |
| − | |||
| − | |||
}} | }} | ||
| − | |||
| − | |||
{{Comparison | {{Comparison | ||
| image1=S3C0408 mhz bosshit.png | | image1=S3C0408 mhz bosshit.png | ||
| − | | image2= | + | | image2=S3&K_MHZ_3C0408Comparsion_BossStart.png |
| − | | game1=0408 | + | | game1=''Sonic 3C'' 0408 |
| − | | game2=''Sonic & Knuckles'' final | + | | game2=''Sonic 3 & Knuckles'' final |
| − | | desc= When Eggman | + | | desc= When [[Dr. Eggman]] is embedded in the ground transmitting his satellite signal, he's closer to the ledge in 0408 whereas he's farther back in the final, and doesn't make any sound effects. You can jump over the satellite dish and repeatedly hit the backside of the boss vehicle. This continues until you hit the satellite dish. This difference would persist in later ''Sonic 3C'' and ''Sonic & Knuckles'' prototypes as far as the [[Sonic & Knuckles (prototype 0606)|0606 prototype]]. |
| + | |||
| + | He stays in place a lot longer after he comes out of the ground. As for the boss itself, it always takes 7 hits to destroy, regardless of how many times you hit it before the autoscrolling sequence. Once you're in the battle, when you hit him, you'll fly back much farther than the final. | ||
}} | }} | ||
{{Comparison | {{Comparison | ||
| image1=S3C0408 mhz nobossexplo.png | | image1=S3C0408 mhz nobossexplo.png | ||
| − | | image2= | + | | image2=S3&K_MHZ_3C0408Comparsion_BossExplodes.png |
| − | | game1=0408 | + | | game1=''Sonic 3C'' 0408 |
| − | | game2=''Sonic & Knuckles'' final | + | | game2=''Sonic 3 & Knuckles'' final |
| − | | desc=Defeating Eggman doesn't cause his ship to | + | | desc=Defeating Eggman doesn't cause his ship to explode until he hits the tree at the end of the level. The spikeballs also disappear and do not burn. |
}} | }} | ||
{{Comparison | {{Comparison | ||
| image1=S3C0408 mhz bluesmoke.png | | image1=S3C0408 mhz bluesmoke.png | ||
| − | | image2= | + | | image2=S3&K_MHZ_3C0408Comparsion_Capsule.png |
| − | | game1=0408 | + | | game1=''Sonic 3C'' 0408 |
| − | | game2=''Sonic & Knuckles'' final | + | | game2=''Sonic 3 & Knuckles'' final |
| − | | desc= | + | | desc=When busting open the [[capsule]] at the end of Act 2, blue smoke comes out instead of grey. (Oddly-colored smoke seems to be plaguing these protos.) |
}} | }} | ||
{{Comparison | {{Comparison | ||
| image1=S3C0408 mhz act2end.png | | image1=S3C0408 mhz act2end.png | ||
| − | | image2= | + | | image2=S3&K_MHZ_3C0408Comparsion_Act2End.png |
| − | | game1=0408 | + | | game1=''Sonic 3C'' 0408 |
| − | | game2=''Sonic & Knuckles'' final | + | | game2=''Sonic 3 & Knuckles'' final |
| − | | desc=The MHZ->FBZ cutscene has missing sound effects with | + | | desc=The MHZ->FBZ cutscene has missing sound effects with the Flying Battery. When Sonic is about to board the ship, Tails continues to run and kills himself in the pit rather than stopping and taking flight. |
| + | }} | ||
| + | ===Map=== | ||
| + | {{Comparison | ||
| + | | image1=Notavailable.svg | ||
| + | | image2=SonicandKnuckles MD Map Mh2.png | ||
| + | | game1=''Sonic 3C'' 0408 | ||
| + | | game2=''Sonic 3 & Knuckles'' final | ||
| + | | desc= | ||
| + | | vertical=yes | ||
}} | }} | ||
| Line 196: | Line 218: | ||
<references /> | <references /> | ||
| − | {{ | + | {{S3C0408Omni}} |
| − | |||
Revision as of 17:18, 21 November 2019

|
This article needs cleanup. This article needs to be edited to conform to a higher standard of article quality. |
Contents
Act 1
| Sonic 3C 0408 |
|---|
| Sonic 3 & Knuckles final |
|---|
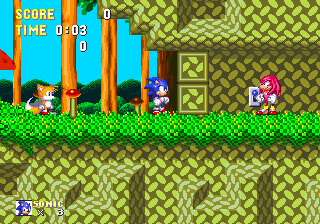
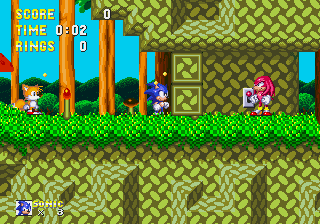
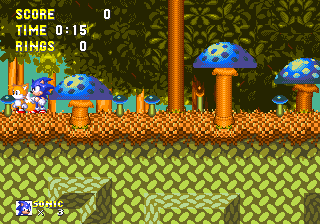
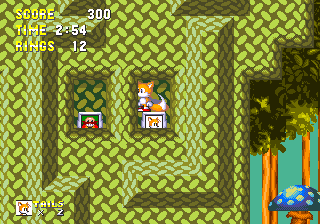
At the beginning of Act 1, Sonic and Tails fall from high up in the sky instead of flying in.
| Sonic 3C 0408 |
|---|
| Sonic 3 & Knuckles final |
|---|
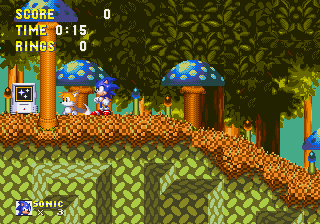
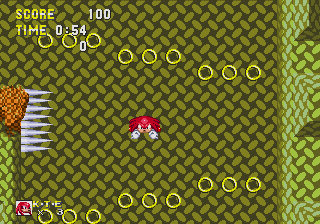
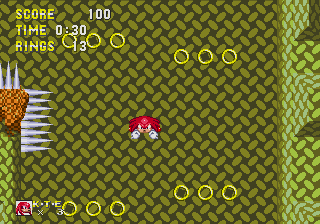
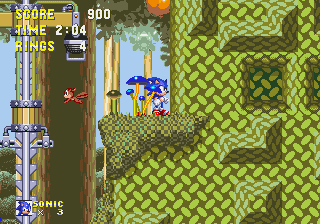
On the other hand, Knuckles gets dumped in a completely different part of the zone than he does in the final. His starting point here is (0x0440, 0x033C), while in S3&K final it's (0x0080, 0x096D)—a point which doesn't even exist in 0408's version of the zone.
If Knuckles climbs the wall on the left, he will find a Fire Shield. When he makes his way to the right, he will find himself at one of the higher routes of the act due to his much higher starting position.
| Sonic 3C 0408 |
|---|
| Sonic 3 & Knuckles final |
|---|
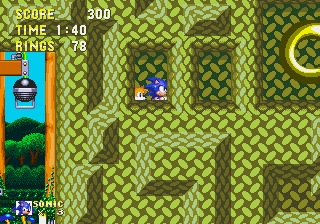
The first Giant Ring is not a Super Giant Ring. Entering it will attempt to send the player to the Hidden Palace emerald chamber with Death Egg Act 2 music playing, then immediately load a Special Stage.
Knuckles, on the other hand, does not encounter any Giant Rings at his starting point.
| Sonic 3C 0408 |
|---|
| Sonic 3 & Knuckles final |
|---|
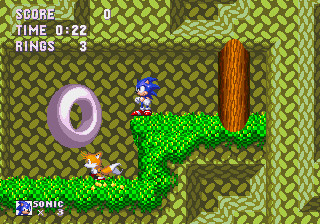
The section of the zone that follows the first Giant Ring is noticeably different.
| Sonic 3C 0408 |
|---|
| Sonic 3 & Knuckles final |
|---|
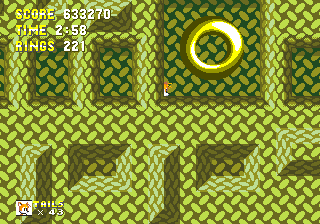
In lieu of a giant ring, there is a diamond pattern of regular rings here instead. (Act 1; screen coordinates 25D1:068C)
| Sonic 3C 0408 |
|---|
| Sonic 3 & Knuckles final |
|---|
However, there is a giant ring seemingly randomly placed elsewhere in the level.
| Sonic 3C 0408 |
|---|
| Sonic 3 & Knuckles final |
|---|
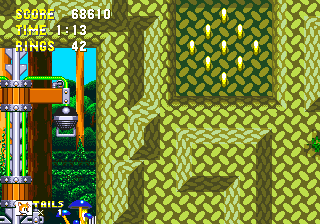
The spring you must hit to get to the ledge to use the pulley machine isn't very reactive.
| Sonic 3C 0408 |
|---|
| Sonic 3 & Knuckles final |
|---|
There is no sound effect on the Pulley machine.
| Sonic 3C 0408 |
|---|
| Sonic 3 & Knuckles final |
|---|
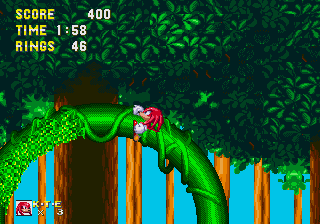
Knuckles can grab a lot more than he should be able to. It is possible to grab the other side as well, but he will be obscured by it.
| Sonic 3C 0408 |
|---|
| Sonic 3 & Knuckles final |
|---|
Touching Hey Ho's axe will hurt you in this prototype, but not in the final. It also doesn't make any sound effects when chopping.
Map

|
| Sonic 3C 0408 |
|---|

|
| Sonic 3 & Knuckles final |
Act 2
| Sonic 3C 0408 |
|---|
| Sonic 3 & Knuckles final |
|---|
Knuckles' switch at the beginning of Act 2 is blue, not red. When Knuckles pulls the lever, it does not move down with his hand and doesn't make a sound effect.
| Sonic 3C 0408 |
|---|
| Sonic 3 & Knuckles final |
|---|
The switch does not appear at all in Knuckles' game.
| Sonic 3C 0408 |
|---|
| Sonic 3 & Knuckles final |
|---|
There should be an Invincibility monitor here. Also, the layout is slightly different.
| Sonic 3C 0408 |
|---|
| Sonic 3 & Knuckles final |
|---|
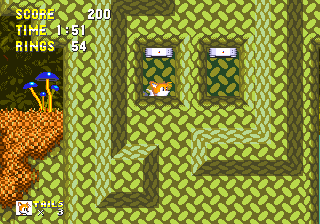
This Giant Ring is missing. Instead, there is...a pair of monitors stuck in the ceiling? Knocking them down reveals...
| Sonic 3C 0408 |
|---|
| Sonic 3 & Knuckles final |
|---|
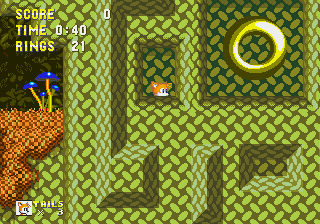
...a little Russian Roulette action? The layout in this area is different, too. Both MHZ1 and MHZ2 received a lot of changes before the final, it seems.
| Sonic 3C 0408 |
|---|
| Sonic 3 & Knuckles final |
|---|
The ring placement in this descent is different.
| Sonic 3C 0408 |
|---|
| Sonic 3 & Knuckles final |
|---|
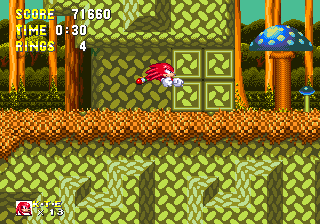
In the final, these breakable walls were shifted to the left. Interestingly, Knuckles cannot break them while gliding, but they break when he lands.
After that segment, the level layout is different.
| Sonic 3C 0408 |
|---|
| Sonic 3 & Knuckles final |
|---|
In this prototype, there is a Water Shield monitor at this location. In the final, it's a Lightning Shield monitor.
| Sonic 3C 0408 |
|---|
| Sonic 3 & Knuckles final |
|---|
There's no entry to the giant ring here.
| Sonic 3C 0408 |
|---|
| Sonic 3 & Knuckles final |
|---|
There is a lack of weighted mushroom devices - but there is one on the bottom of the level, not right after the change.
| Sonic 3C 0408 |
|---|
| Sonic 3 & Knuckles final |
|---|
There is no gust of air that raises Sonic during the mushroom flight, instead, there seems to be a similar air to Sky Sanctuary Zone that mucks up Sonic.
| Sonic 3C 0408 |
|---|
| Sonic 3 & Knuckles final |
|---|
After the palette change, the level layout is different again.
| Sonic 3C 0408 |
|---|
| Sonic 3 & Knuckles final |
|---|
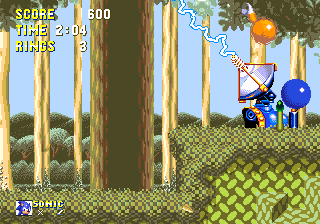
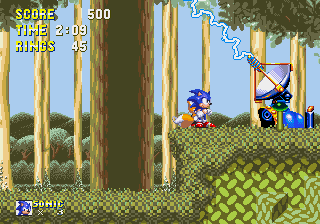
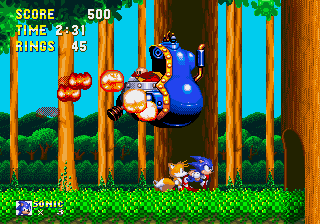
When Dr. Eggman is embedded in the ground transmitting his satellite signal, he's closer to the ledge in 0408 whereas he's farther back in the final, and doesn't make any sound effects. You can jump over the satellite dish and repeatedly hit the backside of the boss vehicle. This continues until you hit the satellite dish. This difference would persist in later Sonic 3C and Sonic & Knuckles prototypes as far as the 0606 prototype.
He stays in place a lot longer after he comes out of the ground. As for the boss itself, it always takes 7 hits to destroy, regardless of how many times you hit it before the autoscrolling sequence. Once you're in the battle, when you hit him, you'll fly back much farther than the final.
| Sonic 3C 0408 |
|---|
| Sonic 3 & Knuckles final |
|---|
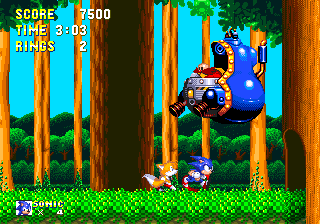
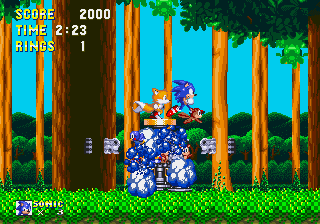
Defeating Eggman doesn't cause his ship to explode until he hits the tree at the end of the level. The spikeballs also disappear and do not burn.
| Sonic 3C 0408 |
|---|
| Sonic 3 & Knuckles final |
|---|
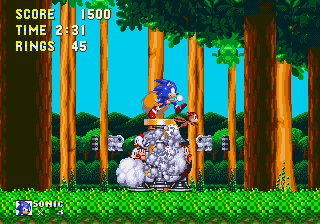
When busting open the capsule at the end of Act 2, blue smoke comes out instead of grey. (Oddly-colored smoke seems to be plaguing these protos.)
| Sonic 3C 0408 |
|---|
| Sonic 3 & Knuckles final |
|---|
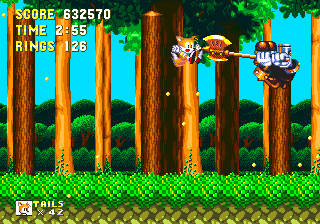
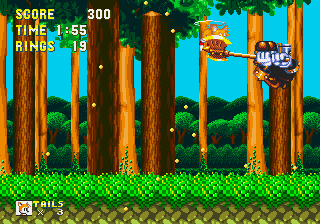
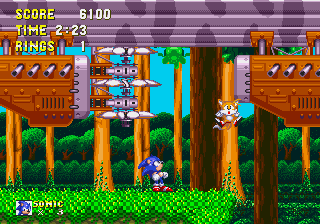
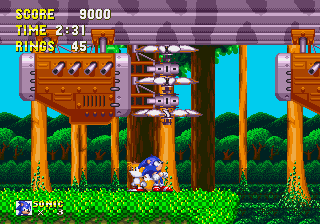
The MHZ->FBZ cutscene has missing sound effects with the Flying Battery. When Sonic is about to board the ship, Tails continues to run and kills himself in the pit rather than stopping and taking flight.
Map

|
| Sonic 3C 0408 |
|---|

|
| Sonic 3 & Knuckles final |
References
| Sonic the Hedgehog 3C (prototype 0408), prototype version of Sonic the Hedgehog 3 | |
|---|---|
|
Main page | Comparisons | Maps | Hidden content | |
