Hot Crater
From Sonic Retro
| |
Sonic Advance 2 |
| Levels |
| Hot Crater |
| Hot Crater |
|---|
| Second Zone, Sonic Advance 2 |
| Number of Acts: 3 |
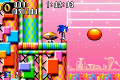
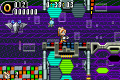
| Level themes: lava/volcano, industrial |
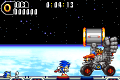
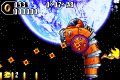
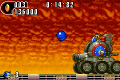
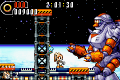
| Boss: Egg Bomber Tank |
| Maximum rings, Act 1: 618 + 26~320 |
| Maximum rings, Act 2: 524 + 43~190 |
Non-English names:
|
| ← Leaf Forest | Music Plant → |

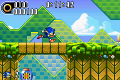
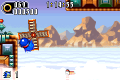
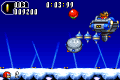
Hot Crater is the second Zone of Sonic Advance 2. As with other Zones in this game, Hot Crater consists of two standard Acts followed by a boss Act.
Overview
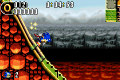
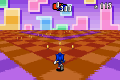
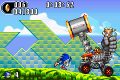
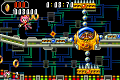
Hot Crater is a volcanic construction site flowing downhill with cranes and handrails, comparable to Red Mountain from Sonic Adventure. At the edge of the crater, the player can see a mountain range and ash-coated rocks. The deeper the Zone goes into the crater, the hotter things get as demonstrated by the background shimmering effect akin to Lava Reef Zone.
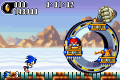
This Zone is slightly trickier than the previous level when it comes to obstacles due to the abundance of gimmicks and bottomless pits. Such gimmicks include hooks that will pull the player up to higher places when grabbed on to, handrails embedded into the ceilings to ride on, tubes that the player will roll through, and horizontal bars to swing from when hitting them with enough speed much like in Mushroom Hill Zone. Taking lower paths puts the player at risk of falling down bottomless pits, so the higher paths are generally safer as long as the player is prepared to take out any Badniks that can get in their way.
Enemies
| Gola — An Orbinaut-type Badnik with flames around it; hit the head to destroy it (doesn't appear in Easy mode). | |
| Koura — Spring-loaded turtles, akin to the Bane Motora of Sonic Chaos's Turquoise Hill Zone. | |
| Kubinaga — Long-necked serpentine bots that poke in and out of the ground or wall, spouting tiny fireballs with each thrust. | |
| Kura-kura — A jellyfish with a tiny flame chain-ball. Just hit the jellyfish. |
Special Ring locations
The following are the locations of the Special Rings for access to the Special Stage in Hot Crater. Detailed maps featuring the Special Ring locations can be found here.
| Ring | Act 1 | Act 2 |
|---|---|---|
| #1 | Shortly after the start, jump off the handrail and land on the Speed Booster on top of the loop to reach a higher path that leads to the first Special Ring. | From the start, grab the hook that comes after the first grindrail and keep heading right until being launched upwards by a Speed Booster, then bounce off the airborne Koura to reach the Special Ring. |
| #2 | After the first Ring, drop down to the lowest possible route, and jump off the second handrail. From the bottom, use the Koura to bounce to the left and enter through the wall to a hidden room with the second Ring. | Continue along on the high road after the first Ring, but jump over the Launcher and drop down. |
| #3 | After the second Special Ring, continue along the bottom path, then use a Trick Action after being launched up to a higher path by a diagonal spring to veer backwards to the third Ring. | After Ring #2, go down to the bottom-most path and keep going, then jump upon reaching a six-Ring cluster to grab the third Special Ring. |
| #4 | From #3, continue on the path and jump at the end of the rail, grabbing a hook. Grab the Invincibility to take out the Gola and use the Speed Booster to gain enough speed to launch off the quarter-pipe and on top of a loop while keeping |
After the Checkpoint, take the lower route and jump through the grindrail, and run through the downward loop to be propelled through a quarter-pipe to the next Ring. |
| #5 | After #4, go through the loop, and drop down halfway across the handrail to pass through Dash Rings that lead to the next Special Ring. | After #4, ride the rail and run through another downward loop leading to another rail. The fifth Special Ring is directly underneath the rail's end point. |
| #6 | After Ring #5, continue on the bottom path through a tube and grab the hook after launching off a quarter-pipe, then perform a Big Air Trick Action ( |
From Ring #5, continue along the path, and after being launched onto a rail by a Launcher, immediately jump off the rail to take a higher path where the sixth Ring is located. |
| #7 | After Ring #6, carry on as normal and take the highest possible routes. A Launcher will catapult the character to the last Special Ring along the way. | After grabbing Ring #6, continue through the remainder of the Act as normal. The final Special Ring is located right on the homestretch. |
References
| Sonic Advance 2 | |
|---|---|
|
Main page Manuals |
show;hide
|